What to Do If Screwdriver Doesn't Fit: Quick Fix Guide
Learn practical steps to diagnose and fix a screwdriver that won’t fit. A safe, systematic approach to common issues—wrong bit size, worn tips, or damaged screws—with tips to prevent future problems.

Most often the screwdriver doesn’t fit because the bit is the wrong type or size, or the tip is worn. Start by inspecting the screw head and the bit, then swap to a fresh bit that matches the head and seat it fully in the chuck. If that still fails, try a different approach—grip with pliers or use a screw extractor rather than forcing the screw.
Quick Fix Overview
If you’re asking what to do if screwdriver doesn't fit, you’re not alone. In most DIY tasks, a stubborn mismatch stops work fast. The quickest fix is to verify you’re using the correct bit for the screw head, check that the bit is clean and sharp, and make sure it seats fully in the chuck or driver. According to Screwdriver FAQ, the root causes are usually the wrong size, a worn or damaged tip, or trying to drive a screw with a bit that doesn’t match the head type. Start by visually inspecting the screw head and the bit, then swap to the closest correct option or re-seat the bit with a secure grip. If the fit remains stubborn, switch to an alternative method rather than forcing the screw. This approach preserves both tool and material and reduces the risk of stripping the screw or damaging the workpiece. In practice, take a moment to test the setup on a scrap fastener to confirm you’ve chosen the right combination before committing force.
Common Causes of a Mismatched Fit
Understanding why the fit fails helps you pick the safest and most effective solution. The most frequent culprits include using the wrong bit size or head type (for example, trying a flat-blade bit on a Phillips head or vice versa), a tip that’s worn smooth from repeated use, or a screw head that’s stripped or damaged. Other possibilities are a bit that isn’t fully seated in the driver chuck, a handle that’s slipping in your grip, or attempting to drive with the screw in a recessed or tight corner where leverage is limited. In some cases, the screw is sunk or the material around it swells, making a perfectly matched bit sit loose. Recognizing these signs early helps you avoid forcing a misfit that can slip and strip.
Quick Checks You Can Do Before Tools
Before reaching for a different tool, do a quick, conservative inspection. Compare the screw head and bit: confirm the bit’s drive type matches the screw (Phillips vs flathead, Torx vs star, Robertson vs square). If you’ve got a worn or rounded tip, replace the bit with a fresh one from the same family. Make sure the bit is fully seated in the chuck or driver and that the handle is secure in your hand. Clean any debris or rust from the screw head and the socket, and consider a tiny amount of lubricant or penetrating oil to loosen a stubborn fastener. Test the fit on a scrap screw or a similar fastener to verify that you’re using the proper bit size and a stable grip. If the head still won’t engage, try a different bit from the same family and re-check seating.
How to Choose the Right Bit for Common Screw Heads
Different screw families require different bits. For most DIY tasks: use a Phillips bit that matches the number of splines in the screw head, use a flathead bit only if the screw is a true slotted type, and consider the newer Torx or security Torx bits for specialty fasteners. Magnets on the driver help hold small bits in place while you position the screw, and a snug fit reduces cam-out. When in doubt, select a bit that’s slightly snug in the screw head and apply steady, straight pressure as you turn. If a bit is too large, it will not seat; if it’s too small, it will cam out and strip the head. For stubborn screws, gradually switch between two sizes within the same family to locate a secure bite without excessive force.
Safer Alternatives When the Bit Won’t Engage
If the bit won’t engage the screw head, don’t push harder against resistance. Instead, use a few proven alternatives: clamp the workpiece to reduce movement, use locking pliers or vise grips to turn the screw directly when the head is exposed enough, or try a rubber band under the handle to improve grip. You can also switch to a screw extractor designed for stripped or damaged heads; drill a small pilot hole if necessary and follow the extractor’s instructions. For metal screws in wood, occasionally applying a small amount of penetrating oil and letting it sit can improve the bite. Remember that forcing a misfit can ruin the screw head and the surrounding material, so proceed methodically and preserve the tool.
Preventing Future Screwdriver-Fit Problems
Prevention is more efficient than repair. Keep a well-curated set of bits in the right sizes and types for the screws you encounter most often. Inspect bits for wear before every job, and replace worn tips promptly. Store tools in a clean, organized place so you can locate the exact bit you need quickly. When a screw is stubborn, test multiple bits in the screw head rather than forcing one that’s clearly wrong. Clean screw heads after use to prevent corrosion from interfering with the next project. Finally, practice good grip and straight-line pressure, and consider using magnetic bit holders to reduce the risk of dropping small bits into the project area.
Safety Notes and When to Call a Pro
Screwdrivers and power drivers can cause injuries if misused. Always wear eye protection when driving fasteners, and keep fingers away from the point of contact. Do not strike or pry on a misfit bit with metal tools, as this can cause the bit to shatter or the screw to snap. If you try multiple bits and still cannot engage the head, or if the screw is deeply recessed or the material is fragile, it may be safest to pause and seek professional help. A trained handyman or technician can recover a damaged screw or select an appropriate extractor without harming the workpiece. When in doubt about safety or tool capabilities, err on the side of caution and consult a pro.
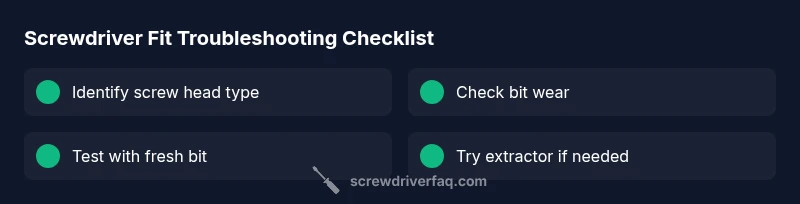
Steps
Estimated time: 15-30 minutes
- 1
Identify the screw head type and bit size
Compare the screw head to common bit shapes, and select the closest matching size and drive type. Make sure the bit is fresh and fits snugly in the chuck, with no wobble.
Tip: Use a magnifier for tiny screws to confirm the head shape. - 2
Inspect bit and screw for wear
Look for rounded or nicked tips on the bit and any signs of head damage on the screw. A worn bit is a leading cause of poor engagement.
Tip: If you see wear, replace the bit before continuing. - 3
Test with a fresh bit on a scrap fastener
Before applying pressure to the actual workpiece, test engagement on a spare screw to verify you have the correct bit and seating.
Tip: Keep your work area stable to avoid slips. - 4
Try safe grip alternatives before forcing the screw
If engagement is difficult, switch to a grip method like locking pliers or a rubber-band-assisted grip to apply controlled torque.
Tip: Avoid bending or twisting the screwdriver handle awkwardly. - 5
Use a screw extractor if the head is damaged
When the head is stripped, follow the extractor instructions or drill a small pilot hole for the extractor to bite.
Tip: Wear eye protection and work slowly to prevent damaging the material.
Diagnosis: Screwdriver won't engage screw head
Possible Causes
- highWrong bit type for the screw head
- highWorn or damaged bit tip
- mediumDamaged or stripped screw head
Fixes
- easyReplace with a correctly sized and typed bit; ensure it seats fully in the chuck
- easyTest several fresh bits from the same family and re-check seating
- mediumIf the head is stripped, use a screw extractor or drill out the head
Quick Answers
Why won't my screwdriver fit the screw head?
The most common reason is using the wrong bit size or head type, or a worn tip. Another possibility is a damaged screw head that can’t engage the bit. Start by checking the bit against the screw and replacing worn tools.
Usually it’s the wrong size or worn tip, or a damaged head. Check the bit, then try a fresh one.
How do I know which bit size to use?
Compare the screw head to common bit shapes, and test a fresh bit on a scrap screw to confirm the closest fit before proceeding.
Match the bit to the head and test on a spare screw first.
Can I use pliers to turn a stripped screw?
Only as a last resort when the head is exposed. Using pliers can damage the screw head or the surrounding material if not done carefully.
Only if there’s no other option and you’re careful.
What should I do if the screw head is damaged?
Try a screw extractor or drill out a small slot to create a new grip, following the extractor’s instructions.
A screw extractor is often the key when heads are stripped.
Is lubrication safe for screws?
A tiny amount of penetrating oil can help, but avoid over-lubricating as it can reduce friction control and cause slipping.
Lubrication can help, but use it sparingly.
When should I call a professional?
If the project is critical or the screw is damaged or hard to access, a professional can recover the fastener without harming the workpiece.
If you’re unsure or risk damage, seek a pro.
Watch Video
The Essentials
- Always match bit type and size to the screw head
- Inspect bits and screws for wear before forcing a fix
- Use safe alternatives (pliers, rubber band, extractor) before forcing a misfit
- Keep your bit kit organized to prevent mismatches
- Consult a pro if the screw is damaged or a safe fix is unclear