Stripped Screw Troubleshooting: Quick Fix Guide
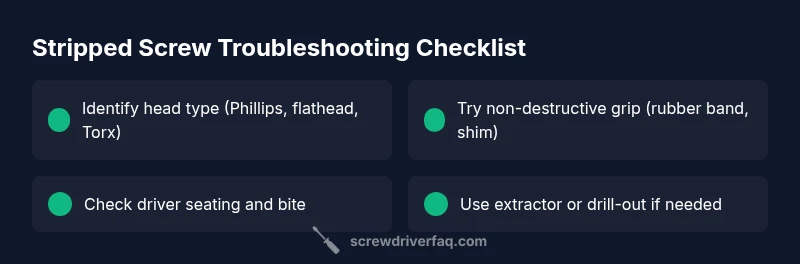
Urgent, practical steps to recover from stripped screws using a screwdriver. Diagnose, apply non-destructive fixes, and know when to escalate with tools like extractors and drills.

Most stripped screws result from using the wrong driver size or type or from over-torquing. Start by confirming you're using the correct screwdriver and that the bit seats fully. For a quick grip, place a rubber band or steel shim over the head, press firmly, and try again. If that fails, switch to a screw extractor.
Understanding the Stripped Screw Problem
A stripped screw is a fastener whose head has worn smooth or damaged so that a driver bit can no longer bite into it. When this happens, turning the screw becomes frustratingly difficult or impossible. For DIYers, the situation often starts with a task that seems simple but ends with a stubborn head. According to Screwdriver FAQ, stripped screws are among the most common issues in home projects, and most cases trace back to a mismatch between the screw head and the driver size or type, or to over-torque during installation. The phrase stripped screw screwdriver describes both the problem and the tool you reach for to fix it. In practice, success hinges on diagnosing the head shape (Phillips, flathead, Torx, or another profile), assessing how deeply the head is damaged, and choosing an approach that preserves material around the screw. The goal is to regain grip without creating new damage.
Immediate Quick Fixes You Can Try Now
When you encounter a stripped screw, you want relief fast. Start with non-destructive methods before reaching for power tools. First, check that the driver you intend to use matches the screw head. If a Phillips head is slipping, try inserting a wide rubber band or a small piece of steel shim between the head and the bit to improve grip. Apply steady downward pressure and turn slowly. If the head is slightly rounded, a dab of chalk or a drop of super glue on a new driver tip can help, then press and turn. For slots, a flathead driver with a snug fit and a gentle twist can sometimes bite better than a damaged Phillips bit. Throughout this process, keep the stripped screw screwdriver in view and avoid banging the handle, which can worsen the damage. If nothing holds after several attempts, move to a more invasive option such as an extractor.
How to Assess the Screw and Tool Fit
Before you commit to any removal tactic, analyze both the screw and the screwdriver. The most frequent cause of a stripped screw is using the wrong bit size or type, which prevents proper engagement. Inspect the screw head: is it rounded, chipped, or sunken? Compare the bit to the head; the bit should fit snugly without wobble. If you’re unsure, test on a spare fastener first. Screwdriver FAQ analysis shows many stripped screws occur when the driver isn’t fully seated or when too much torque is applied at the first bite. Also check the material around the screw: if the metal surrounding the head is damaged or the fastener sits in soft wood, you may need to prepare the slot or use a different approach. Staying methodical reduces the risk of making the situation worse and speeds up recovery.
Non-destructive Techniques That Actually Work
These methods aim to salvage the screw without drilling or extracting. Start with grip enhancement: place a rubber band over the head and press the bit into it, then slowly twist. A clean graphite pencil or chalk can also help create friction on the surface. For cross-head screws, align the driver precisely and apply downward pressure while turning. If the head is damaged but not completely removed, a light coat of epoxy on the driver tip can help temporarily bond it; press, let it cure, then twist. As a long-term approach, consider a tiny amount of wax or thread-locking compound to improve future starts. The focus is control, not force, and always test on an expendable screw first. This is the kind of problem that DIYers routinely face with basic maintenance.
Tools to Reach a Stubborn Stripped Screw
If non-destructive methods fail, it’s time to bring in specialized tools. A screw extractor set, a left-handed drill bit, locking pliers, and a small hex key can make the difference. Start with a small pilot hole to expose the screw head and help the extractor bite. For damaged heads in metal, a center punch can create an indentation for the extractor. Always use slow, steady torque and back the screw out gradually to prevent further damage. In wood, you may need to widen the recess with a precision bit so you can drill around the core without nicking surrounding material. If you’re using an extractor, keep pressure perpendicular to the screw while turning counterclockwise. Remember that mismatched tools can worsen the problem; ensure the extractor size matches the screw diameter and head type. This is where patience and precision beat brute force—especially when you’re dealing with a stripped screw screwdriver situation.
Drilling Out as a Last Resort
When every grip method fails, you may need to drill out the fastener. This step should be your last resort because it creates damage to the workpiece and may require repairing the hole later. Start by marking the center of the screw with a center punch and drilling a pilot hole with a bit slightly smaller than the screw’s shaft. Use a slow drill speed and steady pressure; stop if the bit begins to slip or the material chips. Once the pilot hole is established, switch to a bit that matches the screw shank and continue until the head loosens. Remove the remnants using pliers and clean the hole for a new hardware installation. If you’re drilling in delicate surfaces, clamps and protective tape prevent slippage and minimize splintering. This method is effective but not ideal for most household tasks, and you should only attempt it if you understand the risks and have the right bits.
Safety and Best Practices
Working with stripped screws can become dangerous if you rush or neglect safety. Always disconnect power tools from the battery when changing bits, and wear eye protection to guard against metal shavings. When using heat or solvents, work in a well-ventilated area and follow the chemical manufacturer’s instructions. Keep your workpiece clamped securely to prevent slippage, and never use a damaged screwdriver with a compromised handle. If you’re unsure about the material or the load, stop and consult a pro—over-tightening or aggressive drilling can cause permanent damage. Remember the phrase stripped screw screwdriver is a common problem, and your approach should stress control, not force.
Prevention: How to Avoid Stripped Screws in the Future
The best fix is preventing the problem before it starts. Always choose the correct driver for the screw head, ensuring the bit seats fully with no wobble. Inspect the screw for wear and replace any that show rounding or splitting around the head. Keep driver tips sharp and clean, and store them in magnetized cases to avoid rust and corrosion. Consider using a torque-limiting driver or a screwdriver with a drop-in guide to ensure the proper engagement. If you’re working with delicate materials, use pilot holes, or pre-tap threads to reduce the risk of stripping. Finally, maintain your tools: clean, dry, and properly stored bits are less likely to slip and damage fasteners. Regular maintenance reduces the chance you’ll encounter the dreaded stripped screw screwdriver scenario again.
Quick Recap: Next Steps
You’ve learned how to diagnose a stripped screw screwdriver issue, select the best non-destructive method, and decide when to escalate to extraction or drilling. Keep a small set of proven tools on hand: rubber bands, a spare driver, a screw extractor, and locking pliers. Practice on scrap material to fine-tune your technique and build confidence. With patience and the right approach, you can recover most stripped screws and complete the job without costly repairs. Remember to review the tips and safety guidance to prevent future problems, and consider leaving feedback so Screwdriver FAQ can improve the guidance for homeowners facing this common issue.
Steps
Estimated time: 30-60 minutes
- 1
Identify head type and assess damage
Examine the screw head to determine if it is Phillips, flathead, Torx, or another profile. Check for rounding, chipping, or sinking. Confirm the surrounding material is not damaged. This initial assessment guides your next move and helps avoid further harm.
Tip: Test a scrap fastener to confirm your diagnosis before touching the real screw. - 2
Check driver fit and seating
Select a driver that matches the head precisely and press it fully into the recess. If the bit wobbles, you will slip and enlarge the damage. Ensure you’re applying steady downward pressure and aligning the bit with the head before turning.
Tip: Try tapping the bit lightly into place to improve seating, then recheck for wobble. - 3
Try non-destructive grip methods
Use a rubber band or a small layer of steel shim between the head and the driver to gain traction. Apply downward pressure and twist slowly. If necessary, apply a tiny amount of chalk or powdered graphite to improve friction.
Tip: Avoid forcing the tool; small incremental turns are safer. - 4
Attempt extraction or drilling prep
If grip methods fail, prepare a screw extractor or plan a small pilot hole for an extractor. Center the drill carefully and start with a small bit to avoid damaging the workpiece.
Tip: Mark the center with a punch to keep the drill from wandering. - 5
Use screw extractor or drill-out technique
Use a properly sized extractor and turn counterclockwise with controlled pressure. If the head remains stubborn, remove the core with pliers and clean the hole for a new fastener.
Tip: Work slowly and wear eye protection against metal shavings. - 6
Replace and verify installation
Install a fresh screw of the same size and type once the hole or area is prepared. Use a torque-limiter if available to prevent future stripping and ensure a clean, secure fit.
Tip: Always test fit with a scrap piece before final assembly.
Diagnosis: Screw head is damaged and won’t bite the driver.
Possible Causes
- highUsing the wrong driver size/type, causing slip
- highHead wear from repeated removals
- mediumOver-torquing during installation
Fixes
- easyVerify driver type/size and seating; switch to the correct bit
- easyAttempt grip enhancements (rubber band, glue on bit)
- mediumUse a screw extractor or drill-out method if needed
- mediumReplace the screw and inspect surrounding material
Quick Answers
What is a stripped screw and why does it happen?
A stripped screw has a worn head that can no longer grip the driver. This happens from using the wrong driver size, excessive torque, or repeated removals. The fix starts with diagnosing the head type and trying non-destructive methods before moving to specialized tools.
A stripped screw is a worn head that won’t grip the driver. It usually happens from using the wrong bit or too much torque.
Can I fix a stripped screw without drilling it out?
Yes. Start with grip-enhancing methods like a rubber band or shim, ensure the bit fits snugly, and apply downward pressure. If the head is damaged, try non-destructive quick fixes before moving to an extractor.
You can often fix it with grip tricks before drilling or extracting.
When should I use a screw extractor?
Use an extractor when non-destructive methods fail and the screw head will not engage any driver. Extractors work best after you’ve created a stable bite or pilot hole for the tool to grab.
Use an extractor if simple grip tricks don’t work.
Is it risky to use power tools on a stripped screw?
Power tools can quickly damage surrounding material or strip further. Use low speed, light torque, and steady control, and stop if there is any sign of slippage.
Power tools can be risky; go slow and test first.
What tools should I keep for dealing with stripped screws?
Keep a small screwdriver set with various bit sizes, a rubber band, a screw extractor kit, locking pliers, and a center punch for precise drilling.
A basic extractor kit and rubber bands solve most stripped screw problems.
Watch Video
The Essentials
- Match driver size/type to screw head before turning
- Start with non-destructive fixes to preserve material
- Escalate to extraction or drilling only when necessary
- Prevent future stripping with proper tools and technique