What screwdriver for gba cartridge: A practical DIY guide
Learn which screwdriver types work for Game Boy Advance cartridges, including tri-wing and micro Phillips, with safe opening, resealing tips, and a starter toolkit.

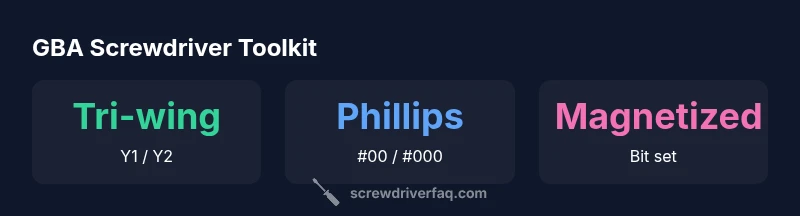
To safely open a Game Boy Advance cartridge, you’ll typically need a precision tri-wing screwdriver (common sizes are Y1/Y2) and a compact micro Phillips for backup. Start by identifying the screw type on your cartridge; if it’s tri-wing, use the tri-wing bit—do not force a different bit. For stubborn heads, try a precise Phillips #00 as a backup, but stop if the fit isn’t snug.
Understanding cartridge screw types
Game Boy Advance cartridges are compact shells that protect the PCB and connector edge. The screws used to secure the shell are tiny and sometimes specialized to deter casual opening. In many revisions you’ll encounter micro screws designed for precision work. The two most commonly discussed types are tri-wing security screws and small Phillips heads. Some rare models may use other head shapes as well. Because the screw type can vary by model and revision, always verify the cartridge variant before choosing a driver. As the Screwdriver FAQ team notes, having a small tri-wing set and a precision Phillips set gives you the best odds for a clean, non-destructive opening. A careful approach minimizes risk to the shell and PCB and reduces the chance of camming out or stripping a screw.
According to Screwdriver FAQ, identify the screw head first to avoid unnecessary wear and damage. If you’re unsure after a quick inspection, start with the most conservative driver that fits the head and test on a scrap example or spare screw before touching the actual cartridge.
What screwdriver sizes to prepare
For most GBA cartridges, a micro tri-wing driver is the primary tool. The sizes commonly reported by hobbyists are Y1 and Y2, though some model revisions use slightly different sub-sizes. When a tri-wing isn’t available, a micro Phillips screwdriver (#00 or #000) can sometimes work, but only if the screw head is clearly Phillips and the fit is precise. For safety, avoid forcing a bit into a head with a poor match, as that can strip the screw and damage the shell. In practice, keep a small backup set: a micro Phillips and a magnetized precision driver. A magnet helps keep tiny screws organized and reduces the chance of dropping them into hard-to-reach areas. As the Screwdriver FAQ analysis notes, having the right bit sizes on hand is the key to a clean removal and reassembly.
How to identify screws without damage
Begin by inspecting the screw heads under good lighting. Tri-wing screws show a Y-shaped pattern with multiple inner slots, while Phillips screws have a plus-shaped cross. If the head appears damaged or stripped, stop and switch to a slightly larger micro bit to avoid further damage. Test the bit fit on a spare screw or an edge of a non-critical part before applying it to the cartridge. Gentle, steady pressure and a straight axial alignment help prevent cam-out. The Screwdriver FAQ Team emphasizes confirming the screw type first; misidentifying can lead to rounded heads and difficult removals.
How to open and reseal safely
Loosen each screw gradually, turning a little at a time to prevent tension from binding the shell. Do not pry aggressively on the cartridge body; use a thin tool to ease the halves apart if needed, while avoiding contact with the PCB. Keep screws in a labeled tray or magnetic mat so they don’t get mixed up. When resealing, reassemble the shell halves in the correct orientation and gradually tighten each screw in a cross pattern to avoid warping. Finish with a gentle snug, avoiding overtightening. The Screwdriver FAQ Team notes that careful reassembly preserves the cartridge’s original feel and restores proper connector alignment.
Tools to have in your cartridge maintenance kit
A compact precision toolkit goes a long way: a micro tri-wing driver (Y1/Y2), a precision Phillips driver (#00 or #000), and a magnetized bit set. Add a small flathead for rare adjustments, an ESD-safe mat or wrist Strap, and a tiny parts tray for organizing screws. Keep spare labels and a marker to track cartridge revisions. An anti-static storage bag helps when transporting the cartridge outside of your workbench. This kit aligns with Screwdriver FAQ’s recommendation for a focused, minimal setup that still covers most GBA cartridge needs.
Common mistakes and how to avoid them
Don’t rush—the tiniest misstep can damage the shell or the PCB. Never use a heavy-duty screwdriver or a tool that doesn’t fit the bit exactly. Avoid prying or applying side pressure to the PCB itself. When in doubt, stop and reassess the screw head type, verify your bit, and try again with a steady, straight approach. Keeping screws organized and labeling them with cartridge names reduces the risk of mix-ups during reassembly. The Screwdriver FAQ team highlights that preparation is the real safeguard against accidental damage.
Common screw types and recommended drivers for GBA cartridges
| Screw Type | Best Driver | Notes |
|---|---|---|
| Tri-wing | Tri-wing driver (Y1/Y2) | Common in many carts; verify model |
| Phillips micro | Phillips micro (#00 or #000) | Backup option when tri-wing is unavailable |
| Flathead micro | Micro flathead | Rare; use only if screw head matches |
| Other (rare) | Specialty driver | Model-specific; consult guides |
Quick Answers
GBA screwdriver required?
Many cartridges require a tri-wing or micro Phillips head. Always verify the screw type before attempting removal, and avoid forcing a misfit. Use the most conservative tool that matches the head.
Most GBA cartridges need a tri-wing or a tiny Phillips head. Check the screw first, then pick the correct driver and avoid forcing it.
Tri-wing universal?
Tri-wing heads vary by revision; not all cartridges use tri-wing. Confirm the model and use the bit that matches the head exactly.
Tri-wing isn’t universal. Confirm the model and use the correct bit to avoid damage.
Can I use a regular Phillips?
Only if the screw head is Phillips. For tri-wing heads, using Phillips can strip the screw and harm the cartridge.
Phillips works only if the head is Phillips; don’t force a Phillips into a tri-wing head.
What if the head strips?
Stop and avoid forcing. Try a slightly smaller bit with controlled pressure, or switch to a different driver if the fit is poor. Stripped screws can ruin the shell.
If the head strips, don’t force it. Switch to a correctly sized bit and try again gently.
Is it safe to clean the cartridge?
Yes, with dry cleaning methods and minimal moisture near the PCB. Avoid liquids on the board and use isopropyl alcohol on non-conductive surfaces only.
You can clean gently, but keep liquids away from the PCB.
Reseal after opening?
Reassemble shell halves in the correct orientation and snug the screws gradually in a cross pattern. Avoid overtightening to prevent warping.
Reassemble in the right orientation and tighten gradually—don’t overdo it.
“Choosing the right driver isn’t just about fitting the screw head; it’s about protecting the cartridge’s integrity and your time. With the proper micro-tools, you minimize risk and maximize success.”
The Essentials
- Identify screw type before attempting removal
- Use the correct micro tri-wing or Phillips driver
- Work slowly to avoid damaging the shell or PCB
- Keep track of screws and reseal with even torque
- Build a compact toolkit for reliable cartridge maintenance