What Screwdriver for Game Boy: DIY Guide
Discover the right precision screwdriver for Game Boy repairs. This guide covers common screw types, starter sets, and model-specific tips from Screwdriver FAQ to help DIYers avoid damage.

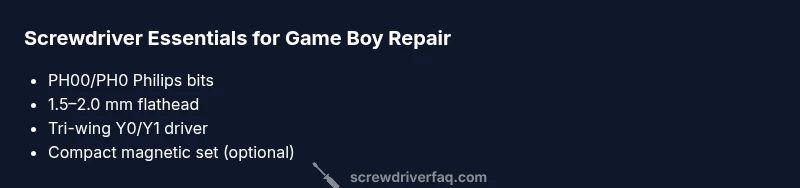
According to Screwdriver FAQ, what screwdriver for gameboy you need depends on model. For most, a precision set with PH00 and PH0 Phillips bits plus a tiny flathead (about 1.5–2.0 mm) for panels. Some units use tri-wing screws (Y0–Y1), so include a dedicated tri-wing bit and verify screw type first.
Why the Right Screwdriver Matters for Game Boy Repairs
The moment you mismatch a bit or apply too much torque on a tiny screw, you risk cam-out, stripped heads, or cracked plastics. Game Boy chassis and internal components are delicate, and the wrong tool can leave you with cosmetic damage or worse, a non-working unit. Using the correct screwdriver reduces the risk of damaging protective coatings, copper traces near the motherboard, and delicate battery contacts. In addition, a good driver helps you recover screws that may be tight due to age, corrosion, or previous repair attempts. By investing in a properly sized precision screwdriver set, you gain steadier control, better bite, and less frustration during disassembly and reassembly. The result is a cleaner teardown, fewer dropped screws, and a higher chance of reusing the original screws without cross-threading or stripping. For hobbyists, this is not just convenience; it is a safeguard for your investment and your time. As you plan your toolkit, think about model variety, tool quality, and the storage of different bits to minimize misplacements during long repair sessions.
Understanding Common Screw Types Across Game Boy Generations
Screw configurations vary by model, generation, and revision. The original DMG-01 Game Boy commonly used small Phillips-type screws, while later models introduced alternative drives. Tri-wing screws appear on some consoles, particularly older Nintendo hardware that used specialized fasteners for cosmetic or security reasons. The exact head type matters because you want a bit that seats fully in the screw slot and resists cam-out. Without the correct bit, you risk slippage that can strip the screw or slide into delicate plastic housings. The most practical approach is to inspect the screw heads under good lighting or a magnifier; if you see a cross-shaped pattern, PH00/PH0 will likely do. If you see a three- or four-pronged pattern, a tri-wing driver will be essential. When in doubt, bring a compact precision set that includes both Phillips and tri-wing options, so you’re prepared for model variety.
How to Choose a Precision Driver Set for DIY Game Boy Projects
A reputable precision driver set should include at least PH00 and PH0, plus a small flathead, and ideally a tri-wing driver. Look for quality handles, corrosion-resistant bits, and a magnetic tip to hold tiny screws. Consider a 60- or 100-bit assortment that covers standard micro-electronics sizes, but avoid oversized drivers that won’t fit the console’s screw recesses. A compact kit with a dedicated storage case makes field repairs easier. If you rarely repair, you can start with a minimal set: PH00, PH0, a 1.5–2.0 mm flathead, and a Y0–Y1 tri-wing. For enthusiasts, expand into magnetized tweezers, an ESD-safe mat, and an anti-static wrist strap to protect components during work. Finally, ensure your tools are kept clean and dry; moisture and oils can affect screw seating and tip wear over time.
A Practical Step-by-Step: Identifying Your Game Boy Model's Screws
- Inspect the back panel and battery compartment; locate every screw hole. 2) Under good light, examine the head shape: cross, slot, or three-pronged. 3) If you’re unsure, compare the screw to a PH00/PH0 and a tri-wing Y0 bit to see which seat fits best. 4) Separate screws into labeled sections for easy reassembly; keep them in a small magnetic tray or pill organizer. 5) When the screws resist, back them out slowly, applying minimal pressure and ensuring the screwdriver is properly seated. 6) If a screw is stripped, stop and assess for a repair extractor or a professional repair service. This approach minimizes damage and increases the chance of a clean reassembly.
Tools and Accessories to Complement the Screwdriver
Beyond the driver, you’ll want a spudger or plastic opening tool to separate shells without marring plastics, an ESD-safe mat, and tweezers to manage tiny screws. A compact carrying case helps keep bits organized. A headlamp or magnifier improves visibility, while a small container keeps screws in order. For more advanced users, a magnetizer can help hold small fasteners, and an anti-static wrist strap protects sensitive circuitry during disassembly. Remember to store your bits dry and away from metal shavings that can contaminate the screw recess and damage threads. Proper storage reduces wear and extends the life of your tools and the device you’re repairing.
Maintenance and Best Practices to Extend Tool Life and Protect Your Console
Clean your bits after use to remove grime and oils. Avoid using worn or rounded bits; replace them promptly to prevent cam-out and screw damage. When working on Game Boy models, rotate among different bits rather than forcing one bit into multiple screws. Keep your workspace tidy and free of dust to avoid debris entering the device. Finally, calibrate your expectations: electronics repairs are delicate work, and patience beats force. By keeping your toolkit organized, you’ll minimize the risk of damage and improve your repair success rate over time.
Overview of screw types and driver recommendations by Game Boy model
| Model Type | Common Screw Type | Recommended Driver | Notes |
|---|---|---|---|
| Original Game Boy (DMG-01) | Phllips PH00–PH01 | PH00 or PH0; small flathead | Model varies; inspect screw head |
| Game Boy Pocket | Phillips PH00 | PH00 | Standard repairs; check console model |
| Game Boy Color | Phillips PH00 | PH00 | Typically small screws; handle with care |
| Game Boy Advance SP | Tri-wing (Y1) screws | Tri-wing Y1 plus PH00 | Some variants require tri-wing only |
Quick Answers
What screwdriver do I need for a Game Boy DMG-01?
Most DMG-01 units use Phillips screws; start with PH00 and PH0, then switch if you encounter a different pattern. Inspect the head to confirm the exact bit.
For DMG-01, begin with PH00 or PH0 and confirm the head before continuing.
Do all Game Boy models require tri-wing screws?
No. Some models use standard Phillips screws, while tri-wing screws appear only on certain revisions. Always inspect the screw head first.
Not all models use tri-wing; check the screw head to decide.
Can I use a generic precision screwdriver set for Game Boy repairs?
Yes, if the set includes PH00, PH0, and a small flathead, and ideally a tri-wing. This covers most common Game Boy models, with model-specific checks as needed.
Yes, but make sure your set has PH00, PH0, a tiny flathead, and a tri-wing if needed.
Are magnetic screwdrivers safe for electronics?
Magnetic tips help hold tiny screws, but keep magnets away from batteries and delicate circuitry. Use non-magnetic bits near sensitive parts when possible.
Magnetic tips are handy if used carefully around delicate components.
What should I do if a screw strips on a Game Boy?
Stop and don’t force the bit. Try a fresh bit, apply steady pressure, and consider a screw extractor or professional help if it won’t budge.
Don’t force it—try another bit or seek extraction help.
“A well-chosen screwdriver set is the quiet backbone of any electronics repair. If you force a wrong bit, you risk permanent damage; with the right tools, you preserve a device’s longevity.”
The Essentials
- Identify screw type before selecting a driver
- Invest in a compact precision set with PH00, PH0, flathead, and tri-wing
- Keep screws organized to simplify reassembly
- Inspect model variations to avoid missing the correct bit
- Protect electronics with ESD-safe tools and proper storage