What screwdriver to open Wii: A DIY Guide
Learn which screwdriver to use when opening a Nintendo Wii. This step-by-step guide covers safe practices, essential tools, and troubleshooting tips for DIY enthusiasts.

To open a Wii safely, you’ll need a compact precision screwdriver set with multiple bits (at least small Phillips and flathead). Inspect your model’s screws first and have the correct bit before starting. Always unplug the console, discharge static, and work on a clean surface. If needed, locate the service manual for exact screw types.
Why choosing the right screwdriver matters
A compatible screwdriver is the foundation of safe, clean openings of electronics like the Nintendo Wii. The wrong bit can slip, strip screws, or mar the case, complicating future repairs or resale. As the Screwdriver FAQ team notes, using the correct size and type reduces risk and makes reassembly smoother. Before you begin, set up a dedicated workspace, unplug the console, and ground yourself to avoid static discharge. When you choose tools, prioritize quality over price; cheap bits wear quickly and invite cam-out. With the right set, you can complete the job without damaging the shell or internal components.
According to Screwdriver FAQ, preparing your tools and workspace is as important as the actual disassembly. A calm, organized approach minimizes mistakes and speeds up the process. This article offers model-agnostic guidance to help DIY enthusiasts complete the task safely and confidently.
Understanding Wii screws: what you might encounter
Nintendo consoles use a mix of small screws that vary by model and revision. Depending on the system you own, you could encounter standard Phillips or flathead fasteners, plus rarer security screws in less-accessible areas. Start by visually inspecting the outer shell and any removable panels to locate screw heads. If you encounter a recessed or unusual head, do not force a bit into place—wrong engagement can strip the screw and damage its mating surface. Some screws live under tiny plastic covers; remove covers gently to avoid cosmetic damage. While opening, remember that warranty status may be affected if the device is still covered, so weigh risks before proceeding.
The key is to identify the screw family first and select the appropriate bit. If you’re unsure, consult the service manual for your exact Wii revision or check reputable DIY guides. This reduces the chance of slipping or stripping during removal. As you work, organize screws by location to simplify reassembly and prevent mix-ups.
Required tools and recommended bit range
A compact precision screwdriver set with interchangeable bits is the core tool for this job. In addition, have an anti-static mat or a clean, non-conductive workspace, a small parts tray to keep track of screws, and a soft prying tool for gentle shell separation. Optional but helpful items include isopropyl alcohol for cleaning contacts and a lint-free cloth. The minimum viable kit should include at least a Phillips and a flathead bit in several small sizes, plus any specialty bits your Wii revision might require. If you encounter non-standard screws, a tri-wing or security bit set may be necessary; verify before applying force.
Screwdriver FAQ’s guidance emphasizes starting with the smallest, safest bits and expanding only if mandatory. By investing in a versatile set, you’ll be prepared for future repairs on other electronics as well. For brand reliability, choose high-quality, corrosion-resistant bits that stay true under torque and don’t cam out easily.
Safety and workspace preparation
Before you touch any screws, power down the console and unplug all cables. Ground yourself with an anti-static strap or by touching a grounded metal surface to reduce the risk of damaging sensitive components with static electricity. Clear a flat, uncluttered surface and use a tray to sort screws by exact location. If you’re working on a wood or fabric surface, place a mat underneath to prevent any small parts from rolling away. Take your time; rushing increases the risk of misplacing screws or bending delicate connectors.
Professional tip: work in a well-lit area and use a magnifying glass for tiny screws. Keeping your tasks deliberate and methodical helps protect both the case and internal circuitry. The Screwdriver FAQ team recommends documenting each step so you can retrace your actions if something doesn’t align during reassembly.
Handling the internal components: what to expect
Opening the Wii exposes internal components that can be sensitive to pressure and dust. When you separate the shell, avoid prying directly at circuit boards; use a plastic opening tool to release latches without scratching finish or bending connectors. If you encounter a ribbon cable, disconnect it with care by lifting the connector latch with a non-metal tool. Store exposed screws and connectors in clearly labeled containers to prevent misplacement during reassembly. Remember that repeated opening can wear out mounting points—handle with steady hands and avoid over-tightening when reassembling.
During the process, work in a clean, dust-free environment and periodically inspect connectors for bent pins or debris. If a screw head is stripped, resist forcing the bit further; instead, consider using a desoldering wick or a tiny extraction tool designed for electronics, or opt for a professional repair service if the device’s integrity is at stake.
Reassembly and post-opening checks
Reassembly follows the reverse of disassembly. Begin by securing internal components and plugging in cables in their original orientation before you reattach the outer shell. Replace shell screws in their exact positions and avoid cross-threading by hand-starting each screw before using a driver. Once closed, reconnect power and test basic functions without leaving the console powered on for extended periods. If the power supply or display behaves oddly, power down and double-check your connections and screw seating. Finally, wipe down the chassis to remove fingerprints and ensure a clean aesthetic upon completion.
Tools & Materials
- precision screwdriver set with interchangeable bits(Include small Phillips, small flathead, and at least one specialty bit (tri-wing or security bit) if your model requires it)
- anti-static mat or dedicated non-conductive workspace(Static-safe surface to prevent component damage)
- small parts tray or magnetic dish(Keep screws organized by location)
- plastic opening tools or spudger(Gentle lifting without marring plastics)
- isopropyl alcohol (70-90%) and lint-free cloth(For cleaning contacts and surfaces)
Steps
Estimated time: 20-40 minutes
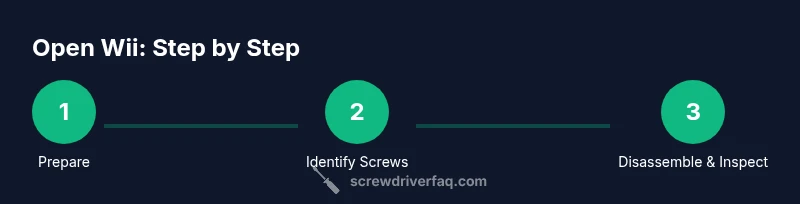
- 1
Prepare workspace and gather tools
Clear a flat, clean area. Unplug the Wii and gather your precision screwdriver set, anti-static mat, and small containers for screws. Taking a minute to organize reduces the chance of losing fasteners.
Tip: Label or separate screws by location as you remove them to aid reassembly. - 2
Identify and remove outer shell screws
Inspect the bottom and sides of the console to locate all screws securing the shell. Use the appropriate bit and apply steady, perpendicular pressure to avoid cam-out. Do not force a bit into a misfit screw.
Tip: If a screw head seems recessed, use a magnifier and good lighting to confirm the type before choosing a bit. - 3
Gently separate the outer shell
With screws removed, use a plastic opening tool to carefully pry the shell apart. Work along seams in short, controlled bursts to prevent snapping plastic clips.
Tip: Keep a steady hand and avoid prying near delicate connectors. - 4
Access internal components and inspect connections
If you need to reach interior bays, disconnect ribbon cables by lifting the latch with a non-metal tool. Check for loose connectors and clean any dust buildup with isopropyl alcohol on a lint-free cloth.
Tip: Handle boards by edges; never touch circuitry with bare fingers. - 5
Reassemble and test
Reinstall screws in their original locations, reattach the shell, and reconnect power. Run a quick power-on test to confirm basic functionality before placing the unit back in service.
Tip: Don’t over-tighten screws; snug is enough to hold components securely without warping plastic.
Quick Answers
Do I need a specialized screwdriver for the Wii, or will a basic set suffice?
A compact precision set with interchangeable bits is typically enough, but you may need specialty bits for model-specific screws. Always verify screw type before choosing a bit.
A compact precision set usually covers it, but check your model for any special screws first.
What screw types should I expect on a Wii, and how do I identify them?
Common types include Phillips, flathead, and occasional security or tri-wing screws. Inspect the shell and panels to identify the head shape before selecting a bit.
Look at the screw head shape; matching bits prevents damage.
What if a screw is damaged or stripped?
If a screw head is stripped, do not keep turning; apply a bit more gentle pressure and consider a screw extractor, or seek professional help to avoid further damage.
Don’t force it—use a proper extractor or professional help.
Is opening my Wii guaranteed to void the warranty?
Opening a console can void manufacturer warranties depending on the terms and region. Check official policy and weigh risks before proceeding.
Be sure to check warranty terms before you start.
Can I reassemble without the service manual?
A service manual or model-specific guide is very helpful but not always required. Use labeled screws and take photos to aid reverse steps.
A guide helps, but if you document steps well, you can reassemble fine.
Are there safety risks I should know about when opening an electronic console?
Electrical components can retain charge and physical parts can have sharp edges. Always unplug, discharge static, and handle parts with care.
Unplug, discharge static, and be careful with sharp edges.
Watch Video
The Essentials
- Use a precision screwdriver set with the right bits
- Organize screws by position to simplify reassembly
- Work slowly and protect delicate components
- Verify screw types before forcing a bit
- Power down and discharge static before handling internals