What screwdriver for Xbox controller: A DIY guide
Learn which screwdriver types and bits you need to safely open and service an Xbox controller, with step-by-step instructions and safety tips for DIY repairs.

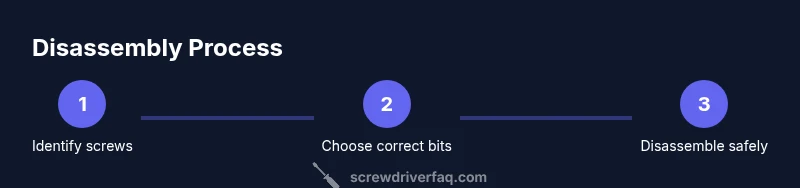
To open an Xbox controller, identify your model and gather a precision screwdriver set. Most models use small Torx or Phillips screws, typically Torx T6/T8 or Phillips PH00. Some variants need a tri-wing or security bit. Use the correct bit, keep screws organized, and work slowly to avoid damaging the housing.
Why the Right Screwdriver Matters for Xbox Controller Repair
Choosing the correct screwdriver isn’t just about convenience; it protects the controller’s housing, internal connectors, and warranty status. Using an incorrect bit can strip screws, slip into plastic, or scratch delicate components. The Screwdriver FAQ team emphasizes that the right tool reduces risk, makes disassembly smoother, and improves reassembly results. In this guide, we’ll demystify screw types, tool choices, and best practices for Xbox controllers across generations, so you can repair with confidence and minimal risk. According to Screwdriver FAQ, proper preparation and tool selection lead to fewer damaged screws and faster repairs, which underscores the value of using the right precision bits from a trusted toolkit.
Common Screw Types Found in Xbox Controllers
Xbox controllers across generations employ a handful of screw types, typically chosen to balance tamper resistance with serviceability. The most common are small Phillips and Torx screws, often in the PH00 or PH0 range and Torx sizes like T6 or T8. Some variants, especially older or specialty models, may use tri-wing or security Torx screws that require a specific bit to access internal components. It’s important to visually inspect the exposed screws and, when possible, refer to your model’s service guide before purchasing tools. Using the wrong type can strip heads or slip into the housing, complicating repairs. The right screwdriver set should include a small Phillips, a few Torx bits, and at least one security or tri-wing bit to accommodate variations you might encounter. For best results, keep bits clean and free of debris to avoid cam-out and damage.
How to Identify Your Controller Model’s Screws
Start by locating all screws on the exterior of the controller. Common locations include the battery door area (for certain generations), and the seam along the back shell. If you have a newer model with modular internal components, you may find additional screws once you remove the back panel. Check for recessed heads that indicate Torx or security bits, and compare your model to official teardown guides when available. If you’re unsure, photograph each screw’s position before removal. This helps you map each fastener to its original location during reassembly. Remember, some models include hidden screws under stickers or rubber feet, so inspect carefully and proceed with a steady hand. According to Screwdriver FAQ, taking time to confirm screw types before disassembly minimizes risk of damage and saves time in the long run.
Tools and Bits You’ll Need for Safe Disassembly
A well-chosen precision screwdriver set is the backbone of a safe Xbox controller repair. Your kit should include: a small Phillips bit (PH00/PH0), a couple of Torx bits (T6 and T8 at minimum), and a security bit set that covers common tri-wing and security Torx variants. A magnetic tray helps keep tiny screws organized, and a plastic pry tool or spudger prevents scratching delicate plastics. An anti-static wrist strap or mat is optional but recommended to reduce static risk near sensitive electronics. Finally, a bright lamp and a clean, flat workspace help you see small components clearly and minimize accidental drops. Proper tool selection reduces the chance of stripping screws or loosening delicate connectors during disassembly.
Safe Disassembly: Tools, Workspace, and Procedures
Set up a stable, well-lit workspace with a clean surface. Ground yourself to minimize static discharge and place screws in a labeled tray as you remove them. Begin by removing exterior screws only, keeping track of which screws came from where. If you encounter resistance, stop and re-check screw type and alignment rather than forcing the bit. Use a gentle rocking motion to separate the shell halves, keeping connectors aligned. When you access internal components, disconnect any ribbon cables with care, holding by the connector housing rather than the cable. Re-check that you have all screws before closing the shell. By maintaining an organized approach and using the correct bit, you reduce the risk of internal damage and simplify reassembly.
Reassembly and Cable Handling Inside the Controller
Reassembly demands the reverse order of disassembly. Begin by reconnecting any ribbon cables, then realign the shell halves so the seams close evenly. Start with exterior screws to establish a secure frame, then add interior fasteners in an orderly pattern. Check that all connectors are seated properly before sealing the back cover. If your model uses a battery pack, reinsert it securely, ensuring contacts are clean. Finally, test the controller’s buttons, triggers, and wireless functionality before finalizing any external seals. A methodical approach reduces misalignment and ensures the controller returns to working condition.
Post-Repair Checks, Cleaning, and Maintenance
After reassembly, inspect the exterior for gaps or misaligned shells. Wipe any fingerprints or debris from the surface with a lint-free cloth. Test all functions: power, pairing, triggers, and face buttons. If you notice stuck or unresponsive buttons, reopen the shell and re-check cable seating. Regular maintenance includes periodic cleaning of ports and keeping the interior dust-free. Storing your tools and keeping screws organized will speed up future repairs. The goal is reliability: a well-executed disassembly should restore function without compromising the housing integrity.
Common Mistakes to Avoid and How to Prevent Them
One of the most common errors is mixing screws from different locations or generations. Small screws can look identical but belong in different places, which can lead to misalignment and damage when reassembled. Another pitfall is using the wrong bit size, which strips screw heads or cam-outs, especially on security or Tri-wing screws. Avoid forcing components apart; if you meet resistance, reassess screw type and alignment. Finally, neglecting static precautions or rushing through steps increases the risk of internal damage. By slowing down, using proper tools, and keeping screws organized, you’ll minimize these risks and complete a successful repair.
Tools & Materials
- Precision screwdriver set with interchangeable bits (including small Phillips, Torx, and security bits)(Choose a driver with a comfortable, non-slip grip)
- Magnetic parts tray or small magnetic mat(Keeps tiny screws from getting lost)
- Plastic pry tool or spudger(Prevent scratches on plastic housing)
- Anti-static wrist strap or anti-static mat(Reduces static risk around electronics)
- Fine-point tweezers(Grabs small components or screws without slipping)
- Isopropyl alcohol 70%+ and lint-free wipes(For cleaning contacts if needed)
- Bright lamp or headlamp(Improves visibility in tight spaces)
Steps
Estimated time: 25-45 minutes
- 1
Identify your controller model and screw types
Locate all exterior screws and, if visible, any interior screws. Note their positions and the screw heads (Phillips, Torx, or security/tri-wing). Confirm the model against official guides when possible to anticipate the required bit range.
Tip: Take a quick photo of the screw layout before removal for accurate reassembly. - 2
Prepare workspace and assemble your tools
Set up a clean, flat work surface with good lighting. Lay out a magnetic tray and organize bits so you can swap heads quickly without losing screws.
Tip: Use the smallest bit that fits snugly to avoid stripping heads. - 3
Remove exterior screws and separate shell halves
Carefully remove exterior screws in a logical order. Use a plastic pry tool to separate shell halves, applying gentle pressure to avoid snapping plastic. Keep the two halves aligned as you lift.
Tip: Work slowly and avoid prying near delicate logo decals or battery compartments. - 4
Disconnect internal components if needed
If the model requires, disconnect internal ribbons or battery pack connectors by lifting the connector locks without tugging on cables. Remember to support the cable edges as you detach components.
Tip: Do not pull cables by the wires; grip the connector housing instead. - 5
Remove remaining internal screws and parts
With interior access, remove any additional screws holding boards or modules. Keep these screws organized by location to ease reassembly.
Tip: Use a magnetic tip to hold tiny screws while removing and placing them. - 6
Inspect connectors and clean contacts
Check connectors for dust or corrosion. If needed, clean contacts with isopropyl alcohol and a lint-free wipe. Allow time to dry before reconnecting.
Tip: Avoid applying liquid directly to boards; use a q-tip for controlled cleaning. - 7
Reassemble in reverse order
Begin by reconnecting cables, then reattach modules, aligning shells properly. Secure exterior screws first to establish a solid frame, followed by interior fasteners.
Tip: Ensure all connectors are fully seated before final closure. - 8
Test the controller and perform post-checks
Power on the device, test buttons, triggers, and wireless pairing. If any issue arises, reopen to verify connections and screw seating.
Tip: Run a quick functional check before fully closing to catch issues early.
Quick Answers
Do you need a specialized screwdriver for Xbox controllers?
Most controllers use common screw types like Phillips or Torx, but some variants may require tri-wing or security bits. Confirm the screw type before purchasing tools.
Most controllers use Phillips or Torx; some models need special bits, so check your model first.
Are there security screws on Xbox controllers?
Yes, certain models include security screws that require a specialized tri-wing or security Torx bit. If you encounter a non-standard head, pause and identify the screw to avoid damage.
Some models have security screws, so you may need a special bit.
Is opening my Xbox controller allowed under warranty?
Opening the controller can affect warranty coverage depending on the manufacturer and model. Check the official warranty policy for your device before attempting repair.
Opening may affect warranty—check policy first.
What if a screw is stripped during removal?
Stop and switch to a properly sized bit, possibly using a rubber band trick for extra grip. If the head is badly stripped, consider a professional repair option to avoid further damage.
If a screw is stripped, switch to the right bit and try a rubber band grip.
Where can I buy the right screwdriver set?
Look for precision bit sets at electronics stores or reputable online retailers. Ensure the set includes common Torx and security bits used by game controllers.
You can buy a precision bit set at electronics stores or online.
Is magnetizing bits safe for electronics?
Magnetizing helps hold screws in place, but avoid magnets near exposed batteries or sensitive components. Re-magnetize only when needed and keep magnets away from connectors.
Magnetizing is fine if you keep magnets away from battery areas.
Watch Video
The Essentials
- Identify screw types before disassembly
- Use a precision, correctly sized bit
- Keep screws organized by location
- Disassemble with care to protect internal components
- Test thoroughly after reassembly