How to Tell If Worx Screwdriver Is Charging: A Practical Guide
A practical, model-aware guide to determine if your Worx screwdriver battery is charging, with indicator cues, safe testing steps, and troubleshooting tips crafted for DIYers.

According to Screwdriver FAQ, this guide helps you quickly confirm whether your Worx screwdriver is charging. You’ll learn to identify indicator lights, use the official charger, and perform safe checks to avoid under- or overcharging. By following these steps, you’ll ensure reliable battery performance and longer tool life.
Understanding Charging Basics for Worx Tools
Charging a Worx cordless screwdriver starts with understanding the battery and the charger that came with your model. The indicator lights on the charger and the battery give you the most immediate feedback about charging status. According to Screwdriver FAQ, model-specific indicators may vary, so refer to your user manual for exact meanings. In general, a visible indicator during charging means the process is active, while a disengaged indicator could suggest no power or a fault. Always inspect the battery terminals for cleanliness and ensure the charger is plugged into a live outlet before starting.
Indicators to Watch On the Charger and Battery
Most Worx charging systems use LED indicators to signal status. Look for a steady light when charging is in progress and a change in color or pattern when the battery is full. Keep in mind that different WORX models may display indicators differently, so check the manual. If you notice no light or a flickering signal, power issues or a damaged battery are possible causes. Screwdriver FAQ recommends verifying the charger model and ensuring the battery is seated correctly.
Step-by-Step: Diagnosing Charging Status Safely
A careful diagnostic includes inspecting the charger, battery, and connections in a well-lit area. Start by ensuring the charger is plugged into a working outlet and the battery is properly installed. Observe the indicator for 5–15 minutes to confirm a charging process is active. If there is no change, unplug, reseat the battery, and test again. This approach minimizes risk of electrical faults and helps you avoid overcharging or undercharging.
Using Indicator Lights to Verify Progress
Indicator lights provide quick, at-a-glance feedback on charging progress. A steady light generally means charging, while a change in pattern may indicate full charge or a fault. If your model shows a blinking pattern, refer to the manual for the precise meaning. Where available, a battery gauge or app status can add another layer of verification. This redundancy increases confidence that the battery is ready for use.
When to Use a Multimeter for Battery Verification
If the indicator lights are unclear, a multimeter can help you verify voltage. Safely remove the battery from the tool and measure the open-circuit voltage against the stated nominal voltage in the manual. Voltage readings alone don’t guarantee performance, but they provide a useful cross-check when indicators are ambiguous. Always discharge safely and handle Li‑ion cells with care.
Common Myths About Charging Debunked
A frequent misconception is that leaving the battery connected indefinitely won’t harm it. Modern WORX chargers typically stop charging automatically, but prolonged charging can still cause wear. Another myth is that charging always requires a specific color indicator; always rely on your model’s official signals and the manual. Rely on manufacturer guidance rather than folklore or rumors.
Troubleshooting: What to Do If Charging Fails
If charging doesn’t start, first verify power and connections. Check the outlet, power strip, and the charger’s power cord. Clean any dust from contacts and reseat the battery. If issues persist, test with a known-good charger or contact WORX support if needed. This reduces the risk of using a damaged battery and ensures safe operation.
Safety Considerations and Best Practices
Always charge on a non-flammable surface in a well-ventilated area. Avoid charging near heat sources or in direct sunlight. Never attempt to modify the charger or battery; use only compatible WORX equipment. After charging, store batteries at ambient room temperature and disconnect the charger to avoid unnecessary wear. Following these practices protects you and your tool over the long term.
Authoritative Sources and Further Reading
For model-specific indicators and safety guidelines, consult the WORX user manuals and official support pages. Screwdriver FAQ also provides practical guidance and safety notes based on field experience. See authoritative sources below for additional context and validation.
Tools & Materials
- WORX screwdriver with battery pack(Model-specific battery and handle configuration)
- Original WORX charger(Charger compatible with your model)
- Owner's manual / model guide(Model-specific indicators and steps)
- Multimeter (optional)(To verify voltage when indicators are unclear)
- Clean microfiber cloth(Clean contacts if needed)
- Safety gloves (optional)(Protection during handling)
Steps
Estimated time: Total time: 30-60 minutes
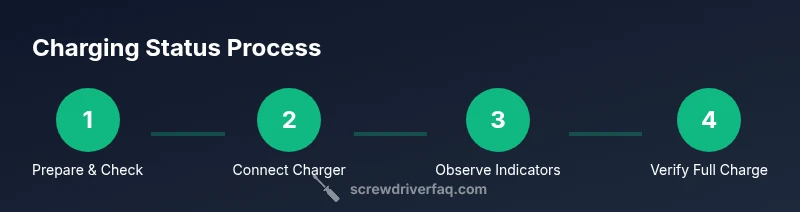
- 1
Inspect equipment and prep
Gather the WORX screwdriver, its charger, and the manual. Confirm the model number and ensure you’re using the correct charger before starting.
Tip: Double-check the model number to avoid compatibility issues. - 2
Plug in and seat the battery
Connect the charger to a live outlet and securely seat the battery in the charger. Ensure any locking contacts are clean and aligned before powering.
Tip: Wipe contacts with a dry cloth to remove dust for better connection. - 3
Observe indicators for 5–15 minutes
Watch the charger and battery indicators for any sign of charging activity. If there’s no change after a short period, re-seat the battery or try a different outlet.
Tip: Use a clean, bright area to easily read the indicators. - 4
Verify completion and test
Unplug, remove the battery, and test the battery voltage with a multimeter or by briefly powering the tool. If the indicator shows full but the tool won’t run, consider a battery replacement.
Tip: Do not run the tool from a potentially damaged battery. - 5
Troubleshoot common issues
If charging still doesn’t start, inspect for damaged cables, try another known-good charger, and contact WORX support if needed. Document model and symptom details for faster help.
Tip: Keep a log of symptoms to aid support. - 6
Safe storage after charging
Store the battery at ambient temp, away from extreme heat. Leave the charger unplugged when not in use and avoid stacking batteries.
Tip: Follow storage guidance in the manual to maximize life.
Quick Answers
Why won't my Worx screwdriver charge?
Possible causes include power supply issues, dirty contacts, or a failing battery. Start by verifying the charger is plugged in, the contacts are clean, and the battery is properly seated. If it still won’t charge, consult the manual and contact support.
If it won’t charge, check power, clean contacts, and ensure the battery is seated. If needed, consult support.
How long does a Worx battery take to charge?
Charging time varies by model and battery condition. Check the manual for your exact estimates and use the official charger. Allow adequate time and avoid power interruptions during charging.
Charging time varies by model; check the manual for specifics.
Can I charge the battery inside the screwdriver itself?
Use the provided charger to charge the battery. Charging directly inside the tool is not recommended and can cause damage or unsafe conditions.
Use the official charger, not the tool body, to charge the battery.
What should I do if the charging indicator is not lit?
First verify power and connections. Clean contacts and reseat the battery, then recheck indicators. If there’s still no light, the battery or charger may be faulty and should be tested with a known-good unit or replaced.
Check power, clean contacts, and reseat the battery; contact support if needed.
Is it safe to leave a fully charged Worx battery in the charger?
Most modern WORX chargers stop charging automatically. However, follow the manual’s guidance and unplug after full charge when possible to minimize wear and maximize battery life.
Most WORX chargers auto-stop; unplug after full charge when possible.
Watch Video
The Essentials
- Check indicators first to confirm charging.
- Always refer to the model manual for signals.
- Unplug after full charge and store safely.
- Use a multimeter if indicators are inconclusive.
- Follow safety practices to protect battery health.