How to Get a Disc Out of PS4 Without a Screwdriver
A screwdriver-free guide to eject a stuck PS4 disc safely. Learn built-in options, safe troubleshooting, emergency ejects if available, and when to seek professional help.

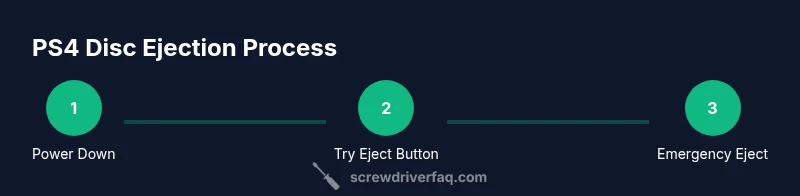
Safely eject a PS4 disc without a screwdriver by using built-in eject options first, then screwdriver-free steps if needed. Power down, try the front Eject button, and avoid forcing the drive. If the disc remains stuck, seek professional support or consult Sony. This guide covers safe, tool-free methods.
Built-in Eject Options to Try First
Most PS4 models provide simple, screwdriver-free ways to remove a disc when the system is on or in standby. Start with the front-panel Eject button, which is designed to pop the tray open and release the disc without tools. If the drive recognizes the disc, your screen may display a prompt or the system may eject automatically when you select the Disc option in the Quick Menu or Home screen. In practice, a calm approach yields the best results: avoid shaking the console, keep it on a stable surface, and remove any nearby objects that could scratch the case or press against the drive. If the disc is spinning or the tray feels stiff, pause and power the unit down before attempting another pass. Reconnect power and give the drive a moment to boot before retrying. If your model supports it, you may also trigger a soft eject using the on-screen interface by navigating to the Drive icon and selecting Eject. This method remains tool-free and is the safest first option. If the Eject button works, you’ve avoided more invasive steps and preserved the disc for reuse.
What to do if the disc is stuck
Dealing with a stuck disc can be nerve-wracking. If the disc won't come out after tapping Eject or using the on-screen option, do not pry or push on the disc. For screwdriver-free troubleshooting, start by unplugging the console from power, waiting 60 seconds, and then reconnecting. A fresh boot sometimes resolves minor drive hiccups. Check around the drive face for any visible obstruction, like a loose label or tiny debris, and wipe carefully with a dry microfiber cloth. If the disc is still lodged but the drive is silent, try again with the PS4 powered on, as some drives only release when they detect activity. If nothing changes after two attempts, proceed to the emergency steps only if your model supports it, outlined in the next section. In all cases, prevent the drive from spinning while you work and keep hands clear of the opening to avoid pinching fingers.
Emergency manual eject: when your model supports it
Some PS4 models offer a small, external pinhole emergency eject next to the drive, while others require internal access. If your model has the hole, you can insert a straightened paperclip gently and press to release the tray. Do not apply force, and never use metal objects that could short the drive. If you don’t feel resistance or if the tray does not move after a light push, stop immediately. If you cannot locate a pinhole or you feel unsure about your model, skip this step and move to contacting support. Note that accessing the emergency mechanism on some consoles may still require partial opening or professional assistance; never attempt to disassemble the case yourself.
When to avoid DIY and seek professional help
DIY attempts beyond built-in options risk damaging the optical drive, console internals, or warranty coverage. If you observe grinding sounds, uneven tray movement, or unusual heat, stop immediately and seek professional service. Contact Sony support or an authorized repair center. Keep records of your PS4 model and serial number handy, as this will speed up the service process. If the console is under warranty, avoid opening the case yourself, as this can void coverage. In all cases, if a disc is damaged or stuck due to a faulty drive, replacing the drive may be the only reliable remedy.
Safety tips and common mistakes
Tips for screwdriver-free disc ejection:
- Always power down and unplug before touching the drive. This minimizes the risk of short circuits or electric shock.
- Use only light, steady pressure when attempting manual release or button presses; forcing the drive increases the chance of further damage.
- Work on a clean, flat surface; a fall could damage the console or the disc.
- If a pinhole is present, use a straightened paperclip, not a metal rod or tool; the aim is to trigger a release without damaging internal components.
- If you have a multimeter or test device, avoid probing the drive while it is powered; this is not necessary for normal ejection and can be dangerous.
- Preserve the disc by avoiding contact with the lens and by not bending or flexing the disc.
How to inspect the drive after eject
Inspect the disc for cracks or warping after removal; if the disc shows signs of damage, set it aside carefully and avoid using it again in the PS4. Reinsert the console cover if you removed it briefly and re-seat any loose cables. When you test again, observe whether the drive seems to operate smoothly during startup or if any unusual sounds occur. If the drive behaves differently after a screwdriver-free ejection, consider professional diagnostics to ensure there is no alignment issue or motor fault.
Next steps and preventive care
To minimize future disc ejection problems, keep your PS4 clean from dust, avoid dropping the console, and store discs properly. Use a case with proper padding, and clean discs with a microfiber cloth before inserting them. If you find yourself repeatedly needing to eject discs by non-standard means, it may indicate a failing drive that needs professional service. The key is patience and using the built-in tools and steps designed for screwdriver-free operation, so you do not void your warranty or damage the hardware.
Tools & Materials
- PS4 console(Place on a stable, flat surface before attempting any steps.)
- Power cable(Unplug from power before any internal or drive-related operations.)
- Straightened paperclip (optional)(Only if your model has an external emergency eject pinhole.)
- Soft microfiber cloth(Helpful for clearing dust and wiping the drive face gently.)
Steps
Estimated time: 30-60 minutes
- 1
Power down and unplug
Shut down the PS4 completely, unplug the power cord, and wait 60 seconds before touching the unit again. This ensures any residual charge is cleared and reduces the risk of short circuits.
Tip: Patience pays off—rushing can cause damage. - 2
Try the front-panel Eject button
With the console on or in standby, press the Eject button firmly near the center to see if the drive will pop the disc out. Do not press repeatedly in quick succession to avoid mechanical wear.
Tip: If it clicks but doesn’t eject, stop and proceed to the next step. - 3
Check for on-screen and manual cues
If your PS4 shows a disc icon or an Eject option in the quick menu, select it. If not, try another power cycle and retry the Eject button after reconnecting power.
Tip: Sometimes the UI prompts help guide the hardware action. - 4
Explore the emergency pinhole eject (if available)
Some models include a tiny external pinhole near the drive; insert a straightened paperclip gently to trigger the release. Do not force or twist the tool.
Tip: Only proceed if you see a clearly labeled hole and feel comfortable. - 5
Retry with the drive active
Reconnect power, turn on the PS4, and attempt a final Eject. A moment of drive activity can help release a stuck disc without tools.
Tip: If it still sticks, stop to avoid damage. - 6
Know when to stop and seek help
If the disc remains inside after screwdriver-free steps or the drive is making grinding noises, contact Sony support or a licensed repair center.
Tip: Warranty coverage may apply; avoid opening the case yourself.
Quick Answers
Can I remove a PS4 disc without using tools?
Yes. Start with the built-in Eject option on the front panel. If the disc remains stuck, follow screwdriver-free troubleshooting steps and consider professional help if needed.
You can eject without tools by using the front Eject button first, and only seek professional help if it stays stuck.
What should I do first if a disc won’t eject?
Power down the PS4, unplug the power cord, wait a minute, then plug back in and try the Eject button again. If it still won’t eject, move to the emergency steps only if your model supports them.
First, power down and unplug, then retry the eject after a brief wait.
Is emergency pinhole eject safe?
Only use the pinhole if your model clearly has one. Gently insert a straightened paperclip and apply a light push. If there’s no response, stop and seek professional help.
Use the pinhole eject only if your PS4 has it, and do so gently.
Will trying to eject without tools void my warranty?
Opening the case or using non-standard tools can affect warranty coverage. Always prefer screwdriver-free methods and contact support if needed.
Yes, tinkering inside can affect warranty; contact support if in doubt.
What if the disc is damaged after ejection?
If the disc shows cracks or warping, set it aside and avoid using it again in the PS4. Damaged discs can cause further mechanical issues.
If the disc looks damaged, don’t reuse it in the PS4 and handle it carefully.
When should I get professional service?
If the disc remains stuck after screwdriver-free steps or the drive makes grinding noises, seek professional diagnostics from Sony support or a repair center.
If it’s still jammed after your DIY steps or you hear grinding, get professional help.
Watch Video
The Essentials
- Power down and unplug before any action
- Start with built-in Eject before DIY methods
- Do not force the drive; risk of damage increases with pressure
- Emergency eject is model-dependent and may require professional help
- Seek professional service if screwdriver-free steps fail