Do You Need a Screwdriver to Install a GPU? A DIY Guide
Learn whether you need a screwdriver to install a GPU, plus step-by-step instructions, tools, safety notes, and troubleshooting for a secure graphics-card installation.

Yes, for most desktop builds you will need a screwdriver to secure the GPU bracket to the case. The process usually uses a small Phillips head screw, though some cases use thumbscrews on the back bracket. Always power down, unplug, and discharge static before handling sensitive components. Having a magnetized PH2 driver speeds things up and reduces dropped screws.
Do you need a screwdriver to install a GPU? Understanding the basics
According to Screwdriver FAQ, the short answer for most desktop PC builds is yes: you’ll typically need a screwdriver to secure the graphics card to the case. The GPU sits in the PCIe slot on the motherboard, but it remains anchored to the chassis by a bracket screw in the back of the case. This simple fastener prevents the card from wobbling, which could damage the PCIe connector or the slot itself. While some newer or compact cases feature tool-less brackets or thumbscrews, the majority of builds still rely on a small Phillips-head screw. Knowing when to use a screwdriver helps you plan your workstation setup and reduces the chance of losing tiny screws in the case during installation. Remember that you’re not just “sliding in” a card; you’re securing it to withstand vibration and system movement during transport and operation.
Tools and materials you’ll typically need for GPU installation
Beyond a basic workspace, you’ll want a few common tools and safety aids. The most important is a Phillips-head screwdriver, typically PH2, because the GPU bracket screws are tailored to that size. A magnetic-tip version helps keep screws from dropping inside the case. An anti-static wrist strap is highly recommended to minimize the risk of static discharge, even if your build is new. A small work light or phone flashlight improves visibility, especially in less bright setups. Finally, a clean container or magnetic tray for holding screws prevents losses when you remove the side panel. If your case uses thumbscrews on the back panel, you may not need a screwdriver for those particular screws, but you’ll still want the PH2 for the GPU bracket in most builds. Having these tools ready keeps the process smooth and reduces the chance of dropped components.
Case types and how they affect screw usage during GPU installation
Desktop PC cases come in various form factors—full-tower, mid-tower, and mini-ITX—each with different access points for the GPU and its mounting screws. In larger cases, the backplate area is easier to reach, and the single bracket screw is located near the PCIe slot. In compact cases, you might find the screw is harder to reach, and you may need smaller hands or a magnetic driver to fit into tight spaces. If your case uses a tool-less PCIe bracket, you may only need to slide the card into place and secure nothing more than a latching mechanism. However, in most builds you will still encounter at least one bracket screw—typically PH2—to secure the card to the chassis. Confirm your case manual to see whether any screws are pre-installed or if the bracket is designed to be secured with a thumbscrew approach. Understanding these differences helps you plan your approach before you open the system.
Handling sensitive components and ESD safety during GPU installation
The GPU contains sensitive circuitry that can be damaged by static electricity. Always begin by powering down, unplugging, and touching a grounded metal surface before you touch any internal components. Use an anti-static wrist strap if available and keep it connected to ground during handling. Hold the card by its edges and avoid touching the gold PCIe connector or memory chips. Work on a non-conductive mat or clean desk surface to avoid static buildup. When you insert the GPU into the PCIe slot, don't force it; align the connector and seat evenly. After the card is seated, you can install the bracket screw with your PH2 screwdriver, but do not overtighten. Finally, if your power supply uses PCIe power cables, connect them securely only after the card is fully in place and the case panel is closed.
Positioning and seating the GPU: alignment and engagement inside the case
The process hinges on a clean alignment with the PCIe slot. Before touching the card, visually inspect the slot to ensure no debris. Hold the GPU level and slide it straight into the slot—never at an angle that could bend connectors. You should hear a soft click as the PCIe reinforcement engages. The bracket should align with the case’s rear opening so that the screw has a clean thread. With the card now seated, attach the bracket screw using PH2, using a magnetic driver if available to keep the screw from dropping. Finally, connect any required PCIe power connectors from the PSU, oriented to avoid stressing the cable. Leave the top expansion slot covers in place and reassemble the case panel.
Troubleshooting common issues during GPU installation and how to resolve them
If the card doesn’t align or the screw won’t bite, back out and recheck the alignment. Confirm the PCIe slot alignment with the GPU’s edge connector; a misaligned card can prevent seating and cause display issues. If you feel resistance when inserting, remove the card, inspect the slot and the card’s edge for burrs or debris, and try again. If the screw threads feel damaged, stop and try a fresh screw in a different hole or use a different bracket position if your case allows. Always verify the power connectors are not loose after installation. If the display doesn’t initialize after boot, reseat the card and clear CMOS settings if necessary, ensuring the GPU is firmly seated and the PSU is providing power.
Final checks after GPU installation and boot testing
With the GPU in place, reconnect power and power on the system. Enter the BIOS/UEFI to confirm the GPU is recognized and set as primary display if needed. Once the OS boots, install or update the GPU drivers, and verify the card temperatures under load to ensure the cooler is functioning correctly. If fans spin up and the display remains blank, re-check power cables and reseat the GPU. Keep a log of any anomalies and consult the motherboard manual for PCIe lane configuration if you’re using multi-GPU setups or unusual PCIe slot configurations.
Tools & Materials
- Phillips-head screwdriver (PH2)(Most PCIe bracket screws use PH2; full-sized cases usually conform to this standard.)
- Magnetic-tip screwdriver(Helpful to keep screws from dropping into the case.)
- Anti-static wrist strap(Highly recommended to prevent static damage to components.)
- Small work light(Ensures clear visibility in tight cases or dark rooms.)
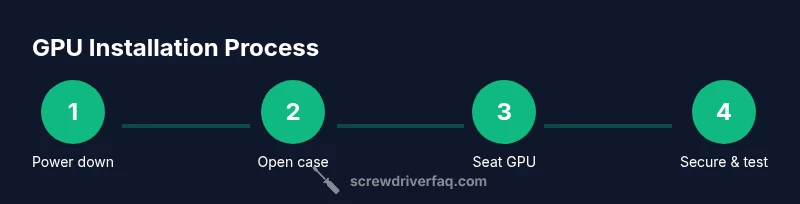
Steps
Estimated time: 15-25 minutes
- 1
Power down and unplug the PC
Shut off the computer, unplug the power supply from the wall, and press and hold the power button for a few seconds to discharge residual energy. This reduces the risk of short circuits or electric shock. Keep screws in a small tray to prevent loss.
Tip: Always unplug before touching internal components. - 2
Open the case and locate the PCIe slot
Remove the side panel to expose the motherboard and PCIe slots. Use a flashlight if needed to inspect the back of the case and find the empty PCIe x16 slot. Clear any visible dust or debris with a dry brush.
Tip: Visual confirmation reduces misalignment during installation. - 3
Loosen or remove the bracket screw
If there’s an existing screw securing the bracket, loosen or remove it to prepare for the GPU insertion. Keep the screw nearby so it doesn’t get lost. Do not force the screw if it threads poorly—inspect the threads instead.
Tip: Use the PH2 screwdriver with a magnetic tip to hold the screw. - 4
Insert the GPU into the PCIe slot
Align the GPU’s PCIe edge connector with the slot and press the card straight in until you feel it seat securely. Do not bend the connectors or force the card. Once seated, ensure the rear bracket aligns with the case opening.
Tip: Keep the card level and avoid tilting it into the slot. - 5
Secure the bracket and connect power
Insert and tighten the bracket screw with PH2 until snug. If your card requires PCIe power, connect the cables from the PSU without stressing the cables. Recheck all connections, then reattach the side panel and power on to test.
Tip: Avoid over-tightening; it can strip threads or warp the bracket.
Quick Answers
Do I always need a screwdriver to install a GPU?
In most desktop builds, yes. A screwdriver is typically required to secure the graphics card’s bracket to the case. Some cases feature tool-less brackets or thumbscrews for the back, but you’ll still often rely on a screw for the GPU bracket. Verify your case manual if you’re unsure.
Yes. Most builds require a screwdriver to secure the GPU bracket, though some cases use thumbscrews for part of the process.
What screwdriver size should I use for GPU brackets?
Most GPU brackets use a Phillips-head screw that fits PH2. Using the correct size prevents stripped threads and makes installation smoother. A magnetic PH2 driver is especially helpful.
Typically a PH2 Phillips screwdriver; magnetize the tip if you can.
Can I install a GPU without removing the side panel?
Usually not. Access to the back of the case and the bracket screw often requires removing the side panel. In some compact builds, you may access the bracket from the rear, but you’ll still need room to maneuver the card.
Usually you’ll need to remove the side panel to install the GPU securely.
What if the case uses thumbscrews?
Thumbscrews can simplify the process, but you may still need a screwdriver for the bracket screw or for other internal screws. Check the case manual to know what’s required for your model.
Thumbscrews can help, but you might still need a screwdriver for the bracket.
Is static electricity dangerous when installing a GPU?
Static can damage sensitive components. Use an anti-static strap, ground yourself, and handle the card by its edges. This reduces the risk of damaging the GPU or motherboard.
Yes, static can harm parts—ground yourself and handle the card carefully.
What should I do if the GPU won’t seat properly?
Power down, unplug, re-check alignment, and reseat the card carefully. If needed, inspect the PCIe slot and the card’s edge for debris. Do not force the card; gentle pressure is key.
If it won’t seat, remove, realign, and try again gently.
Watch Video
The Essentials
- Power down and unplug before handling hardware.
- Use a PH2 screwdriver and magnetic tip for reliability.
- Align GPU carefully with the PCIe slot for a secure seating.
- Test boot and driver installation after securing the GPU.