Can You Drill with a Screwdriver? A Practical Guide
Learn when a screwdriver can substitute for drilling, safety tips, and smarter approaches. Screwdriver FAQ guides DIYers with practical, safety-first instructions for holes and fasteners.

Short answer: not safely or effectively. A screwdriver isn’t a drill and won’t cut cleanly or precisely. According to Screwdriver FAQ, drilling with a screwdriver should be avoided for most materials and hole sizes. For reliable holes, use a proper drill with the correct bit, clamp the workpiece, and wear eye protection. In very soft wood, you might make a tiny pilot hole with caution, but this is the exception, not the rule.
Can you drill with a screwdriver? What you need to know
Many DIYers ask if a screwdriver can double as a drill in a pinch. While you can sometimes create a tiny starter hole in soft materials by applying steady pressure and turning slowly, a screwdriver is not designed to cut across fibers, remove material, or make clean holes. The Screwdriver FAQ team emphasizes that a true drill with the right bit delivers safer, cleaner results and reduces the risk of bit breakage or material damage. If you must improvise, expect rough edges and a higher chance of wandering the hole. This article dives into what you can realistically do with a screwdriver, when to stop, and how to transition to proper drilling tools.
When it might be reasonable to start a hole with a screwdriver (and when not to)
In soft, untreated wood, a sharp awl or punch can start a small hole more cleanly than forcing a screwdriver tip. You might use this as a visual aid to align a drill bit later, but you should not rely on a screwdriver to cut into wood or metal. For metal, plastic, or thick materials, starting with a precise drill remains the safest option. According to Screwdriver FAQ analysis, many DIYers underestimate the importance of a proper starting point; skipping this step increases the risk of bit slip and misalignment. If you do attempt to begin a hole with a screwdriver, use a center punch to prevent the bit from wandering and set up a clamp to stabilize the work.
Safety and risk considerations when improvising with a screwdriver
Improvising is not risk-free. The main hazards include bit slippage, damaged workpieces, and skin injuries from sudden tool movement. Always wear safety goggles and consider a stable platform. Materials like hardwoods, soft plastics, and delicate metals behave very differently when drilled. If you notice the bit binding, stalling, or smoking, stop immediately—these are signs you should switch to the correct drill and bit size. The Screwdriver FAQ team reminds readers that using improvised methods can lead to unpredictable outcomes and should be treated as a last resort.
Alternatives and best practices for clean holes
For most projects, invest in a dedicated drill and a small set of bit types: wood bits for wood, metal bits for metal, and brad-point bits for precision in wood. Start with a pilot hole that’s smaller than the final hole to guide the larger bit. Secure the workpiece with clamps or a bench vise, mark the center with a pencil, and maintain steady pressure and straight alignment as you drill. If you absolutely must proceed without the right drill, at least use a sharp awl and a hand drill with a steady hand; but remember, results will be inconsistent and may damage surfaces.
Tools and techniques to transition from improvisation to proper drilling
Move from improvised methods to purpose-built tools as quickly as possible. Build a small starter kit: a cordless drill with a variable speed control, a set of wood and metal bits, a center punch for metal, clamps, and safety gear. Practice on scrap material to understand how different bits behave before tackling your project. The more you practice with the correct tools, the more confident you’ll be about making accurate, clean holes.
Tools & Materials
- Cordless drill(With variable speed, appropriate chuck size, and a charged battery.)
- Drill bits (wood and metal)(Choose sizes that match your hole plan (e.g., pilot hole smaller than final hole).)
- Brad-point or countersink bit(Useful for clean wood holes.)
- Center punch(Helps keep bits from wandering on metal.)
- Clamps or bench vise(Secures the workpiece for accuracy.)
- Safety goggles(Protects eyes from chips and debris.)
- Measuring tape and pencil(Marks precise hole locations.)
- Lubricant or cutting fluid(Useful for metal drilling to reduce heat)
Steps
Estimated time: 20-45 minutes
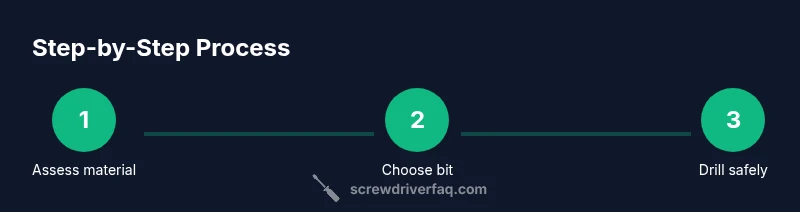
- 1
Assess material and hole size
Identify the material you’ll drill into and determine the final hole diameter. If the material is soft wood and the hole is small, you may cautiously start with a pilot hole using appropriate bits—but avoid forcing a screwdriver to cut. Understanding the material helps you select the correct bit and drilling approach.
Tip: Always pre-check the material with a scrap sample to gauge resistance before committing to the final piece. - 2
Select the right tool and bit
Choose a drill with the correct bit for the job. Use wood bits for wood, metal bits for metal, and ensure the bit is sharp and clean. If you’re trying to start a hole in wood, a brad-point bit can reduce wandering.
Tip: Verify bit size against your hole plan; a wrong size is harder to correct later. - 3
Secure the workpiece
Clamp the workpiece firmly to a stable surface. Movement can cause the bit to wander and create an oversized or misaligned hole. A secure setup is essential for accuracy and safety.
Tip: Use a scrap block under the workpiece to protect surfaces and prevent tear-out. - 4
Mark the center and pilot hole
Use a sharp pencil or center punch to mark the exact hole center. Create a light pilot hole with a small bit first to guide the larger bit and reduce resistance.
Tip: Pilot holes should be clearly smaller than the final hole to maintain material integrity. - 5
Drill the pilot hole
With a slow to moderate speed, begin drilling the pilot hole through the marked center. Maintain steady pressure and keep the drill perpendicular to the surface.
Tip: Let the bit do the work; don’t push too hard, which can cause bit breakage. - 6
Drill the final hole
Switch to the final bit size and continue drilling to the required depth. If drilling metal, consider using cutting fluid to reduce heat and wear.
Tip: Pause briefly if the material heats up to prevent dulling the bit. - 7
Deburr and finish
Remove the drill and clean burrs from the hole edge. Deburring prevents future catch on fasteners and ensures a smooth surface for the next step.
Tip: Lightly edge the hole with a deburring tool or sandpaper for a clean finish.
Quick Answers
Is it safe to drill with a screwdriver?
Generally no. A screwdriver isn’t designed to cut through materials and can slip, causing injury or damage. It should only be considered in emergencies and very soft materials, and even then with caution. For reliable results, use a drill and appropriate bits.
Not safe for regular drilling; use a drill and proper bits for safety and quality.
When, if ever, should I start a hole with a screwdriver?
Only in very soft wood or for minor starter marks where a tiny guide is needed. It’s not a substitute for drilling, and you should switch to a drill as soon as possible to complete the hole safely.
Only as a last resort for tiny starters—then switch to a proper drill.
What are safer alternatives to drilling with a screwdriver?
Use a drill with the correct drill bits, or a hand drill with sharp bits for small holes. For metals, a center punch and dedicated metal bits improve accuracy. Always clamp the work and wear PPE.
A drill with the right bits is safer; consider a center punch for metal and clamps for stability.
Can a screwdriver be used to create holes in metal?
No. Metal requires precision bits and typically cutting fluids to manage heat. A screwdriver cannot perform the required cutting and will likely produce an inaccurate hole or damage the workpiece.
No—metal holes need a proper drill and metal bits.
What should I do if the screwdriver bit starts slipping?
Stop immediately, inspect the bit and material, adjust your grip, and switch to the proper bit or tool. Slippage can injure your hands and ruin the work.
Stop, check alignment, and switch to the correct drill and bit.
Is there any scenario where a screwdriver could help after drilling?
A screwdriver can help torque fasteners after drilling, but only after using the correct drill to create the hole. Do not rely on a screwdriver to create the hole itself.
Use it for driving screws after you’ve drilled a proper pilot hole with a drill.
Watch Video
The Essentials
- Use a proper drill for most holes
- Pilot holes improve accuracy and reduce breakout
- Secure the workpiece and mark accurately
- Choose the right bit for the material
- Follow safety practices to avoid injuries