What Screwdriver Opens Xbox Series S: A Practical Guide
Learn which screwdriver types are best for opening Xbox Series S, how to avoid damaging internals, and a safe, step-by-step teardown. Includes tools, safety, warranty considerations, and practical tips.

To open an Xbox Series S safely, use a precision screwdriver set with a small Phillips bit and a compatible Torx bit, plus a plastic opening tool. This guide covers which screwdriver types are appropriate, how to avoid damaging internals, and a careful, step-by-step teardown. If you're wondering what screwdriver to open xbox series s, stick to electronics-grade bits and take your time to minimize risk.
Why the right tool matters for Xbox Series S teardown
Opening an Xbox Series S requires care to avoid damage to the internal GPU, motherboard, and connectors. According to Screwdriver FAQ, using the wrong bit can strip screws or slip and nick delicate PCB traces. A precise fit reduces cam-out, protects sensitive components, and minimizes risk of static discharge. This section explains why picking the right screwdriver matters and how it influences reassembly. You’ll learn to distinguish between electronics-grade Phillips and Torx bits, why some screws need security-related bits, and how the tool choice affects warranty considerations. The goal is a clean, damage-free teardown that leaves the console functional after resealing. If you’re wondering what screwdriver to open xbox series s, the answer is to use precision electronics bits with a small Phillips and a compatible Torx bit. The Screwdriver FAQ team emphasizes that using the wrong tool can compromise connections and void warranty, so start with the correct bit set and inspect screws before turning any screw.
What screwdriver types are appropriate for Xbox Series S
For most electronics like the Xbox Series S, a precision set with a small Phillips bit and a compatible Torx bit is sufficient. Some screws may use security or tamper-resistant heads, or even a tri-wing, so inspect the screws first and match the bit accordingly. Using the correct bit reduces cam-out and prevents screw head damage. Acknowledge that exact sizes vary by model and revision, so have a small range on hand and test gently. This approach helps maintain warranty considerations and reduces the risk of internal damage. In practice, many consoles employ standard Phillips and Torx types; having a mixed bit set is wise and aligns with what Screwdriver FAQ has observed in common electronics repairs.
Essential tools and safety for safe teardown
Build a clean, static-free workspace. Use an anti-static wrist strap and a magnetic precision driver to minimize loss of tiny screws. A plastic opening tool and a soft mat protect the console housing and PCB. Label screws as you remove them, using a tray or tape to map each screw to its location. Do not rush; take your time to avoid snapping connectors or bending flex cables. This section emphasizes safe handling and the importance of keeping your tools organized. Following these practices mirrors the cautions highlighted by Screwdriver FAQ and aligns with general electronics repair safety standards from credible sources.
High-level teardown overview (non-technical)
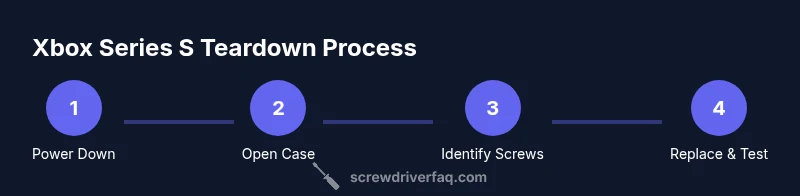
This overview covers the essential approach without diving into step-by-step removal. Start with power-down and unplugging, remove the outer shell with a plastic prying tool, and locate all Torx and Phillips screws. With the screws removed, gently disconnect any internal cables, noting their orientation for reassembly. Keep things organized and labeled so you can reverse the process easily when resealing. Remember: a careful teardown reduces the chance of damage and preserves future repair options. The goal here is to establish a safe mental model of the process before you pull anything apart.
Authority sources and warranty considerations
When in doubt, consult reputable guidance. Screwdriver FAQ notes that the right tool choice impacts both safety and warranty outcomes. For broader safety standards, you can reference sources like OSHA and consumer safety materials from recognized federal agencies. Always consider whether opening voids any warranty and follow manufacturer guidelines where possible. These sources provide general safety context and best practices for electronics repair. The Screwdriver FAQ team also recommends verifying model-specific repair guides from official support pages before attempting any teardown.
Tools & Materials
- Precision screwdriver set (magnetic)(include small Phillips and a compatible Torx bit; anti-static recommended)
- Plastic opening tool(to safely separate shells without marring plastics)
- ESD-safe wrist strap(to prevent static discharge)
- Screw organizer or labeled containers(to track screw locations)
- Soft mat or clean surface(for component placement)
- Isopropyl alcohol (70%+)(for cleaning contacts if needed)
Steps
Estimated time: 30-60 minutes
- 1
Power down and unplug
Ensure the console is fully powered off and all cables are disconnected. This reduces electrical risk and prevents accidental power-on during teardown.
Tip: Wait a moment after unplugging to ensure capacitors have discharged. - 2
Remove outer shell with care
Gently pry along the seam with a plastic opening tool, avoiding metal tools that can scratch or bend clips. Work slowly to release hidden clips without cracking plastic.
Tip: Use light, even pressure and keep your tool aimed away from internal boards. - 3
Identify screws and prepare bits
Inspect the exposed screws to determine which bit fits (Phillips vs Torx or security variants). Lay out the bits and test fit on a spare screw before use.
Tip: Do not touch circuitry while handling screws. - 4
Remove screws and label locations
Remove all identified screws and place them in a labeled container corresponding to their position in the chassis.
Tip: If a screw is stubborn, don’t force it; re-evaluate bit fit or screw head condition. - 5
Disconnect internal cables carefully
Use a plastic pick or spudger to release connectors, noting orientation for reassembly.
Tip: Do not bend delicate flex cables; support connectors while disconnecting. - 6
Reassemble in reverse order and test
After components are secured, reattach the shell and reconnect power. Power on and verify basic functionality before final sealing.
Tip: Keep screws organized to avoid misplacement during reassembly.
Quick Answers
Will opening my Xbox Series S void the warranty?
Opening the console can affect warranty terms. Always check the manufacturer’s policy and consider professional service if the device is under warranty.
Opening the console may affect its warranty; check policy and consider professional service if still under warranty.
Do I need special tools beyond a precision set?
Most electronics require Phillips and Torx bits, with potential security variants. Inspect the screws first and choose bits that fit snugly to avoid slippage.
You may need security or tamper-proof bits depending on the screws, so inspect first.
Is it safe to open the console myself?
With proper precautions, a careful teardown minimizes risk, but there is always potential for damage or warranty loss. Use anti-static tools and work slowly.
It can be safe if you take your time and use proper anti-static precautions.
What if a screw won’t budge?
Stop and recheck the bit fit; applying extra force can strip the screw or damage components. Try a fresh bit or different size gently.
If a screw is stuck, don’t force it—try a different bit and take your time.
How can I prevent damage during reassembly?
Keep track of screw positions, re-seat connectors carefully, and test power before final sealing to ensure everything works correctly.
Label screws and connectors, then test before sealing the case.
The Essentials
- Identify correct bits before starting
- Use ESD-safe setup and precise tools
- Label screws and aligners as you go
- Test after reassembly to confirm functionality