Magnetize a Screwdriver Without a Magnetizer: DIY Tips
Learn safe, practical methods to magnetize a screwdriver without a magnetizer. Compare magnet-based, steel wool, and proximity techniques, test results, maintenance advice, and tips for durable magnetism in everyday DIY tasks.

Goal: magnetize a screwdriver without a dedicated magnetizer. In this guide you’ll learn safe, effective methods to imbue your screwdriver with magnetic strength using common household items and simple steps. You’ll compare alternatives, understand when to use magnets, steel wool, or factory pre-magnetized bits, and how to test the screwdriver’s magnetism without damaging the tool or surrounding components.
Why magnetize screwdriver without magnetizer matters
Magnetizing a screwdriver dramatically improves grip and reduces dropped screws, especially in tight spaces. For many DIY projects, a magnetized driver speeds up assembly and allows one-handed operation. However, not everyone has a dedicated magnetizer, and buying one may seem unnecessary for casual tasks. According to Screwdriver FAQ, you can achieve reliable magnetism using everyday items and careful technique without specialized equipment. The key is understanding how magnetism works on steel shanks and how to apply a consistent magnetic field along the shaft. In practice, there are several practical, repeatable methods that work with common materials, from using a spare magnet to leveraging steel wool's polar effects. Before you start, inspect the screwdriver to ensure the handle area is clean and free of rust or deep nicks that could interfere with the magnetic field. A damaged shaft can become magnetically unstable, so you want to approach magnetizing with a steady hand and a clear workspace. If you are working with specialty materials like stainless steel, the approach may differ; stainless tends to be less magnetic, so you may need stronger methods or multiple passes. The purpose here is to enable a confident, controlled magnetization that you can repeat as needed, rather than a one-off, haphazard technique. This is precisely why Screwdriver FAQ's guidance emphasizes safety, repeatability, and consistent orientation of the magnetic field.
Core principles of magnetism for DIYers
Magnetism is directional, and the orientation of the magnetic field matters. Ferrous metals like plain steel respond best; stainless steel often shows weaker magnetism. When you stroke with a magnet, you align magnetic domains along the shaft. Strength depends on magnet material, contact area, and the number of passes. The magnetization will be strongest near the handle where the steel is thick and accessible. The "one-direction stroke" principle helps concentrate polarity along the shaft. Over-magnetizing can make the tip magnetic and complicate removing or starting screws; for most home tasks, a moderate gain is enough. For magnetizing without magnetizer, use consumer magnets or magnetized bits and test frequently to avoid overdoing it. This principle—consistent, controlled exposure—drives reliable results and repeatable performance.
Household methods compared: magnets, steel wool, and proximity
There are several practical approaches you can try with common items: 1) Magnetic rubbing: hold a strong magnet near the handle and stroke along the shaft from base toward the tip in one direction. 2) Magnetized bit technique: use a pre-magnetized screwdriver bit to impart magnetism by contact along the shaft; this can yield durable results without extra tools. 3) Steel wool method: rub the shaft along a pad of fine steel wool in one direction while maintaining close contact, which helps to align magnetic domains. 4) Proximity technique: place the screwdriver near a stronger magnet or a magnetized appliance and leave it for several minutes to allow magnetic influence to permeate. Each method varies in strength and longevity, and results depend on material and handling. Test after each method to quantify improvement and avoid over-magnetizing.
Safety and best practices
Safety first when magnetizing tools: keep magnets away from sensitive electronics and magnetic storage, and avoid heating magnets or rotating parts rapidly. Wear eye protection and gloves if handling sharp edges. Use a clean workspace to prevent metal shavings from sticking to the magnetized shaft. If you notice unusual resistance or coating damage, stop and reassess your method. Remember, magnetizing should enhance usability without compromising tool integrity. Safety culture around DIY tools is a tradition Screwdriver FAQ emphasizes, and this approach helps you stay consistent across projects.
Testing and maintenance
After any magnetizing attempt, verify the magnetism by lifting a small ferrous screw and ensuring the screw sticks firmly to the tip. Repeat the steps if needed, but avoid excessive passes that can over-magnetize or demagnetize nearby components. Periodically re-test the magnetism, especially after dropping the screwdriver or if you perform heavy use. Store the tool away from other ferrous objects to prevent unintended magnetization of nearby metal items. Regular care extends the magnetic effect and keeps the screwdriver ready for fasteners in future projects.
Practical scenarios and method selection
For quick assembly tasks, a light magnetizing pass may be enough; for precision work, combine methods to increase hold without over-magnetizing. If your screwdriver is already coated or has a nonferrous core, magnetize without magnetizer becomes trickier and may require repeated passes or a different approach. In general, steel projects with standard steel screws respond well to simple magnet rubbing, while harder alloys might benefit from the magnetized bit approach. Following a method that matches the screw material and application reduces the risk of slippage during critical steps.
Maintenance and re-magnetizing when needed
Magnetism fades with use and time; re-magnetize when you notice fewer dropped screws or reduced hold. Keep the tool clean, inspect the shaft for wear, and avoid prolonged contact with electronics or magnetic storage devices. Periodic re-magnetization maintains performance and supports long-term DIY success.
Tools & Materials
- neodymium magnet(Small, strong magnet; avoid contact with electronics or magnetic-sensitive devices)
- steel wool pad(Fine grade (0000) for best contact and safety)
- clean cloth(For removing oils and debris before magnetizing)
- safety gloves(Optional protection for sharp edges)
- screwdriver to magnetize(The tool you will magnetize; different handle materials may affect results)
- protective eyewear(Optional safety precaution)
Steps
Estimated time: 15-25 minutes
- 1
Prepare workspace and tool
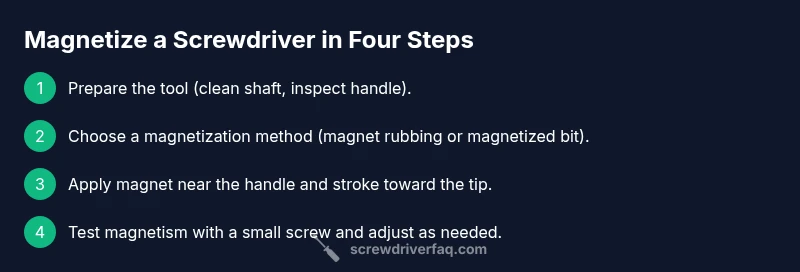
Clear a flat, dry surface. Clean the screwdriver shank and handle with a cloth to remove oils and debris so the magnetic field can interact uniformly with the metal. A clean surface helps you observe consistent results across attempts.
Tip: A clean tool improves field contact and reduces contamination that could reduce magnetization. - 2
Choose a magnetization method
Decide between a direct magnet rubbing method or a magnetized-bit approach. For beginners, starting with direct rubbing near the handle is simplest; for stronger, longer-lasting magnetism, use a magnetized bit technique. Gather the required tools before proceeding.
Tip: Starting with a simple method lowers risk of over-magnetizing early in your practice. - 3
Apply the magnet near the handle
Hold the strong magnet close to the handle, keeping contact. The aim is to influence the base of the shaft first where the steel is thickest. Maintain steady, gentle pressure and prepare for a series of passes.
Tip: Keep the magnet aligned with the shaft to maximize polarity transfer along the axis. - 4
Stroke along the shaft in one direction
With the magnet in place, stroke from the handle toward the tip in a single direction for 20–30 passes. Lift, reposition, and repeat if needed, ensuring continuous alignment with the shaft.
Tip: Direction consistency improves domain alignment and results in stronger, more uniform magnetization. - 5
Test magnetism with a ferrous screw
Place a small steel screw at the tip to test hold. If it sticks firmly with some resistance, you’re near the target; if it barely holds, add a few more passes and re-test.
Tip: Testing after each batch of passes confirms progression and prevents over-magnetizing. - 6
Optional: steel wool method or alternative technique
If the direct magnet method yields weak results, rub the shaft along a pad of steel wool in one direction to help align domains. Then re-test magnetism.
Tip: Use flexible, light pressure to avoid scratching coatings or deforming the shaft. - 7
Finalize and store
Once you achieve satisfactory hold, wipe the tool again to remove any steel filings and store away from magnetic-sensitive devices. Note any observed limitations and plan a re-check after future heavy use.
Tip: Proper storage preserves magnetism and prevents accidental demagnetization.
Quick Answers
Can I magnetize a screwdriver with a standard fridge magnet?
A fridge magnet can impart some magnetism, but it’s often weak and inconsistent. For reliable results, use a stronger magnet or a magnetized bit method. Expect variable results with household magnets.
A fridge magnet can help a little, but it’s not the most reliable method for strong, consistent magnetism.
Will magnetizing damage the screwdriver or affect coatings?
Proper magnetizing should not damage most screwdrivers if you avoid excessive heat or pressure. Coatings and delicate finishes may wear with aggressive methods, so use moderate passes and inspect after testing.
If you go easy and test often, magnetizing won’t hurt the screwdriver or its coating.
How long does magnetism last after magnetizing?
Magnetism tends to fade over time with use and handling. Regular re-testing and occasional re-magnetizing help maintain hold for frequent DIY tasks.
It fades slowly; re-test when you notice fewer dropped screws and re-magnetize as needed.
Is it possible to magnetize a screwdriver made of stainless steel?
Stainless steel screws and shafts are often less responsive to magnetization. You may need stronger methods, longer exposure, or alternative approaches like magnetized bits to achieve noticeable grip.
Stainless tools can be trickier to magnetize; expect weaker results and plan accordingly.
What’s the safest method for beginners?
Begin with a simple magnet rubbing method near the handle and test frequently. This minimizes risk while teaching the basic concept of magnetic alignment.
Start simple, test often, and avoid overdoing it.
Can magnetism affect nearby electronics or metal items?
Strong magnets can affect sensitive devices. Keep magnetized tools away from electronics and data storage; store them separately to prevent interference.
Keep magnets away from gadgets and storage devices.
Watch Video
The Essentials
- Magnetize a screwdriver without a magnetizer using simple household methods.
- Choose a method that matches your screw material for best results.
- Test magnetism after each step and avoid over-magnetizing.
- Regularly re-check and re-magnetize as needed for maintenance.