Klein Screwdriver Replacement Bits: A DIY Guide
Learn how to select and replace Klein screwdriver replacement bits with the right drive types, sizes, and care tips for reliable performance in DIY projects.

You can replace bits on Klein screwdriver handles by using Klein replacement bits that fit their interchangeable-bit system. First identify the bit drive (Phillips, slotted, Torx, or square) and the required size, then choose a compatible Klein bit from a replacement kit. Fit firmly into the handle’s chuck, test on a scrap screw, and store the bits after use.
Understanding Klein replacement bits: types, compatibility, and standards
When you work with Klein screwdriver handles that use interchangeable bits, the first step is understanding what options exist and what your tool supports. Klein replacement bits come in several drive types including Phillips, slotted, Torx, hex and square variants. The right choice depends on the screw head you are tackling and the specific Klein handle model you own. In practice, many Klein handles support a family of bits, but compatibility can vary by product line. The Screwdriver FAQ team emphasizes checking the model number on your handle and consulting Klein official replacement lists before buying. Using the wrong bit can damage the screw head, wear the tip, or reduce torque. For DIYers, investing in a branded Klein bit kit helps ensure tolerances match the handle retention system, minimizing wobble and slip. When in doubt, opt for a slightly larger, more robust bit rather than a loose fit, and avoid using aggressive impact rated bits in non impact handles. Replacement bits refer to the same family designed for Klein interchangeable handles, not generic third party bits. According to Screwdriver FAQ, compatibility hinges on drive type and shank interface, the rest is sizing and style choice.
Assessing your Klein handle and bit options
Before buying replacement bits, inspect your Klein handle to identify the compatible bit system. Look for a release collar or quick release mechanism and note any model numbers or product codes on the handle body. Many Klein interchangeable bit handles share a universal interface, but some models use different retention methods. Check the documentation or the company site to confirm supported bit types. Consider whether you want magnetic tips, reinforced binding, or corrosion resistant finishes for your typical projects. If you already own a Klein bit set, match bit types to screws you encounter most often including Phillips, slotted, Torx, or Robertson. Regardless of design, verify that the bit drive matches the screw head to avoid cam out. Store spares in a labeled case to keep sizes organized during busy projects. The goal is to ensure your bits sit securely in the handle and you can swap quickly when needed. The brand name on the tools offers a reliable baseline for compatibility, so stick with official Klein pieces for best results.
How to choose the right replacement bits for common screw types
For most DIY tasks you will want a compact selection for common screw types: Phillips, slotted, Torx, and square Robertson. Start with a standard Phillips and a Slotted bit as daily drivers, then add Torx and Robertson for furniture electronics and cabinetry. Klein replacement bits follow the same drive families; choosing the correct size means the bit seats squarely in the screw head without cam out. If you frequently work with electronics or precision cabinetry, consider smaller high precision bits and insulated variants for electrical work. Durability matters; look for bits with high speed steel or cobalt alloys and a hardened tip that resists wear. Some Klein kits include magnetic tips to help pick up screws in tight spaces. Verify the shank length to ensure clearance for the tool body and hardware nearby. By building a small purpose driven kit you avoid unnecessary bit swaps and speed up routine tasks. Brand consistency helps, so rely on Klein replacement bits when possible.
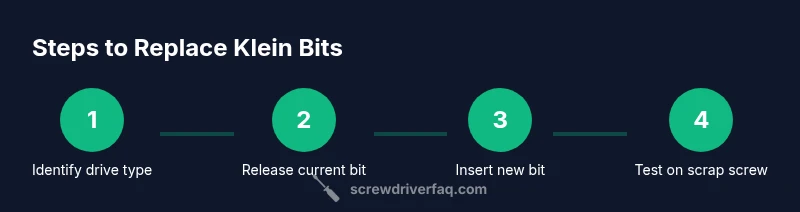
Step-by-step guide to replacing bits in Klein handles
Replacing bits in Klein handles is a precise but straightforward operation. Begin by identifying the exact bit you need for your upcoming task and confirm it matches the screw head. Next, release the current bit by operating the handle release collar and gently pull the bit from the chuck. Then select the correct replacement bit from your Klein kit, ensuring the drive type and size match the screw. Insert the bit into the handle and push until it seats with a distinct click. Return to the work area and test the fit on a scrap screw, applying light pressure and a few turns to verify there is no wobble. If the bit seats cleanly and drives smoothly, you are ready to work on the project; otherwise recheck the bit type and try a slightly different size. After finishing, wipe the bits, dry them, and return them to their storage case to keep them organized for next time.
Tip: If you are uncertain about fit, pause and re check the alignment of the bit with the screw head before applying full torque.
Care, storage, and longevity of replacement bits
Proper care extends the life of Klein replacement bits and keeps performance high. Always keep bits clean and dry; wipe away oil, dust, and metal shavings after use. Store bits in a labeled organizers or pouch that separates drive types and sizes to prevent mix ups. For magnetic tips, periodically wipe the contact area to remove debris that can reduce holding power. Inspect bits for wear and replace any with chipped tips or rounded edges. When transporting bits, use a rigid case to protect tips from bending or chipping. If you notice reduced performance, re sharpen or re seating the bit may help; if not, replace with a new genuine Klein bit to avoid compatibility issues. Regularly checking fit with the handle ensures safety and reduces the risk of stripped screws or damaged devices.
Troubleshooting common issues and best practices
If a bit refuses to insert, recheck the drive type and size; forcing it can strip both bit and screw. If the screw head cams out, you likely have a mismatched bit or a worn bit. Ensure the handle is clean and the chuck is fully open before insertion. If the bit feels loose, verify the retention mechanism is fully engaged or consider upgrading to a higher quality Klein kit. Avoid using bits not intended for Klein handles as this creates mismatches in tolerances and can cause damage. Finally, always practice good safety by wearing eye protection and keeping fingers clear of the screw path. To maximize performance, create a habit of selecting the right bit for the screw head before any project and confirm it seats properly before applying torque.
Tools & Materials
- Klein interchangeable-bit handle(Essential base tool for bit swapping)
- Klein replacement bits kit(Ensure it covers your common screw types (Phillips, slotted, Torx, Robertson))
- Magnetic bit holder (optional)(Helpful for holding screws during installation)
- Isopropyl alcohol or cleaning wipes(For cleaning bits and the chuck area)
- Lint-free cloth(Drying and wiping bits after use)
- Safety glasses(Eye protection during swapping and driving)
Steps
Estimated time: 15-25 minutes
- 1
Identify the correct bit type
Inspect the screw head to determine the drive type (Phillips, slotted, Torx, Robertson). Verify this matches the Klein kit options and the handle specification. Choose a bit that matches the screw head as closely as possible for a clean engage.
Tip: Tip: If you are unsure, compare the bit with the screw head side by side before removal. - 2
Release the current bit
Hold the Klein handle firmly and operate the release collar or mechanism to unlock the bit. Gently pull the bit out of the chuck without forcing.
Tip: Tip: Do not yank; a slow controlled pull prevents wear on the chuck. - 3
Select the replacement bit
From your Klein kit, pick the bit that matches both the drive type and the required size. Ensure it is free of nicks or burrs that could damage the screw head.
Tip: Tip: If you are between sizes, choose the larger bit and test on a scrap quickly. - 4
Insert the new bit
Push the replacement bit into the handle until it seats with a distinct click. Confirm it sits straight and engages fully with the retention mechanism.
Tip: Tip: Align the bit with the drive before insertion to avoid bending the bit. - 5
Test on a scrap screw
Apply light torque to ensure the bit fits properly and seats the screw head. If there is wobble or slipping, remove and recheck alignment or size.
Tip: Tip: Start with low torque to confirm engagement before full driving. - 6
Finish and store
Wipe the bit clean, dry if needed, and return it to the storage case. Keep bits organized by size and drive type to speed up future tasks.
Tip: Tip: Store magnetic bits with the magnet away from metal surfaces to prevent attraction of nearby screws.
Quick Answers
What replacement bits are compatible with Klein screwdriver handles?
Klein replacement bits are designed to work with Klein interchangeable handles. Look for the drive type and ensure it matches the screw head before use. Using the correct bit reduces damage to both the screw and the bit.
Klein replacement bits fit Klein interchangeable handles. Check drive type and match the screw head to avoid damage.
Are Klein replacement bits universal across all Klein handles?
Most Klein replacement bits are designed for specific Klein handles that accept interchangeable bits. Always verify model compatibility from Klein's official lists before purchase.
Bits are generally compatible with specific Klein handles; check your model's list before buying.
How do I identify the correct bit size for Klein handles?
Compare the screw head with the candidate bits and test their fit. When in doubt, start larger and test on a scrap screw to avoid rounding the head.
Check the screw head and test bits on scrap screws to confirm sizing.
Can I mix Klein bits with third party bits?
Mixing bits from different brands can lead to poor fit and potential damage. Prefer official Klein replacement bits for Klein handles.
Avoid mixing brands to prevent poor fit and damage.
Where can I buy Klein replacement bits?
Klein replacement bits are available through official Klein channels and authorized retailers. Check Klein Tools websites or trusted home improvement stores for compatible kits.
You can buy Klein bits through Klein Tools official site and authorized retailers.
What maintenance keeps bits lasting longer?
Keep bits clean and dry, inspect for wear, and replace worn tips promptly. Store in labeled cases and avoid dropping to prevent chipping.
Clean and inspect bits regularly and store them properly.
Watch Video
The Essentials
- Identify the drive type before buying bits
- Use genuine Klein replacement bits for best fit
- Test fit on a scrap screw before full use
- Store bits properly to extend life