What Size Screwdriver for PS5 SSD: A DIY Guide
Learn the exact screwdriver size for installing a PS5 SSD, including M.2 mounting screw specs, tool tips, and a practical step-by-step upgrade guide.

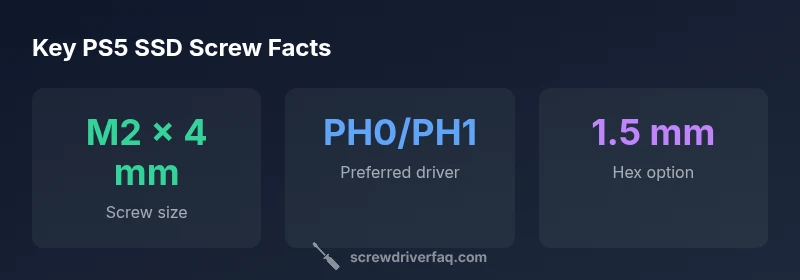
For PS5 SSD installation, you’re dealing with a standard M2 mounting screw (M2 x 4 mm). The actual screwdriver size is a precision tool: typically a PH0 or PH1 Phillips head or a small hex driver (around 1.5 mm), depending on the kit that ships with your SSD. Use a magnetized, comfortable precision screwdriver to avoid dropping tiny screws.
What size screwdriver for ps5 ssd: practical overview
If you're planning a PS5 SSD upgrade, the first question often is what size screwdriver for ps5 ssd. The reality is that the drive uses a standard M.2 mounting screw, and the rest depends on the hardware kit you have. In 2026, most PS5 SSD installations rely on an M2 x 4 mm mounting screw to secure the module to the motherboard. The tool you need is a precision screwdriver set rather than a full-sized household screwdriver. For DIYers, a magnetized, comfortable driver with a small Phillips head (PH0 or PH1) or a tiny hex bit (about 1.5 mm) is usually sufficient. The key is controlling torque so you don't strip the screw or damage surrounding components. While this reads as a simple task, using the correct tool reduces frustration and protects the console. Throughout this guide, you’ll learn which screwdriver types work best and how to handle the different drive sizes that appear in PS5 SSD upgrades.
The PS5 SSD mounting screw: specifications and why size matters
The PS5’s M.2 slot uses a standard mounting approach that aligns with common M.2 NVMe drives. The mounting screw is typically M2 x 4 mm. Why does screw size matter? If you use a screw that’s too long, you may damage the motherboard or the SSD; if it’s too short, the drive won’t be secured. The drive’s length (e.g., 2280) is independent of the M2 mounting screw, but the screw must reach the motherboard thread properly. The PS5 SSD upgrade process benefits from using a high-quality precision driver to minimize slippage. In practice, you’ll likely encounter two common driver styles: a small Phillips head (PH0 or PH1) or a tiny hex (1.5 mm). Some SSD kits include a tiny screwdriver, while others rely on standard precision sets. Always verify you’re using the correct screw, and never force a misaligned drive. These small decisions prevent post-install issues such as loosened hardware or improper seating.
Precision screwdriver basics for electronics upgrades
When upgrading a PS5 SSD, choosing the right precision tools is as important as the drive itself. Start with a magnetized tip to keep the tiny screw from wandering. A PH0 or PH1 Phillips bit covers most PS5 mounting screws, but some devices use a tiny 1.5 mm hex bit—so a compact hex set is wise. Look for a comfortable, non-slip handle and a balanced weight so you can steady the console while you work. If you’re building a small electronics kit, include at least these: PH0 and PH1 bits, a 1.5 mm hex bit, and a magnetic screwdriver handle. For best results, keep spare micro-screws in a labeled container and work on a soft, padded surface to prevent losing parts in the crevices of the PS5 chassis.
Step-by-step: installing a PS5 SSD
Preparing for install begins with power safety. Turn off the PS5 and unplug all cables. Place the console on a flat surface with the top facing up to access the side panel. Remove the side panel according to the official guide, then locate the M.2 slot cover and the mounting screw. Use your precision screwdriver to loosen the mounting screw enough to slide the SSD into the slot at a slight angle, then lay it down flat. Secure with the M2 x 4 mm screw, tightening just until snug. Reattach the cover and panel, reconnect power, and boot the system. If the drive isn’t recognized initially, double-check seating and file system formatting. The process is straightforward with the right toolset and a methodical approach.
Common mistakes and how to avoid them
One frequent error is using a tool that’s too large, which can slip or strip tiny screws. Avoid over-tightening; the mounting screw should hold the SSD firmly but not press against the PCB. Another pitfall is ignoring a static-safe setup—ground yourself and handle the drive by its edges. Don’t force the screw into a misaligned position; if you feel resistance, back out, realign, and reinsert. Keep a calm pace, use a magnetized tip to prevent dropped screws, and check that you’re using the correct screw length and type for your PS5 model. A tidy work surface reduces the risk of losing parts.
Troubleshooting common issues with PS5 SSD screws
If the screw won’t tighten, verify the SSD is properly seated and that the threaded hole isn’t cross-threaded. If you accidentally drop the screw, retrieve it with a magnetic pickup tool to avoid losing it inside the chassis. If you notice looseness after installation, re-seat the drive and reseat the screw with careful torque. In rare cases, the screw may have been replaced by a non-standard part; in that case, consult the SSD kit’s manual for the exact spec and consider replacing with the proper M2 x 4 mm screw.
Maintenance tips for longevity and safety
After a successful upgrade, store your precision tools in a padded case to prevent damage and keep small parts organized. Clean your screwdriver tips with a lint-free cloth to maintain grip and reduce corrosion risk. Check your tools occasionally for wear, especially the tip profile, which can become rounded after repeated use. Regularly inspecting screw holes for cross-threading helps prevent future issues. A small tool kit with magnetized bits is a wise long-term investment for any PS5 maintenance task.
Quick procurement tips: what to pack in your toolkit
For a PS5 SSD upgrade, assemble a compact toolkit: a magnetized PH0 and PH1 screwdriver bit, a 1.5 mm hex bit, a magnetic pickup tool, a soft mat, and labeled containers for parts. If your SSD kit includes a specialized driver, add it to your collection, but don’t rely solely on it—having a standard precision set ensures you can handle various screws across models. Keeping a spare mounting screw is prudent in case the installed one shows signs of wear over time.
Warranty and safety considerations when upgrading the PS5 SSD
Before you begin, verify your console’s warranty policy; some manufacturers require professional service for hardware modifications. Use anti-static precautions and avoid touching the SSD’s contact pins. Keep screws away from the console’s power supply and components. If you’re unsure about risks, consult the official PlayStation support resources or seek guidance from experienced DIY guides to minimize the chance of warranty voiding or hardware damage.
PS5 SSD mounting screw details
| Component | Screw Size | Recommended Driver |
|---|---|---|
| PS5 M.2 mounting screw | M2 x 4 mm | PH0/PH1 or 1.5 mm hex (kit dependent) |
| SSD form factor 2280 | N/A | N/A |
| General guidance | N/A | Use precision tool |
Quick Answers
What size screwdriver do I need to install the PS5 SSD?
The PS5 uses a standard M2 mounting screw (M2 x 4 mm). Use a precision driver—PH0/PH1 or a small 1.5 mm hex—depending on the kit.
Use a precision driver, typically PH0 or PH1, or a small hex driver.
Is a magnetized screwdriver recommended for this task?
Yes. A magnetized tip helps keep the tiny M2 screw secure while you work.
Yes, magnetized tips help keep the tiny screw secure.
Can I reuse an old screw if I upgrade again later?
If the screw is undamaged and properly sized, it can be reused, but many SSD kits provide a spare. Check the fit and thread engagement.
You can reuse if undamaged, but keep track of thread engagement.
What if the PS5 SSD screw won’t tighten?
Ensure the drive is correctly aligned, avoid overtightening, and inspect for cross-threading. Stop if resistance is strong.
Make sure it's aligned; don’t force it.
Do I need to remove the power cord or other covers to access the SSD?
Yes, you’ll need to open the PS5 shell following official steps, but avoid touching power components unnecessarily.
Open the shell following official steps; avoid power parts.
“The right precision screwdriver makes PS5 SSD upgrades cleaner and safer; even a tiny misalignment can cause long-term damage.”
The Essentials
- Identify the M2 x 4 mm screw first
- Use a precision, magnetized screwdriver
- Avoid overtightening and misalignment
- Keep screws organized and protected
- Consult official guidelines for warranty safety