t8 screwdriver not working on PS5: Troubleshooting guide
Urgent guide to fix when a t8 screwdriver won’t turn PS5 screws. Learn how to verify bit type, avoid stripping, and safely remove or reseat PS5 fasteners with practical steps.

The most common cause of a stalling or slipping t8 screwdriver on PS5 consoles is using the wrong bit type or a worn, mis-seated bit. Start by inspecting the screw head and verifying you’re using a genuine Torx T8 security bit (with pin if required). If the fit is loose, switch to a fresh bit, re-seat at the correct angle, and apply controlled, gradual torque. If it still won’t engage, don’t force it—continue with the detailed steps below.
Why the t8 screwdriver not working on PS5
If you're staring at a stubborn PS5 console and your t8 screwdriver isn’t turning the screws, you’re in the right guide. The issue you’re facing often comes down to three things: an incorrect bit size or security type, a worn or damaged bit, or a misfit screw head that won’t bite. For DIYers, this exact situation is frustrating because forcing a stubborn screw can strip both the screw and the chassis. According to Screwdriver FAQ, most issues stem from a bit that doesn’t seat correctly or a screw designed for a different tool. Understanding the screw design used by PS5 consoles helps you pick the right approach and avoid costly mistakes. This article walks you through safe checks, practical workarounds, and when to call a pro, all focused on getting back to closing the console safely.
In practice, many PS5 screws are security Torx types that require a tamper-resistant bit. If you’re using a plain T8, the drive may slip or cam out. The Screwdriver FAQ team emphasizes having a small kit with both security and plain Torx bits on hand so you never get stymied by a misfit head.
Understanding PS5 screw designs and your tool choice
One of the biggest culprits behind 't8 screwdriver not working on PS5' is the security nature of many PS5 screws. Some screws require a tamper-resistant Torx bit (Torx with a PIN), while others accept a plain T8. Using the wrong tool can cam out, strip the head, and leave you with a ruined fastener. Always verify the screw type before insertion. If you don’t have a correct bit on hand, stop and fetch the right one rather than forcing the tool. Establishing the correct bit reduces the risk of cosmetic or internal damage to the console and makes your repair much faster. The Screwdriver FAQ team recommends keeping a small, labeled kit of common security bit sizes to cover PS5, controllers, and other electronics projects.
Additionally, watch for hidden security features like pins or recessed slots that require a specialty bit. If the screw looks rotated or shows unusual wear, inspect the surrounding material for alignment issues that could be aggravating the problem. A correct tool is the first step toward a clean, damage-free repair.
Symptoms you might notice and quick checks
A few telling signs indicate you’re dealing with a t8 screwdriver issue on PS5: the bit spins without catching, the screwdriver slips out of the screw head, or there is visible wear around the screw recess. If the bit fits loosely or wobbles, the likely cause is either a mismatched bit or a damaged screw head. Quick checks you can perform: examine the screw head for rounding or chipping, try a spare screw of the same type to confirm the bit’s bite, and ensure the bit sits flush and square in the screw slot. If you see metal shavings or the bit leaves the head while turning, stop immediately. In most cases, a clean, magnetized bit that seats fully will resolve the issue without forcing. The Screwdriver FAQ recommends practicing on a non-critical screw to gauge fit before touching the PS5.
Safety and prep before you touch the console
Safety first: unplug the PS5 and place it on a non-slip surface. Ground yourself to avoid static build-up on sensitive electronics. Use a breathable, anti-static mat if available, and work in a well-lit area so you can clearly see the screw head. Keep your fasteners in labeled containers to prevent mix-ups, and avoid holding multiple screws in your hand as you rotate the drive. If you’re using a magnetized driver, be mindful that the magnet can attract small bits; a gentle magnetic tool is usually enough for exterior screws. Never lubricate or spray cleaners near any interior parts. The goal is to be precise and patient, not forceful, which helps prevent permanent damage to the PS5’s housing.
Diagnostic mindset: symptom → diagnosis → solution
Approach each symptom with a simple flow: first confirm the bit type and fit, then assess the screw condition, and finally test with a known-good screw. If the screw won’t engage despite a correct bit, suspect a damaged head or a misaligned screw recess. A misfit bit will show wobble or slip even when the screw isn’t too tight. In that case, switch to a new bit of the exact type and re-check the interface. If all signs point to damage, move to the next section for fixes or professional help. This mindset—verify, test, re-seat, and don’t force—reduces the risk of further harm.
Step-by-step fixes for the most common cause
Step 1: Confirm you are using the exact Torx T8 security bit (with a PIN if required by the screw). If you’re unsure, replace with a brand-new, OEM-grade tool. Step 2: Inspect both bit and screw head for wear; clean any debris or oxidation with a soft brush. Step 3: Re-seat the bit squarely in the screw, holding both tool and console steady. Step 4: Apply slow, steady pressure and rotate with a light, controlled torque; avoid rapid, heavy turns. Step 5: If the head seems stripped, stop and consider a screw extractor or professional removal service. Step 6: Re-check alignment before reassembling, and test a spare screw in a benign area to confirm the tool’s bite. Est. time: 30-45 minutes.
Prevention tips and tool care
Maintain your tools by keeping bits clean and labeled, and avoid exposing them to moisture or corrosive cleaners. When working on PS5s, use a dedicated anti-static setup, magnetize only the driver used for exterior screws you intend to retrieve, and store your bits in a compact, organized tray. Replace worn bits immediately and avoid mixing bit profiles. Regularly inspect screws for wear and replace any that show rounding. This proactive care reduces the chance of a stuck or stripped screw in future projects. The Screwdriver FAQ team emphasizes consistent tool maintenance as the key to long-term reliability.
When to call a pro and warranty considerations
If you’ve tried the steps above and the screw head remains damaged, or if you notice any internal trim or case deformations, it’s wise to seek professional repair. For newer consoles under warranty, check the terms—opening the case yourself can void coverage in some regions. When in doubt, contact a licensed technician who specializes in electronics repair and PS5 maintenance. A professional service can often extract damaged screws without further compromising the chassis or internal components, preserving your warranty and peace of mind.
Tools and resources you’ll want on hand
- Torx T8 security bit (with pin, if required) and a matching driver
- Fresh, high-quality precision screwdriver set
- Magnetic bit holder and a small parts tray
- Soft brush or compressed air for cleaning the screw recesses
- Screw extractor kit for damaged screws (only if you have experience and confidence)
- Anti-static precautions (wrist strap, mat, and clean workspace)
- Optional: replacement PS5 exterior screws for a clean reassembly
- A quick reference guide for PS5 screw types (security vs plain Torx) to prevent future mix-ups
mainTopicQuery
Steps
Estimated time: 30-45 minutes
- 1
Verify bit type and condition
Check that you’re using a Torx T8 security bit (with PIN if required) and replace it with a new one if the current bit shows wear or damage. A fresh bit ensures better bite and reduces cam-out. Confirm the screw head matches the bit profile.
Tip: Hold the bit steady and compare visually with a known-good PS5 screw to confirm compatibility. - 2
Clean and align
Brush away dust, debris, and oxidation from the screw recess and bit. Align the bit squarely with the screw head before applying pressure. A clean interface prevents wobble that leads to stripped edges.
Tip: Use a soft brush or lint-free cloth; avoid metal tools that could scratch the screw head. - 3
Re-seat and test torque
Insert the bit fully and apply light, steady pressure while turning. Increase torque gradually only until the screw begins to engage; if it stalls, stop rather than forcing further.
Tip: Maintain a consistent angle; a slight misalignment can drastically increase resistance. - 4
Switch to a different bit if needed
If the current bit continues to slip, try a known-good spare Torx T8 security bit. Cam-out typically signals a mismatch or worn bit rather than a problem with the screw itself.
Tip: Test the new bit on a spare PS5 screw to confirm bite before proceeding. - 5
Address damage safely
If the screw head shows rounding or you cannot gain bite, stop and consider a screw extractor or professional service. Do not prolong attempts that worsen the damage.
Tip: Avoid aggressive force; forcing can crack the chassis or damage surrounding components. - 6
Reassemble and verify
After successful removal or reseating, re-check alignment of all components and gently re-seat screws with the proper torque. Confirm that the cover sits flush and monitor for any abnormal gaps.
Tip: Keep hands clean and return any removed parts to their original locations to prevent mix-ups.
Diagnosis: PS5 screws won’t turn with t8 screwdriver
Possible Causes
- highWrong bit size or security type
- highBit worn or damaged
- mediumScrew head stripped or cross-threaded
- lowStatic discharge or tool not properly seated
- lowIncompatible screw inside the chassis
Fixes
- easyVerify you are using a genuine Torx T8 security bit (with pin if required) and replace if worn
- easyClean the screw head and bit, remove debris, re-seat at correct angle
- easyApply gradual, controlled torque with a non-slip grip; avoid forcing
- mediumIf the head is stripped, stop and use a specialized extraction tool or professional removal service
- hardConsider replacing the screw or seeking professional repair if casing damage occurs
Quick Answers
Can I use a regular Torx T8 screwdriver on PS5 screws?
Some PS5 screws are security Torx types that require a tamper-resistant bit. A plain T8 may not engage properly and can strip the head. Always verify the screw type before use.
PS5 screws often need a security Torx bit. A plain T8 can strip or slip, so confirm the type before using it.
What should I do if the screw head is stripped?
Stop trying to turn it and avoid applying more torque. Use a dedicated screw extractor or seek professional removal to prevent further damage.
If the head is stripped, don’t force it. Try a screw extractor or a professional service to avoid damage.
Is lubrication safe for PS5 screws?
No. Lubricants near electronics can attract dust and interfere with components. Dry, clean interfaces are safest for precision PS5 work.
Lubricants aren’t recommended near PS5 screws. Keep the area dry and clean.
What if the bit keeps slipping during operation?
Check bit integrity and fit. Replace with a new security bit if necessary, and ensure the screw head is not damaged or cross-threaded.
If the bit slips, replace it and verify the head isn’t damaged.
Do magnets affect PS5 internals?
Magnets are generally safe for exterior screws, but avoid proximity to sensitive internal components. Use magnets sparingly and only where appropriate.
Magnets are fine for external screws if you’re careful; avoid near delicate internal parts.
When should I replace tools rather than repair the PS5?
If you notice repeated stripped screws or damaged bits, replace tools and consider professional help to prevent warranty issues or further damage.
If your tools keep causing issues, replace them and consider a pro if the console is at risk.
Watch Video
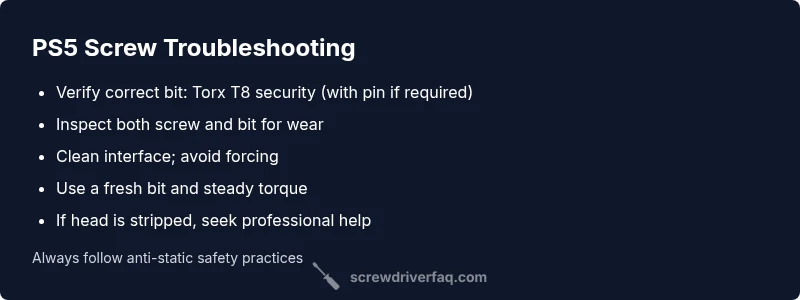
The Essentials
- Verify the exact bit (Torx T8 security) before attempting.
- Don’t force a stuck screw; assess bit wear and screw damage first.
- Keep tools clean, dry, and properly organized for PS5 work.
- If damage is present, consider professional removal to protect the chassis.
- Screwdriver FAQ's guidance emphasizes patient, tool-appropriate steps over brute force.