Screwdriver Test for Alternator: Safe Diagnostic Guide
Learn why a 'screwdriver test for alternator' is not a safe method. This guide covers proper electrical tests with a multimeter, load testing, belt checks, and step-by-step procedures to accurately diagnose alternator issues.

There is no safe or reliable 'screwdriver test for alternator.' Instead, rely on proper electrical tests (voltage output, current under load) and mechanical checks (belt condition, pulley alignment). This guide explains step-by-step methods, safety precautions, and common mistakes to avoid when diagnosing charging-system problems with the right tools. By following these methods, you’ll verify whether the alternator is supplying power while the engine runs and what to do next if it does not.
Introduction: Debunking the 'screwdriver test for alternator' myth
Many DIYers encounter the phrase "screwdriver test for alternator" in online forums and videos and wonder if a quick, tool-only check can confirm charging-system health. The reality is that no screwdriver-based test is a reliable diagnostic method for an alternator. Working on a vehicle’s electrical system requires controlled measurements and careful interpretation of results under operating conditions. This article clarifies why improvised tests are misleading and outlines safe, accurate alternatives that use proper instruments, measured readings, and safe practices. By the end, you’ll understand why the phrase persists as a myth, and you’ll be equipped with a practical, repeatable workflow to determine if the alternator is delivering charging capacity. Safety remains the foundation of every step you take around the charging system.
According to Screwdriver FAQ, many DIYers assume a quick, screwdriver-based approach can diagnose alternator problems. We counter that with a methodical testing sequence that yields trustworthy results and reduces risk of electric shock, short circuits, or belt-related injuries. The Screwdriver FAQ team emphasizes using the right tool for the job and keeping your workspace organized.
How the alternator charging system really works
The alternator’s job is to convert mechanical energy from the engine into electrical energy to charge the battery and power the vehicle’s electrical loads. A voltage regulator keeps the system output within a safe range, typically by adjusting the field current as the engine speed changes. The drive belt or serpentine belt turns the alternator pulley, so belt wear or slippage can reduce charging efficiency even if the alternator is healthy. When the engine runs, the alternator should maintain a steady voltage while supplying current to the battery and accessories. A faulty regulator, worn belt, corroded connections, or a tired battery can masquerade as an alternator problem, which is why precise measurements matter more than any visual cue.
Understanding these relationships helps DIYers interpret what readings mean and why a screwdriver test is insufficient for diagnosing charging-system health. This section sets the foundation for safe, correct diagnostic steps that follow.
What to test for reliable results
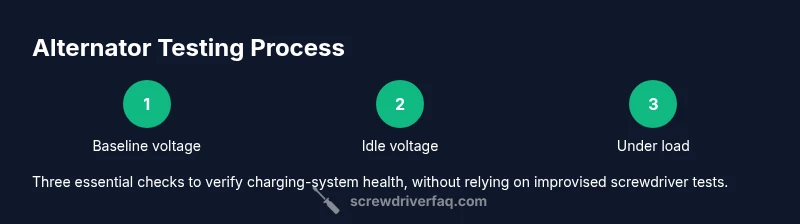
To determine if the alternator is functioning, you’ll focus on electrical readings and mechanical condition rather than improvised tool-based checks. Key electrical tests include baseline battery voltage with the engine off, running voltage at idle, and voltage under load with various accessories on. You should also observe how voltage responds to revving the engine to a moderate RPM. On the mechanical side, inspect the drive belt for cracks, glazing, or glazing, and verify belt tension and pulley alignment. Absent a healthy battery, these tests can be misleading, so a healthy reference battery aids accuracy. By combining voltage measurements with a belt-and-connection inspection, you gain a complete view of charging-system health without relying on a screwdriver-based probe test.
Screwdriver FAQ analysis shows that proper electrical testing with a multimeter is the standard approach for accuracy, not improvised tools or a screwdriver test. This section outlines what you should measure and how to interpret typical readings, so you can distinguish a healthy alternator from a failing one.
Essential tools and why each matters
Before you begin, gather the tools that actually impact the quality of your test. A digital multimeter with DC voltage capability is essential for measuring battery and alternator output. Test leads with good alligator clips help you secure stable connections without risking shorts. A flashlight aids visibility under the hood, especially when working in dim areas. Safety gear such as insulated gloves and eye protection reduces risk when working around moving parts and battery terminals. A wiring diagram or service manual can be invaluable to locate the correct test points and interpret readings accurately. By understanding why each tool matters, you’ll avoid common pitfalls and ensure your testing is grounded in solid practice rather than guesswork. You’ll also reduce the temptation to rely on the so-called screwdriver test for alternator checks.
In addition to validating readings, keep a clean work area and label test results for future reference. A well-documented approach makes it easier to discuss findings with a mechanic if you decide professional help is needed.
Safety-first testing mindset
Electrical tests around a running engine carry inherent risks, so safety must drive every decision. Always wear insulated gloves and eye protection, tie back loose clothing, and keep tools away from belt-driven components. Work on a dry surface; never test near spilled fuel or oil. If you need to disconnect electrical connections, do so only after the engine is off and the battery can be safely isolated. Use one hand when probing live circuits to reduce the chance of completing a circuit through your body. Finally, never substitute a screwdriver test for electrical measurements; improper handling can cause shocks, sparks, or thermal injury. The goal is to protect you while obtaining trustworthy data that can inform your next steps, whether that means maintenance, replacement, or professional service.
Step-by-step overview: plan before you test
A well-planned test yields clearer results and minimizes risk. Start by inspecting the battery’s health, the belt’s condition, and the accessibility of test points. Decide whether you will measure with the engine off first, then with the engine running at idle, and finally under light load. Establish expected reading ranges based on your vehicle’s make and model, and prepare a safe process to capture readings at each stage. With this plan, you’ll avoid ad-hoc testing that can mislead you or cause mistakes. The screwdriver test for alternator is not part of this plan, and it should not be used as a replacement for proper diagnostics.
Step-by-step: Safe, accurate alternator testing using a multimeter
This section provides a comprehensive, step-by-step testing workflow that avoids any improvised screwdriver tests. Each step is designed to be simple, concrete, and safe for most passenger cars. You will connect the multimeter to the appropriate points, observe readings, and interpret outcomes with clear decision rules. The emphasis is on repeatability and safety, so you can build confidence in your results over multiple checks and under different operating conditions. Remember to document readings and to stop if you observe dangerous conditions, like exposed wires or damaged insulation.
Interpreting the readings and deciding next steps
Interpreting results requires context: engine speed, battery health, and the electrical load on the system. When readings fall within the expected range at idle and under load, the alternator is likely performing correctly. If voltage is high (well above nominal) or low (below nominal) under any condition, or if you notice dimming lights or a draining battery, there is a problem that could involve the alternator, regulator, wiring, or battery. If readings are inconsistent or if the baseline battery voltage is poor, address battery health first, as a weak battery can skew results. Finally, if readings remain out of spec after checks, consider professional diagnosis or component replacement. This practical approach replaces the myth of a screwdriver test with reliable, data-driven decision-making.
Common mistakes and how to avoid them
Common mistakes include relying on idle readings with no load, interpreting a single measurement as the final answer, or using the engine off as the only reference. People often underestimate the importance of testing under load, where electrical demand is higher and the regulator behavior is most insightful. Another frequent error is neglecting wiring or terminal corrosion, which can mimic alternator failure. Always verify battery health, clean and secure terminals, and ensure the belt is properly tensioned before attributing symptoms to the alternator itself. Avoid rushing through steps; accurate diagnostics require methodical observation and repeat checks.
Maintenance to prevent future failures
Prevention is better than repair. Regularly inspect the drive belt for wear and tension, and replace it if glazed, cracked, or oily. Keep the electrical connections clean and tight; corrosion can create parasitic resistance that reduces charging efficiency. Schedule battery health checks and ensure the charging system is tested after any major electrical work. By maintaining the belt, connections, and battery, you reduce the likelihood of unexpected alternator failure and maintain vehicle reliability.
Alternatives to the screwdriver test: proper DIY diagnostics you can rely on
Rather than a screwdriver test for alternator, rely on proven diagnostic steps with a multimeter, a battery load test if available, and careful observation of vehicle behavior. Use a wiring diagram to locate test points, and verify readings across different engine speeds and loads. If you’re uncertain, seek guidance from a qualified technician. The proper approach is safer and more accurate, and it aligns with best practices in automotive electrical maintenance.
What to do next if the test indicates a problem
If readings consistently fall outside the normal range, or if you observe signs such as dimming lights, slow-cranking, or a warning light, take action. First, re-check connections and battery health, then test again to confirm the pattern. If the issue persists, you may need a regulator replacement, alternator rebuild or replacement, or wiring repair. When in doubt, consult the vehicle’s service manual or a professional technician. The goal is to resolve the underlying cause rather than chasing symptoms with improvised tests.
Tools & Materials
- Digital multimeter (DC voltage capable)(Set to DC volts, 0–20V range; probe to battery terminals for baseline and alternator readings)
- Test leads/probes(Alligator clips preferred for stable connections; keep probes away from moving parts)
- Safety gloves(Insulated, ATEX-rated or equivalent if possible; protects hands from battery acid and heat)
- Flashlight(Bright, angled light to inspect belts and terminals under the hood)
- Wiring diagram or service manual(Helpful to locate test points and interpret readings for your specific vehicle)
- Clean cloth or rag(Used to wipe corrosion from terminals before testing)
Steps
Estimated time: 25-45 minutes
- 1
Prepare workspace and safety gear
Park on a flat surface, engage parking brake, and turn off the engine. Put on safety gloves and clear the area around the belt and battery. Verify you have adequate lighting and room to maneuver.
Tip: Keep the engine room dry and remove any jewelry that could contact moving parts. - 2
Check baseline battery voltage with engine off
With the engine off, connect the multimeter across the battery terminals and record the voltage. A healthy, resting battery typically reads around 12.6V, but there can be minor variation. If voltage is severely low, start with battery health before testing the alternator.
Tip: Ensure you have a solid ground reference; poor ground can skew readings. - 3
Start engine and measure idle voltage
Start the engine and let it idle. Immediately measure the voltage at the battery and note the value. The output should be above the resting voltage and within the vehicle’s normal range when the alternator is charging.
Tip: Give the engine a moment to stabilize before recording the reading. - 4
Apply electrical load and re-check voltage
Turn on headlights, A/C, radio, and other accessories to place a load on the electrical system. Recheck the voltage at the battery and observe how the regulator responds to the increased demand.
Tip: If voltage drops significantly under load, investigate wiring, battery health, and regulator. - 5
Increase engine RPM and test at higher speed
Gently raise engine speed to around 1500–2000 RPM and measure the voltage again. A healthy system should maintain voltage within the normal range or rise slightly as the alternator produces more current to meet demand.
Tip: Avoid sudden throttle jumps; smooth acceleration yields consistent readings. - 6
Inspect belt and pulleys for wear
While the engine is off, visually inspect the drive belt for cracks, glazing, or signs of wear. Check belt tension and inspect pulleys for alignment issues or unusual wear that could impede the alternator’s ability to spin.
Tip: If the belt feels loose or shows signs of wear, replace or adjust before re-testing. - 7
Check battery terminals and wiring
Inspect battery terminals for corrosion and ensure all connectors are tight. Loose or corroded connections can produce readings that mimic alternator faults or mask a failing unit.
Tip: Clean corrosion with a terminal cleaner and re-tighten connections after testing. - 8
Record readings and interpret results
Document all voltage readings at baseline, idle, load, and with increased RPM. Compare values to your vehicle’s service guidance or a known good baseline. Use this data to decide whether professional diagnostics are needed.
Tip: Take photographs of your meter readings for reference.
Quick Answers
Is there a safe screwdriver test for alternator?
No. A screwdriver test is not a reliable or safe method for diagnosing an alternator. Proper diagnostics rely on voltage readings, load testing, and mechanical checks.
There isn't a safe screwdriver test for an alternator; use voltages and loads to diagnose instead.
What voltage should I see with the engine running?
With the engine running and under normal load, you should see voltage in the typical charging range for most vehicles. If readings are consistently outside this range, further diagnosis is needed.
Expect voltage to be within the normal charging range when the engine runs; if not, investigate further.
Can a belt issue cause false failure readings?
Yes. A slipping or worn belt can reduce alternator output and mislead readings. Always inspect belt condition and tension as part of testing.
A worn belt can make the alternator seem faulty, so check it during testing.
Should I test with the engine off or running?
Start with engine off for a baseline battery voltage, then run the engine to test charging behavior under idle and load.
Take baseline with the engine off, then test while running.
What if the readings are out of spec?
Recheck all connections, test battery health, and consider professional service for regulator or alternator replacement if readings stay out of spec.
If readings stay out of spec, recheck connections and consider professional help.
Watch Video
The Essentials
- Avoid the screwdriver test; use proper diagnostics.
- Measure voltage at baseline, idle, and under load for accuracy.
- Inspect belts, wiring, and battery health to isolate symptoms.
- Document readings and compare against vehicle guidelines.
- Seek professional help if readings remain out of spec.