Screwdriver for Glasses Repair: A Practical DIY Guide
Learn how to repair eyeglasses safely using the right precision screwdriver, avoid stripping screws, and extend the life of your frames with clear, beginner-friendly steps.

With this guide, you’ll repair most minor eyewear issues using a correctly sized screwdriver for glasses repair. You’ll learn to match the screw head, prevent cam-out, and keep lenses safe. Start with a clean workspace, gather the right precision bits, and follow careful, small-turn steps to avoid damage. This quick answer sets expectations and directs you to the full steps.
Why a dedicated screwdriver matters for glasses repair
Using a screwdriver designed for glasses, often called a screwdriver for glasses repair, minimizes the chance of slipping, cam-out, or stripping the tiny screw heads that hold eyewear together. Eyewear screws are significantly smaller than standard hardware screws, and their heads are designed for delicate tolerances. When you use the wrong driver, you can corrode the screw head, scuff the frame, or damage lens coatings. According to Screwdriver FAQ, investing in a precision, appropriately sized driver reduces the risk of damage and makes even small adjustments safer. A proper driver also provides better control, which reduces the time you spend fumbling with tiny parts. If you’re a DIY enthusiast or a homeowner taking on glasses maintenance, using the correct tool is the most important first step.
Principles at play include fit, control, and material compatibility. A high-quality, properly sized bit seats in the screw head with less wobble, so you can apply torque without stripping. The result is faster repairs, fewer lost screws, and frames that stay aligned. Keep in mind that eyewear construction varies by brand, so you may see Phillips, flathead, or sometimes Torx-like fasteners. Start by identifying the head type on your specific glasses and select a corresponding bit.
As you work, maintain a clean workspace and a soft surface to prevent drops. Small screwdrivers often come with interchangeable bits; store used bits in a labeled tray to avoid mixing sizes. If you’ve never used a tiny driver before, practice on a non-valuable screw to build confidence before touching your glasses. This approach keeps the process efficient and cuts down on risk.
Choosing the right screwdriver for glasses repair
Selecting the right screwdriver begins with understanding the screw head type and the screw size used on your glasses. Most eyewear uses micro-sized Phillips or flathead screws, with heads sized to fit only a tiny driver blade. A dedicated eyeglass screwdriver set typically includes multiple micro-bit options, such as Phillips (often 00 or 0) and flathead variants in very small widths. When you shop, look for: a precision blade with a comfortable grip, magnetized bits (optional but helpful), and a case that keeps bits organized. A good rule of thumb is to choose a set labeled specifically for glasses or electronics repair because those tools are designed for delicate work and tiny fasteners.
In addition to bit size, consider blade hardness and handle ergonomics. A longer handle can improve leverage, but a shorter blade reduces wobble in tight spots. If you expect to work with different frame materials (plastic, metal, or combo frames), ensure the bits won’t chatter or slip on soft metals. Magnetic bits can help hold tiny screws in place, but be cautious around sensitive coatings that magnets could affect. Finally, invest in a small, clean storage solution so you don’t lose screws or tiny hinge parts when you’re mid-repair.
If you already own a general precision screwdriver, test it on a scrap micro-screw before attempting glasses repair. If it fits the screw head snugly and the blade seats cleanly, you’re in good shape. Otherwise, upgrade to a dedicated eyeglass toolkit. As noted by the Screwdriver FAQ team, the right tool dramatically improves safety and efficiency in tiny-drivers repairs.
Understanding screw types in eyeglasses
Eyeglasses aren’t one-size-fits-all when it comes to screws. Many models use micro Phillips or flathead screws that require correspondingly tiny bits. Some frames incorporate hex or Torx-like fasteners for hinge assemblies, though this is less common. The key is to visually inspect the screw head and verify the bit that seats securely without slipping. If you’re unsure, take a magnified look with a jeweler’s loupe or a good magnifying lamp.
Common issues include worn screw heads, bent screws, or stripped threads in the frame holes. In such cases, select a bit that matches the remaining screw head shape and apply light, steady pressure. Avoid using larger bits to “fit” a stubborn screw; that will ruin the head and damage the surrounding frame material. Remember: delicate handling is essential with eyewear hardware. A correct match between screw head and bit reduces the risk of damage and makes future maintenance easier.
Tools and materials setup for glasses repair
A well-prepared workspace makes glasses repair safer and more efficient. Gather these essentials before you begin:
- Precision screwdriver set (0.8–1.2 mm range) with interchangeable bits
- Microfiber lens cloth for cleaning lenses and frames
- Magnifying loupe or headset magnifier to see tiny screws clearly
- Small parts tray to hold screws, hinge parts, and washers
- Soft mat or anti-slip surface to prevent parts from rolling away
- Tweezers for picking up tiny screws (optional but helpful)
- Replacement screws or hinge screws (if you know you’ll need them)
Before you start, clean the lenses and frame surface with the microfiber cloth. A clean surface helps you see any wear, cross-threading, or alignment issues more easily. Keep screws organized in the tray and only handle them with clean, dry hands to avoid oils that can degrade metal.
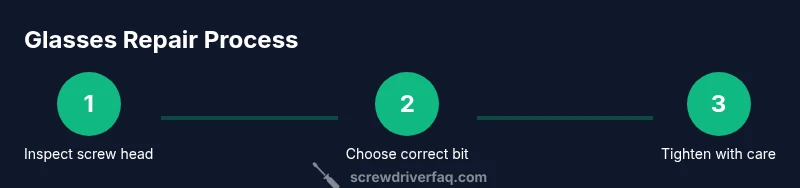
Step-by-step guide for a common hinge screw repair
-
Set up a clean, well-lit workspace and lay the glasses on the soft mat. Hold the frame steady with your non-dominant hand while assessing which screw needs attention. Step 1 establishes a stable baseline for the repair. Tip: Use a magnifier to inspect the screw head for wear and the hinge area for alignment.
-
Identify the correct bit size and attach it to your driver. Ensure the bit seats snugly in the screw head without wobble. Step 2 ensures you’re applying torque precisely and preventing cam-out. Tip: Test the bit on a scrap screw to confirm fit before touching the actual frame.
-
Loosen or remove the screw slowly with controlled, small turns. Support the hinge with your other hand to avoid stressing the frame. Step 3 focuses on minimizing stress and avoiding strip-out. Tip: If the screw is resistant, pause, re-clean the screw head, and re-check alignment before continuing.
-
Clean the hinge area and inspect threads. If threads appear damaged, do not force reassembly. Clean components help you identify whether replacement is needed. Step 4 reduces the chance of cross-threading during reassembly. Tip: Use a tiny amount of appropriate thread lubricant if the screw seems to bind, but only if the frame manufacturer approves it.
-
Reinsert or replace the screw and tighten with steady, light pressure. Hand-tighten first, then give a final gentle turn with the driver. Step 5 ensures proper seating without over-tightening, which can crack plastic or deform metal. Tip: Check the alignment by gently flexing the frame near the hinge to confirm stability without stressing the screw.
-
Re-test the hinge movement and overall frame alignment. Ensure the temple sits evenly and the lens line remains parallel. Step 6 confirms the repair success and helps catch misalignment early. Tip: If the screw continues to loosen, consider replacing the hinge plate or consulting a professional.
Estimated total time: 30–40 minutes depending on frame complexity.
Maintenance, storage, and safe handling after repair
After completing a glasses repair, take a few minutes to restore order for future fixes. Return screws and small parts to a labeled tray, wipe down the frame to remove fingerprints or oils, and store your tools in a dedicated case. Regularly inspect hinges for looseness and repeat tightening as part of routine care. When storing, keep the tools away from moisture and direct sunlight, which can degrade plastic frames and coatings.
For ongoing maintenance, clean lenses regularly with a microfiber cloth and avoid applying liquids directly to hinge areas. If you notice persistent loosening or damage to the frame, stop using the glasses and seek professional service to prevent further harm. This approach extends the lifespan of eyewear and keeps you ready for quick, safe adjustments in the future.
Troubleshooting common issues and when to seek professional help
If a screw is stripped or won’t engage properly, stop applying force and reassess. A stripped head may require a precision screw extractor or professional reshaping of the screw head. If the hinge shows looseness after reassembly or the frame alignment seems off, consider professional maintenance to avoid frame damage. For coated lenses, never tighten aggressively near the lens edge, as coatings can wear quickly. If you’ve tried multiple times without success, it’s safer to seek professional repair rather than forcing a fix.
Tools & Materials
- Precision screwdriver set (0.8–1.2 mm range)(Interchangeable bits; choose sizes appropriate for eyeglasses screws; magnetized bits optional but helpful.)
- Microfiber lens cloth(For cleaning frames and lenses before and after repair.)
- Magnifying loupe or headset magnifier(Helps you see tiny screws clearly.)
- Small parts tray(Keeps screws, hinges, and washers organized.)
- Anti-slip mat or soft workspace(Prevents parts from rolling away.)
- Tweezers(Helpful for handling tiny screws.)
- Replacement screws or hinge screws(Have on hand in case a screw is damaged or missing.)
- Isopropyl alcohol 70%+(For surface cleaning; avoid contact with lens coatings.)
Steps
Estimated time: 30-40 minutes
- 1
Set up a clean, well-lit workspace
Clear your area, place glasses on a soft mat, and prepare your tools. Position the frame so the hinge you’ll work on is easily accessible. A stable setup reduces mistakes.
Tip: Use a magnifier to verify screw head type before choosing a bit. - 2
Identify the screw head and attach the correct bit
Examine the screw head (Phillips vs flathead, tiny sizes). Attach the matching bit to your driver, ensuring it seats fully in the screw head. This prevents slipping during turning.
Tip: Test the bit on a scrap screw first. - 3
Loosen or remove the screw carefully
Gently turn counterclockwise with small increments. Support the hinge with your other hand to avoid stressing the frame. Stop if you feel resistance.
Tip: If it won’t budge, re-clean the head and try again with a lighter touch. - 4
Inspect and clean hinge components
Wipe away any dirt or oils from the hinge area. Check threads for wear or damage and decide whether to reuse or replace parts.
Tip: Do not use harsh solvents near lenses or coatings. - 5
Install or replace screws and reassemble
Align the hinge, thread the screw by hand, then snug it with the driver. Avoid over-tightening to protect frame integrity.
Tip: A tiny amount of thread lubricant can help if threads are rough, but only if approved by the frame manufacturer. - 6
Test fit and adjust alignment
Wear the glasses and check for proper temple alignment and lens plane. Make small adjustments as needed to ensure comfort and proper fit.
Tip: If the screw keeps loosening, stop and consult a professional. - 7
Store tools and document the repair
Return components to your tray, wipe tools clean, and note any parts that were replaced. This record helps future repairs.
Tip: Keep a spare replacement screw kit in your repair box.
Quick Answers
What size screwdriver do I need for eyeglasses repair?
Eyeglass screws are very small and typically require micro-sized Philips or flathead bits, often in sizes 00 or 0. Check the screw head and use the smallest bit that fits snugly. If you’re unsure, use a dedicated glasses repair kit.
Eyeglass screws usually need micro-sized bits; start with the smallest bit that fits and avoid forcing the screw.
Can I repair glasses with a regular precision screwdriver?
If your precision driver has micro-sized bits suitable for eyeglasses, you can use it. A dedicated eyeglass screwdriver kit reduces risk by offering correctly sized bits and ergonomic handles.
Yes, if your driver has tiny bits sized for eyewear and comfortable grip.
Is it safe to use glue or tape on loose screws?
No. Glue or tape can damage the frame and coatings and make future adjustments impossible. If a hinge is loose, replace the screw or hinge rather than gluing it.
Glues are not recommended for eyewear screws; replace or professionally repair if needed.
What should I do if a screw is stripped?
Do not continue to force it. Use a precision extractor or carefully re-seat the head with a tiny tool. If the head is too damaged, seek professional help to avoid frame damage.
If the head is stripped, don’t force it—use an extractor or get help.
How can I prevent screws from loosening?
Tighten to snug, not tight, and periodically check frames for looseness. Avoid overtightening plastic frames and hinges, which can crack or warp.
Tighten just enough to hold; check periodically to catch loosening early.
When should I seek professional help?
If screws are damaged, hinges are bent, or the frame integrity is compromised, a professional repair is safest. Eyewear frames can be delicate; a pro can avoid irreversible damage.
If you see damage beyond simple tightening, go to a pro.
Watch Video
The Essentials
- Use the right micro-sized bits to prevent head damage
- Keep screws and parts organized to avoid losses
- Inspect hinges and frames for wear before fastening
- Stop if a screw won’t turn—seek professional help when needed