How to Use a Tester Screwdriver: A Practical DIY Guide
Learn how to safely use a tester screwdriver, test wiring, and read indicators. This step-by-step guide covers safety, setup, testing, and maintenance for DIYers.

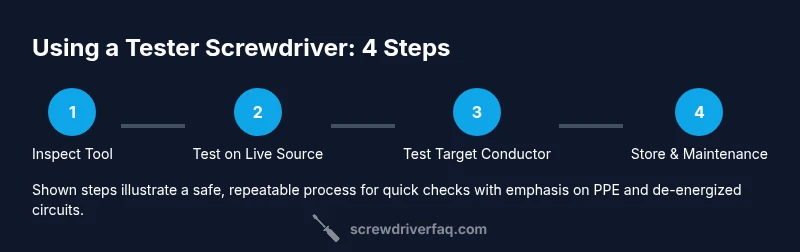
With a tester screwdriver, you can quickly check for live circuits and verify basic wiring safety before you work. This guide shows how to prepare, test outlets or terminals, interpret the indicator color or neon glow, and confirm you’re safe to proceed. Always follow safety rules and PPE when testing electrical gear.
What a tester screwdriver is and how it works
A tester screwdriver is a compact hand tool designed to indicate the presence of live electrical current at a conductor or outlet. It typically has a metal blade, a resilient plastic handle, and a small neon indicator that lights when the blade is energized. Some models use LED indicators, others rely on a neon lamp. The principle is simple: when the metal tip makes contact with an energized conductor, a tiny current flows through the indicator circuit, and the light tells you something about the circuit's status. Note that a tester screwdriver should not be considered a substitute for a full multimeter or a proper voltage tester in professional settings, but it serves as a quick pre-check in many DIY tasks.
For the DIYer, the common question is 'how to use a tester screwdriver' effectively. According to Screwdriver FAQ, the key is to keep the tip insulated from your fingers, touch only the metal part that probes into the conductor, and observe the indicator. If the indicator glows, the circuit is live; if it remains dark, there’s no obvious live voltage at that point. The Screwdriver FAQ team emphasizes that you should always assume a circuit could energize at any moment and treat any uncovered conductors accordingly. Use a tester screwdriver only on devices and outlets that you’re authorized to work on, and always test the tool on a known live source first to confirm it’s functioning correctly. This small check can save you from false readings caused by a worn tip or a weak bulb.
Safety essentials before testing
Electrical work carries risk of shock, burns, or arc flash. Before you reach for the tester screwdriver, prepare your space and PPE. Put on safety glasses and dry, non-conductive gloves if available; clear the area of standing water and metal jewelry. Ensure you know where the power source is and, if possible, shut it off. Lockout-tagout practices reduce accidental energization in shared spaces. Use non-conductive, dry surfaces and keep your tools away from water.
Always verify your environment with a non-contact tester or a separate voltage indicator before-hand to minimize surprises. If you’re unsure about a circuit, do not proceed. Screwdriver FAQ recommends using a tool you know is in good condition and treating every exposed conductor as potentially energized. If in doubt, pause and consult a professional.
How to set up and inspect your tester screwdriver
Start by inspecting the tool itself: check for cracked handles, bent blades, or loose fittings. If your model uses a neon indicator, test the bulb on a known live source to confirm it lights reliably; if LED-based, check for brightness. Confirm that the insulated handle shows no cracks and that the blade edge is sharp enough to contact a conductor without slipping. If your toolkit requires a battery, replace it following the manufacturer’s instructions. Finally, wipe away dust and store in a dry location ready for use. A quick visual and tactile check now saves time and prevents misreads later. In line with best practices from the Screwdriver FAQ Team, always validate your tool’s accuracy before relying on it in the field.
Real-world usage scenarios
- Testing a wall outlet: If you’re performing a pre-work check, first test a known live source, then probe the outlet’s hot prong to confirm voltage presence. Do not rely on the tester screwdriver for detailed readings; treat any indicator as a quick status check.
- Testing a switched circuit: Identify whether the switch controls a light or receptacle. Use the tester screwdriver to confirm live voltage on the switch terminals, but don’t depend on it for final verification—turn to a multimeter if precise measurements are needed.
- Testing a lighting fixture: When approaching a ceiling fixture, ensure power is off and the fixture is safe to handle. Use the tester screwdriver to check exposed conductors after energization status is confirmed, observing PPE and dry conditions.
In all cases, watch the indicator closely, keep your fingers away from the blade, and document results if this is part of a larger project.
Common mistakes and best practices
- Relying on a tester screwdriver for precise voltage measurements. It’s a quick check, not a replacement for a multimeter.
- Testing with damaged tools. A cracked handle or weak indicator can give false readings; replace immediately.
- Not verifying the tool on a known live source before approaching a target. Always confirm functionality.
- Working without PPE or in damp conditions. Wear safety glasses and avoid wet surfaces.
- Not turning off power when possible. When in doubt, de-energize the circuit.
Tools & Materials
- Tester screwdriver (voltage tester screwdriver)(Ensure it has a functional neon/LED indicator; test on a known live source before use.)
- Safety glasses(ANSI Z87.1 compliant.)
- Non-slip insulated gloves(Optional for higher-risk environments.)
- Dry environment/work surface(Avoid moisture; keep area dry.)
- Lockout/tagout device(Use when working on known circuits in shared spaces.)
- Multimeter (for follow-up measurements)(Not required for tester screwdriver use, but helpful for precise readings.)
Steps
Estimated time: 20-30 minutes
- 1
Inspect the tool and PPE
Check the tester screwdriver for cracks, bent blade, or loose fittings. Inspect the insulated handle and the indicator (neon/LED) to ensure they show no signs of wear. If you use a battery-powered model, verify the battery is seated and not corroded. Safety gear should be nearby and ready before you begin.
Tip: If the indicator is dim or nonfunctional, replace the tool before use. - 2
Test on a known live source
Before approaching any target, test the tool on a known live outlet or fixture to confirm the indicator lights reliably. This step verifies the tool’s function and helps you calibrate your expectations for readings at the target.
Tip: Hold the tool by the insulated handle and keep fingers away from the metal blade. - 3
Power down when possible
If feasible, switch off the circuit at the breaker and use lockout/tagout if you’re in a shared workspace. De-energizing reduces the risk of shock or arc flash while you work on the target.
Tip: Double-check that a breaker cannot be re-energized while you’re working. - 4
Test the target conductor
Carefully place the tester’s tip onto the target conductor or terminal. Do not press with bare fingers; maintain a stable grip on the insulated handle and avoid touching the metal blade while contacting the live surface.
Tip: Keep one hand behind your back or away from the conductors to minimize shock pathways. - 5
Interpret the indicator and decide
If the indicator lights, treat the circuit as live and proceed with extreme caution. If it stays dark, proceed only if you’ve de-energized and confirmed with another method (e.g., a non-contact tester).
Tip: If you’re unsure about a reading, stop and use a secondary test method. - 6
Store and maintain the tool
Power down, clean away dust, and store the tester screwdriver in a dry, accessible spot. Inspect again before your next use and replace any worn components promptly.
Tip: Record any indicator issues so you can replace the tool when needed.
Quick Answers
What is a tester screwdriver and when should I use it?
A tester screwdriver is a simple voltage indicator with a neon or LED light. Use it for quick live-checks before working on wiring, but don’t rely on it for precise measurements or professional-grade testing.
A tester screwdriver is a quick voltage indicator you use to check if a circuit is live before working on it. It’s not a replacement for a multimeter.
Can a tester screwdriver reliably indicate voltage?
Indicator lighting confirms the presence of voltage in a general sense but doesn’t provide exact voltage values. Use it as an initial check and follow up with a multimeter if you need precise readings.
The indicator shows if a circuit is live at a basic level, but it doesn’t give exact numbers. Follow up with a multimeter for precise measurements.
Is it safe to test live outlets with a tester screwdriver?
Testing live outlets with a tester screwdriver is common for quick checks, but you should never rely on it as your only safety measure. Always de-energize when possible and wear PPE.
It’s common for quick checks, but don’t rely on it alone. De-energize when possible and wear PPE.
What should I do if the indicator lights unexpectedly?
If the indicator lights unexpectedly, stop and re-check the tool on a known live source. Inspect the blade for damage, replace the tool if needed, and verify the circuit status with another method.
If it lights up unexpectedly, stop and re-check with another method and inspect the tool for damage.
How often should I replace a tester screwdriver?
Replace the tester screwdriver if the indicator is dim, the handle is damaged, or the tip is worn. Regular checks extend safety and accuracy.
Replace it if the indicator isn’t reliable or the tool is damaged.
What’s the difference between a tester screwdriver and a multimeter?
A tester screwdriver provides a quick presence-of-voltage check, while a multimeter measures exact voltage, resistance, and continuity. Use both as needed depending on task complexity.
A tester screwdriver is for quick checks; a multimeter gives exact readings. Use both as needed.
Watch Video
The Essentials
- Test tool on a known live source first.
- Treat every exposed conductor as energized until proven safe.
- Use PPE and follow lockout/tagout when possible.
- Rely on the tester screwdriver for quick checks, not precise readings.