How to Tell If a Screwdriver Is Insulated: A Practical Guide
Learn practical steps to verify screwdriver insulation, spot damage, and stay safe. This guide covers labeling, visual checks, testing methods, and maintenance for DIYers and homeowners.

By the end, you will know how to tell if a screwdriver is insulated, verify its voltage rating, and check insulation for wear. You’ll need good lighting, a dry workspace, and a properly rated tester. Follow these steps to confirm safety before use and avoid electric shock or damage in the field.
Understanding insulated screwdrivers and safety standards
Insulated screwdrivers are designed to reduce the risk of electric shock when working near live circuits. They combine a non-conductive handle with an insulated shaft and blade, keeping the conductive metal away from your hand and body. In many regions, insulated tools must meet particular safety standards and be clearly labeled with a voltage rating. According to Screwdriver FAQ, the label and construction are the most reliable indicators of a tool’s insulation quality, not the appearance alone. A screwdriver might look new but fail certification tests, and equally, a well-used tool can still pass if the insulation remains intact. Always verify that the tool cover or handle bears the official standard mark, such as IEC/EN 60900, which indicates suitability for live work up to the specified voltage in your region. When shopping, prefer brands that publicly publish test results and replacement guidance. Maintenance, storage away from heat and solvents, and avoiding cutting corners on handles are part of responsible insulating tool ownership.
How insulation works on screwdrivers
The insulation on an insulated screwdriver is a non-conductive jacket applied over the metal shaft and blade. It acts as a barrier between your hand and the live metal if contact occurs. Most modern insulated screwdrivers use a plastic or rubber sheath, often with a color-coded handle, and an internal conductive core that ensures strength without compromising safety. The safety rating is not universal; it depends on regional standards and intended use. For example, in many parts of the world, tools designed for live electrical work carry a certification such as IEC 60900 or EN 60900. The insulation must be intact along the shaft and around the tip, and the handle should remain securely attached. Even when the coating looks intact, microscopic cracks or UV exposure can gradually degrade insulation, reducing protective performance. Always treat insulation as a single-use performance feature: once damaged, the tool should be retired or professionally repaired if allowed by the manufacturer.
Visual cues: If insulation is damaged
A quick visual check can reveal insulation damage before use. Look for visible cracks, tears, or exposed metal along the blade or at the transition from the handle to the shaft. Fading color, blistering, or sticky residues may indicate breakdown of the coating. Dents, gouges, or deep scratches that expose underlying metal are warning signs. Inspect both sides of the blade and the areas where the insulation bends near the handle; cracks often start at these stress points. If you notice any of these signs, set the tool aside and retire it from service. Cleaning solvents or heat exposure can degrade insulation, so avoid storing near solvents or in extreme heat. When in doubt, replace rather than risk a shock.
Certifications and voltage ratings you should look for
Always verify the insulation rating and certifications on the tool. Reputable insulated screwdrivers carry marks such as IEC 60900 or EN 60900, indicating testing to withstand specified voltage. The rating informs you the tool is intended for live work up to that limit; never attempt higher voltage. Some tools may use alternative standards in other regions; consult the manufacturer's manual for exact limits. In addition to the rating, confirm that the entire shaft, including the blade tip, is covered; any exposed metal at the tip signals potential risk. If the label is worn or illegible, do not rely on it.
Quick visual checks at a glance
- Inspect the entire length of the insulation for cracks, cuts, or discoloration.
- Check the junctions where the handle meets the shaft for stiffness or detachment.
- Look for clear, legible markings (IEC/EN 60900) and color-coding that matches the label on the packaging.
- Avoid tools stored in damp or solvent-rich environments; moisture can degrade insulation.
- If you see any sign of wear, treat the tool as compromised and retire it.
Note: Color alone is not a guarantee of insulation quality; always verify markings and test where trained.
Using testing tools to verify insulation integrity
If you have access to proper testing equipment and training, you can supplement visual checks with a formal test. Start with a non-contact voltage tester to confirm the surrounding area is safe before inspecting the tool. If certified and trained, use an insulation resistance tester (megger) or a high-quality multimeter to assess resistance along the insulation path according to the manufacturer’s guidelines. Never attempt high-voltage testing without proper instructions and PPE. For DIY purposes, rely primarily on labeling, visual inspection, and manufacturer guidance rather than performing risky electrical tests.
What to do if insulation is suspect or compromised
If you notice any cracks, tears, discoloration, exposed metal, or illegible markings, retire the screwdriver from service immediately. Do not attempt to repair insulation; repairs can weaken safety barriers and lead to shock hazards. Tag the tool as damaged and consult the manufacturer for replacement options or guidance on disposal. When in doubt, replace with a new, certified insulated screwdriver rather than risking injury. Keep a documented replacement schedule to ensure you always use tools within their rated lifespan.
Common myths about insulated tools
- Myth: The color guarantees insulation. Reality: Color helps with quick identification but is not a safety guarantee without certification marks.
- Myth: If the handle feels sturdy, the insulation is fine. Reality: Insulation can crack under stress without visible signs on the surface.
- Myth: Any insulated-looking tool is safe for live work. Reality: Only tools with proper certification marks (IEC 60900/EN 60900) are rated for live work.
Screwdriver FAQ notes that relying on appearance alone leads to dangerous assumptions. Always verify certification marks and conduct a careful inspection.
Practical practice: Safe handling and maintenance
- Inspect your insulated screwdriver before every use, especially after drops or exposure to heat or chemicals.
- Store tools in a clean, dry location away from solvents and direct sunlight.
- Clean the tool with a dry cloth; avoid solvents that can degrade insulation.
- Create a simple retirement policy: retire tools showing any damage or wear and replace promptly.
- Use the correct size and type of screwdriver for each fastener to minimize stress on the insulation.
Authority sources
- OSHA: https://www.osha.gov
- NFPA: https://www.nfpa.org
- NIST: https://www.nist.gov
Tools & Materials
- Non-contact voltage tester(To verify live voltage presence in the work area before inspecting the tool)
- Bright work light(Ensure adequate lighting for close inspection of insulation seams)
- Insulation resistance tester (megger) or professional-grade multimeter(For thorough insulation testing if you are trained)
- Dry, non-conductive workspace(Avoid metal surfaces and moisture during inspection)
- Replacement insulated screwdriver(For immediate replacement if damage is found)
- Safety gloves(Nitrile recommended for extra grip and protection)
Steps
Estimated time: 15-25 minutes
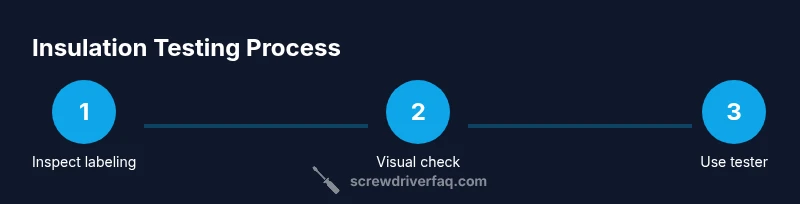
- 1
Inspect labeling and certification
Begin by looking for official marks on the handle or blade, such as IEC 60900 or EN 60900. Check the voltage rating printed on the tool or packaging. This confirms the tool is rated for live work in your region and is not assumed safe based on appearance alone.
Tip: If markings are faded or missing, do not rely on the tool—seek a replacement. - 2
Visual inspection of insulation along the shaft
Under bright light, examine the entire length of the insulation for cracks, tears, or discoloration. Pay close attention to the transition from handle to shaft where stress concentrates.
Tip: Run your fingertip along seams to feel for rough edges or micro-cracks that eyes might miss. - 3
Check for exposed metal or damaged tips
Carefully inspect the blade tip for any metal exposure and ensure the insulation covers the tip. Exposed conductor is a clear safety risk and means the tool should not be used for live work.
Tip: If you see any exposed metal, retire the tool immediately. - 4
Validate the surrounding environment with a tester
If you have a trained user, verify that the environment is safe using a non-contact voltage tester before you proceed. This ensures there are no hidden live sources in the work area during inspection.
Tip: Always follow PPE and local safety guidelines when testing in the field. - 5
Consult manufacturer data or professional testing
Refer to the manual for official voltage ratings and testing methods. If you are unsure, consult a qualified electrician or the manufacturer for guidance.
Tip: Document results and date of inspection for maintenance records. - 6
Decide on retirement if compromised
If any sign of wear, damage, or illegible labeling is found, retire the screwdriver from service and replace with a certified tool. Do not attempt to repair insulation yourself.
Tip: When in doubt, prioritize safety and replace rather than risk injury. - 7
Safe storage and ongoing maintenance
Clean and dry the tool after use, then store it away from solvents and heat. Perform a quick inspection before each use and schedule a periodic maintenance check.
Tip: Create a simple retirement-and-replacement policy to maintain tool safety over time.
Quick Answers
What does insulation on a screwdriver protect against?
Insulation helps reduce the risk of electric shock when working near live circuits by keeping the conductive parts away from your skin. It is not a guarantee in all conditions; inspect and follow the rated guidelines.
Insulation reduces electric shock risk when near live circuits, but you must verify ratings and inspect the tool.
Can I test an insulated screwdriver without professional tools?
Visual inspection and checking official markings are the primary DIY checks. Electrical testing should only be done with appropriate equipment and training. When in doubt, replace rather than risk safety.
Visual checks are best for DIYers; use proper equipment if you’re trained, otherwise replace the tool.
What symbols should appear on insulated screwdrivers?
Look for certification marks such as IEC 60900 or EN 60900 indicating testing to withstand specified voltage. Ensure the entire tool shows markings that match the manual.
Check for IEC 60900 or EN 60900 marks to confirm voltage ratings.
Is color alone a reliable indicator of insulation?
No. Color helps with rapid identification but does not guarantee insulation quality. Always verify the official marks and the insulation’s condition.
Color isn’t enough—verify marks and inspect for wear.
What should I do with a damaged insulated screwdriver?
Retire the tool from service and replace it with a certified insulated screwdriver. Do not attempt to repair insulation yourself.
If damaged, retire the tool and replace it.
How often should insulated screwdrivers be replaced?
Replace when you notice wear, damage, or illegible markings. Regular checks improve safety, but there is no fixed replacement interval.
Inspect regularly and replace as soon as you see wear or damage.
Watch Video
The Essentials
- Verify certification marks before use.
- Inspect insulation along the full shaft length.
- Do not rely on color alone for insulation status.
- Retire damaged tools and replace with certified insulated screwdrivers.
- Maintain a safe storage and inspection habit.