dcf682n1 Error Code: Urgent Troubleshooting Guide
Instant clarity on dcf682n1: what it means, quick fixes you can try now, and a step-by-step plan to diagnose and repair with safety tips and cost ranges.

dcf682n1 is a generic error code used by many screwdriver models to signal a sensor or safety fault. This fault often stems from battery, motor, or circuitry protection triggering a safe shutdown. The quickest way to recover is to perform a power cycle, inspect connections, and reattempt operation after addressing visible issues.
What dcf682n1 means for your tool
The code dcf682n1 signals a safety or sensor fault in a screwdriver that fails to operate until the fault is cleared. In many models, this is a protective response to conditions like poor battery contact, overheating, or an intermittent wiring issue. Understanding that this is a self-protection mechanism helps you approach fixes calmly. According to Screwdriver FAQ, this error is reported across brands and often resolves after a simple reset and a quick check of the power path. In 2026, DIYers encounter dcf682n1 during long sessions or when a battery pack shows signs of wear; resolving it promptly saves both time and frustration.
When you are most likely to see dcf682n1
This error tends to appear after prolonged use, on warm or hot days, or when a battery is swapped and not seated correctly. It can also show up after dropping the tool or if debris interferes with the trigger mechanism. If the tool has an internal sensor for overcurrent, an abnormal spike can trigger dcf682n1 even without obvious damage. Homeowners and DIY enthusiasts are most likely to notice the code while completing a project that requires repeated starts and stops, rather than light, intermittent tasks.
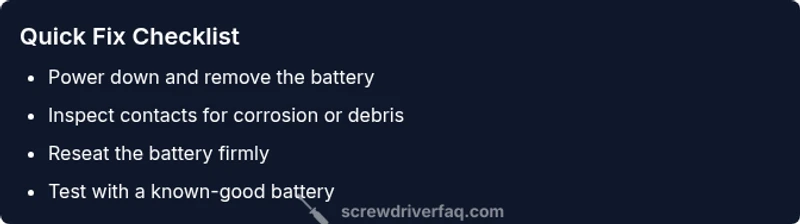
Quick fixes you can try now
- Power down the tool and remove the battery for at least 15-30 seconds, then reinsert. This power-cycle often clears transient faults.
- Inspect the battery contacts and clean any corrosion or grime with isopropyl alcohol and a dry cloth. Poor contact is a frequent culprit.
- Re-seat the battery by ensuring correct alignment and a firm click. A loose fit can trigger fault signals.
- If available, test with a fresh or known-good battery to see if the code persists.
- Let the tool cool if it feels hot; high temperatures can trigger protective shutoffs during heavy use.
- Do not attempt to disassemble battery packs or internal electronics beyond safe maintenance.
The most likely causes (by probability)
- High likelihood: Loose or corroded battery contacts preventing proper power delivery.
- Medium likelihood: Overheating during extended use or heavy load.
- Medium likelihood: Debris or dust inside the chuck affecting trigger signals.
- Low likelihood: A damaged safety switch or a failing control board.
- Low likelihood: A permanently damaged battery leading to ongoing fault signaling.
Step-by-step fix for the most common cause: loose battery connection
- Power down and remove the battery; wait 15-30 seconds. Disconnect any charger to avoid mixed power sources. Tip: Work on a non-conductive surface to avoid shorts.
- Inspect the battery contacts on both the tool and the battery for corrosion, dirt, or wear. If present, clean with isopropyl alcohol and a lint-free cloth until shiny. Tip: Do not scrub aggressively to avoid scratching contacts.
- Reseat the battery: reinsert fully until you hear a decisive click. Ensure correct orientation and no gap between battery and contacts. Tip: Hold the battery firmly and avoid twisting when reseating.
- Reconnect and perform a short test: without a load, gently press the trigger to check for a normal response. Tip: Do this close to a stable surface so the tool doesn’t move if it starts.
- If you have a known-good battery, try it. If the code disappears, the original battery is likely at end of life. Tip: Keep spare batteries charged and rated for your model.
- If dcf682n1 persists, inspect for damaged wiring or loose connectors inside the tool. This step may require professional service due to internal access. Estimated time: 15-25 minutes. Tip: Keep a small flashlight handy to inspect internal harnesses.
Other possible causes and how to verify them
- Overheating protection due to long runtimes: allow cooling and resume with a duty cycle (short bursts with rest).
- Trigger mechanism misalignment or dirt: remove accessories, spin chuck by hand, and inspect for resistance.
- Battery pack degradation: try a replacement pack to isolate power supply issues.
- Internal PCB or sensor fault: present as intermittent faults; professional diagnosis needed.
Safety notes and when to call a pro
- Always wear safety glasses and gloves when handling electric tools.
- If a battery shows swelling, leakage, or heat beyond normal, stop using the tool immediately.
- Do not disassemble battery packs beyond basic cleaning; internal cells can be dangerous. When the fault persists after all quick fixes, contact authorized service or a professional technician.
Preventive maintenance to reduce future dcf682n1 events
- Regularly inspect battery contacts and clean them as part of your maintenance routine.
- Store batteries in a cool, dry place and avoid exposing tools to high temperatures.
- Use a compatible charger and avoid cheap third-party packs that don’t meet spec.
- Schedule periodic tool checks and replace aging batteries before failures occur.
Steps
Estimated time: 15-25 minutes
- 1
Power down and remove the battery
Switch the tool off and remove the battery. If possible, disconnect from the charger to eliminate simultaneous power sources. Wait 15-30 seconds before proceeding.
Tip: A cold, stackable workspace reduces the risk of accidental drops. - 2
Inspect battery contacts
Examine the metal contacts on both tool and battery for corrosion, grime, or damage. Clean with isopropyl alcohol and a lint-free cloth until shiny.
Tip: Avoid using water or abrasive cleaners that could corrode the contacts. - 3
Reseat the battery correctly
Reinsert the battery firmly until you hear a definite click. Ensure correct orientation and no visible gaps between battery and tool.
Tip: Hold the battery steady and avoid wiggling during seating. - 4
Run a quick test
With no load attached, gently press the trigger to verify a normal response. If the motor hesitates or the code returns, proceed to testing with another battery.
Tip: Test in a stable, non-slip area for safety. - 5
Test with a known-good battery
If available, use a fresh or known-good battery to see if dcf682n1 clears. If the code disappears, the issue was battery-related.
Tip: Keeping a spare battery on hand helps confirm the cause quickly. - 6
Deep check or professional help
If the code persists after the above steps, inspect internal wiring or seek professional service to assess control boards or sensors.
Tip: Internal diagnostics may require specialized tools; costs vary by repair scope.
Diagnosis: Screwdriver shows error code dcf682n1 and stops mid-operation
Possible Causes
- highLoose or corroded battery contacts
- mediumOverheating protection triggered during prolonged use
- lowDamaged safety switch or trigger mechanism
- lowControl board fault or sensor fault
Fixes
- easyPower cycle the tool by removing the battery, waiting 15-30 seconds, and reattaching
- easyClean and reseat battery contacts; test with a known-good battery
- easyTest with a different battery to isolate power issues
- easyAllow the tool to cool and reduce duty cycle during use
- mediumIf the fault persists, inspect internal wiring or contact service
Quick Answers
What does dcf682n1 mean on my screwdriver?
dcf682n1 signals a safety or sensor fault that prevents the tool from operating. It’s commonly caused by battery contact issues, overheating, or a faulty switch. Start with quick fixes and refer to the step-by-step guide to verify and resolve.
dcf682n1 is a safety fault code; check contacts, reset the tool, and test with a good battery to confirm the issue.
Is dcf682n1 dangerous to ignore?
The code isn’t typically a direct safety hazard, but it prevents operation and can indicate an underlying problem. Ignoring repeated faults could lead to overheating or component wear.
It’s not usually dangerous, but you should fix it to avoid damage and ensure safe operation.
Can I fix dcf682n1 myself?
For common causes like loose contacts or overheating, yes. If the fault persists after quick fixes, consider professional diagnostics for internal components or PCB issues.
You can try the basics yourself, but if it keeps coming back, get a pro to check internals.
Should I replace the battery when this code shows up?
Trying a different battery is a good first step to isolate power issues. If the code persists with a new battery, the problem is likely elsewhere in the tool.
Try another battery first; if the code stays, there may be a deeper problem.
How much might repairs cost for dcf682n1?
Costs vary by fault scope. Quick fixes are usually inexpensive or free; professional service for internal faults or PCB work can range from roughly $60–$300 depending on parts and labor.
Costs depend on the fault; simple fixes are cheaper, more complex repairs can be hundreds.
Watch Video
The Essentials
- Power cycle first to reset faults
- Check and clean battery contacts for reliable signaling
- Test with a known-good battery to isolate power issues
- Seek professional help if the code persists after quick checks