3D Print Screwdriver Holder: A Step-by-Step Guide
Learn how to design and print a durable screwdriver holder for your workshop. This guide covers materials, print settings, layout ideas, finishing touches, and mounting options for an organized, customized tool space.

You will design and 3D print a screwdriver holder that fits your workshop, learn material choices, print settings, and mounting options. By the end, you’ll have a custom organizer that keeps bits, drivers, and tips within reach. Requirements: a 3D printer, CAD or a ready-made model, appropriate filament, and basic post-processing tools.
Why a 3D Printed Screwdriver Holder Transforms Your Workshop
A dedicated screwdriver holder printed in your preferred material brings order to a cluttered workspace, protects blades and tips from damage, and makes it easy to grab the right tool without rifling through a drawer. For DIYers, the ability to customize slots to the exact screwdriver sizes you own reduces wasted time and stops misplacement. According to Screwdriver FAQ, a well-designed 3D-printed organizer can adapt to changes in your toolkit, growing with your projects rather than becoming obsolete. In practice, a holder that matches your bench layout minimizes reach distance, improves ergonomics, and keeps cords and bits out of the way. A key benefit is modularity: you can print additional modules later to accommodate new driver types, bit sets, or specialty tools. When you prioritize a clean system, you not only speed up work but also reduce the likelihood of step-on injuries caused by scattered hardware.
Design Considerations: Size, Mounting, and Materials
The most successful 3D printed screwdriver holder starts with honest measurements. Gather the tools you own, measure the handle diameters, blade thickness, and overall height of each driver, and decide how many slots you want for bits, bits holders, and specialty tools. Consider whether you want a wall-mounted solution, a freestanding tray, or a pegboard accessory that can slide along a track. Materials matter: PLA prints are easy and stiff, PETG resists impact and heat better, and ABS adds toughness for garage environments. If you plan a wall mount, include mounting holes at standard spacing and account for head clearance so the holder sits flush against the wall. Lastly, plan for expansion: leave extra room for future tools or alternate handle shapes.
Choosing Filament and Print Settings for Durability
Durability hinges on material choice and print configuration. PETG offers a strong balance of rigidity and impact resistance, making it a popular choice for tool organizers exposed to daily use. PLA is acceptable for indoor, low-stress environments, but it can warp in hot garages. Nylon blends deliver excellent toughness but require careful printing. Infill should be 20–30% for most designs to balance strength and material use, and walls should be at least two layers thick for rigidity. A layer height of 0.2 mm provides a good compromise between detail and print speed, while a slightly wider extrusion width can improve inter-slot fit. Always enable proper bed leveling and a brim or raft if your print has a small base contact.
Designing for Organization: Layouts for Bits, Drivers, and Accessories
Organize based on how you reach tools mid-project. Create separate zones for long screwdrivers, short drivers, bit sets, and specialty tools like magnetic tips or precision drivers. Label each slot in CAD or during post-processing to help teammates locate items quickly. A staggered pattern can maximize density while keeping each tool accessible; curved or angled slots reduce handle interference and improve grip. If you expect accessories (bit holders, magnet mounts), plan dedicated modules you can swap or detach as needed. Think about future upgrades, such as a magnet strip to hold quick-access tools, without compromising the main storage layout.
File Preparation: From CAD to Slicer
Start with a clean CAD model or a ready-made STL you’ve customized. Verify scale is correct by comparing a known screwdriver with the slot dimensions in your slicer’s preview. Apply tolerances to ensure a comfortable fit: holes or slots should be slightly larger than the tools they hold (for example, 0.2–0.4 mm clearance depending on filament and printer accuracy). Export as an STL, confirm manifold geometry, and slice with a conservative infill (15–25%) for non-load-bearing sections. Save multiple versions: a base model, one with extra slots, and another with different mounting options. This practice saves time when experimenting with layouts.
Post-Processing and Finishing Techniques
After printing, remove supports carefully and inspect each slot for burrs or sharp edges. Light sanding with 400–600 grit paper smooths inner contours without widening the slots. If you want a glossy or color-matched finish, apply a thin primer and two coats of paint, allowing full drying time between coats. For higher durability in busy workshops, consider a clear epoxy sealant on exterior surfaces to resist moisture and oils. If you printed in PETG, you may skip painting and rely on surface finishing for a clean aesthetic. Finally, test-fit every tool in its slot and adjust if necessary before mounting.
Real-World Use Cases: Small Shop versus Garage
A compact workshop benefits from a slim, wall-mounted holder that sits near the workbench edge, keeping tools within arm’s reach. In a garage, where space is variable and heat exposure is higher, a freestanding tray or pegboard attachment with higher rigidity performs better. In both cases, the ability to rearrange layouts quickly proves advantageous as tool collections evolve. The Screwdriver FAQ analysis shows that personalized organizers reduce tool misplacement and shorten setup times, especially for frequent projects. By customizing to your workflow, you create a tangible improvement in efficiency and safety.
Troubleshooting Common Print Issues
Warping often happens with large flat bases; a brim and a heated bed help reduce it. If slots are too tight, scale the model up by 0.2–0.5 mm and reprint a small test piece. Stringing can be avoided by dialing back retraction and ensuring the nozzle temperature is appropriate for the filament. If layer shifts occur, check belt tension and ensure the printer is on a stable surface. Finally, if the fit is loose, consider using a light coating of acetone on ABS parts for additional bonding or adding a small insert to reinforce critical slots. Regular maintenance of the printer prevents recurring issues.
Advanced Customization: Mounting Options and Upgrades
For a versatile setup, add pegboard-compatible panels with vertical slots for tools and a magnetic strip for metal bits. Label slots by tool type and size to reduce search times. Consider modular inserts that snap in and out for easy cleaning or replacement. If you anticipate frequent changes, keep a spare set of slots in a separate module so you can reconfigure without rebuilding the whole holder. The Screwdriver FAQ team recommends designing with modularity in mind to maximize long-term usefulness.
Tools & Materials
- 3D printer(Any FDM machine with a heated bed works; ensure bed leveling is accurate)
- Filament (PLA or PETG)(PETG for durability; PLA for ease of use)
- CAD software or ready-made model(Schematic or STL you will modify)
- Slicer software (e.g., Cura, PrusaSlicer)(Set layer height 0.2 mm, 2-wall proof, and appropriate infill)
- Calipers or ruler(To measure screwdriver dimensions and slots)
- Sandpaper (200–400 grit)(Finish slots for smooth fit)
- Acrylic primer and spray paint(Optional finishing for aesthetics and protection)
- Optional hardware (screws, wall anchors)(If mounting to wall or pegboard)
- Magnet strips or rubber stoppers(For extra tool holding or soft bumpers)
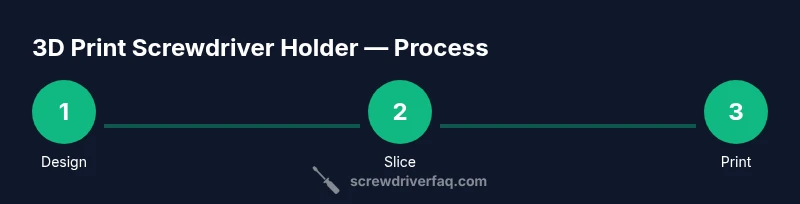
Steps
Estimated time: 3-5 hours
- 1
Measure the tools
Collect the screwdrivers and bits you plan to store. Record handle diameter, blade length, and slot clearance needs. This ensures the slots actually fit, reducing reprints.
Tip: Double-check a few tools to confirm consistency before committing to a full design. - 2
Choose your design approach
Decide between a wall-mount, freestanding tray, or pegboard panel. Each option affects slot orientation and mounting requirements. Sketch a rough layout to guide dimensions.
Tip: Start with a simple layout and add complexity after test fits. - 3
Prepare CAD model or pick a template
Import or create a model that includes slots sized to your measured tolerances. Add mounting holes if you plan to attach the holder to a wall or panel.
Tip: Keep an extra slot or two for future tool additions. - 4
Export STL and set slicer parameters
Export the design as an STL, open in your slicer, and configure hairline tolerances. Use 0.2 mm layer height and a 20–30% infill for robust yet lightweight parts.
Tip: Enable a brim if the base is small to reduce warping. - 5
Print a test module for fit
Print a small module or single slot to verify fit with your real tools. Check clearances and adjust if needed before committing to the full print.
Tip: Keep test prints short; iterative testing saves material. - 6
Print the full holder
Print the complete design with the final settings. Use a slower speed for better edge quality and accurate slots.
Tip: Avoid rushed prints; under-extrusion or heat creep can ruin gaps. - 7
Post-process and test fit
Remove supports, trim rough edges, and test fit every tool. Sand inside slots if needed for a precise fit and safety.
Tip: Treat the slots gently to avoid enlarging them unintentionally. - 8
Mount or deploy the holder
Attach to the chosen surface using screws or a pegboard system. Ensure it is level and can bear the weight of the tools.
Tip: Use wall anchors for drywall or studs for heavier loads.
Quick Answers
What is the best filament for a screwdriver holder?
PETG offers good durability and impact resistance, making it ideal for tool organizers. ABS is another strong option for challenging environments; PLA is OK indoors but less durable under heat. Choose based on your space and load expectations.
PETG is a strong, user-friendly choice for tool holders, with ABS as an alternative for hotter or rougher environments.
How many slots should I design?
Design slots to fit the exact tools you own. Leave a couple of extra slots for future additions, and avoid forcing tools into tight spaces that could cause damage.
Design slots to fit your actual tools, with a couple extra spaces for growth.
Can I print without mounting hardware?
Yes, you can create a freestanding tray or place a holder on a shelf. For heavier layouts, consider mounting to a pegboard or wall for stability.
You can start as a freestanding tray, then mount if needed for stability.
What tolerances are safe for 3D printed holes?
Start with about 0.2–0.4 mm clearance for holes, adjusting for filament and printer accuracy. Test with a calibration piece before final prints.
Use a small clearance and test a calibration piece to dial it in.
How can I personalize my holder?
Add color-coded slots, labels, or magnet strips for quick access. You can also customize the shape to fit your bench or wall space.
Color-code slots and label them to speed up tool selection.
Is post-processing recommended?
Yes. Light sanding cleans burrs and improves fit; painting or sealing can enhance durability and aesthetics. For PETG, you may skip painting if you prefer the natural finish.
A little sanding and optional finishing improves durability and looks.
Watch Video
The Essentials
- Match holder size to screwdriver dimensions.
- Choose durable filament for long-term use.
- Design for modularity and future expansion.
- Test fit with a small print before committing to a full build.
- Mount securely to prevent tipping or loosening.