What Screwdriver to Open a Hard Drive: A Practical Guide
Learn which screwdriver to use to open a hard drive enclosure safely, identify common screw types, and follow a clear, step-by-step process to access the internals without damage. This guide covers precision tips, safety, and reassembly for DIY enthusiasts.

To open a hard drive safely, you’ll need the right screwdriver and a clean workspace: most desktop HDDs use small Phillips or Torx screws on the enclosure, while SSDs or magnetized cases may use Torx or hex bits. Start by powering down, unplugging, and grounding yourself, then choose the appropriate screwdriver to avoid stripping screws and voiding warranty. This guide shows you how.
Why the right screwdriver matters when opening a hard drive enclosure
Opening a hard drive enclosure requires care with the screwdriver tip to avoid stripping screws and damaging the enclosure. The wrong tip or blade angle can cam out, scratch the metal, or nick a plastic housing, making reassembly difficult or unreliable. According to Screwdriver FAQ, choosing the correct bit size and type is one of the simplest, most effective ways to prevent damage and save you time. In practice, you’ll encounter a variety of head styles on consumer drives: Phillips or cross-head, Torx star screws, and occasionally hex or hex-Allen fasteners. Each style demands a specific tip that fits snugly without wobble. Before you touch the drive, take a moment to inspect the screw heads, gather the appropriate bits, and clear a clean, static-free space. This foundation reduces frustration and preserves the integrity of the drive’s enclosure and internal connectors. If you’re unsure, start with a versatile precision screwdriver set that includes multiple tip shapes and sizes. Remember: precision matters as much as power when you’re dealing with delicate electronics.
Understanding common enclosure screw types on drives
Hard drive enclosures come in many designs, but most share a handful of common fasteners. Desktop external enclosures used for 3.5-inch drives often conceal Phillips screws in recessed holes, while some compact enclosures for 2.5-inch drives rely on Torx variants. You may also encounter smaller hex or Allen screws in special models. The key is to identify the screw head shape and size before selecting a driver. If the head looks damaged, a light touch of calibrating force with the correct size is essential, as forcing a wrong bit will strip the screw and complicate removal. When you’re uncertain, consult the drive’s manual or manufacturer website. Screwdriver FAQ notes that many hobbyists overlook this step and proceed with an ill-fitting bit, leading to slip marks and a damaged enclosure.
Preparing your workspace and grounding yourself
Consistency and cleanliness help. Build a workspace with bright light, a clean desk, and a magnetized tray for tiny screws. Ground yourself to reduce static discharge by touching a grounded metal surface or wearing an anti-static wrist strap. Static can disrupt internal circuits or degrade magnetized components, so avoid wool sweaters and synthetic fabrics that shed charges. If you own a laptop, remove the battery if accessible and ensure the unit is unplugged. For desktop drives, unplug power cords and disconnect any connected USB or data cables. Have a shallow dish ready to capture screws and a soft mat to prevent the enclosure from sliding. The goal is to create conditions where you can work calmly and precisely, not rush the job.
How to choose the right screwdriver size and tip
Start by examining the screw head and selecting the corresponding bit. In most common consumer enclosures you’ll use a Phillips #0 or #1 for small screws and a Torx T6 or T8 for star-shaped heads. A good rule is to use the smallest bit that fully seats in the screw—if it wobbles, try the next size up. A magnetized driver helps keep screws from dropping, but keep the magnet away from the drive’s sensitive connectors. Always test the bit in a non-critical screw first to confirm fit. If you’re faced with a rare head like Torx Plus or security Torx, avoid improvising with a flathead; use the exact bit from a precision set. This step saves you from stripping the head and sticking points in the enclosure’s threads.
Safety, warranty considerations, and reassembly tips
Safety first: power down, unplug, and ground yourself as described above. Opening a drive may void manufacturer warranties; check terms before proceeding. Keep all screws in labeled containers according to their positions to ensure proper reassembly. When removing screws, photograph or mark the order to aid reassembly. Do not apply force with metal tools to pry open a closed enclosure; use a plastic pry tool if provided, or simply loosen natural seams with gentleness. If you encounter a stubborn screw or a damaged head, stop and reassess rather than forcing it. After you finish, re-check all connectors and screws, reconnect cables, and power up in a controlled environment to verify the drive boots normally.
Common mistakes and how to avoid them
Rushing the process leads to mistakes. A frequent error is using the wrong head size by simply guessing. Another common error is forgetting to discharge static or leaving metal tools near the drive. Avoid mixing screws from different drives. Always use a magnet tray and keep track; don’t reuse screws from a different enclosure. If you damage the screw head or the enclosure, pause and reassess rather than forcing the component apart. By taking a methodical approach, you protect both data and hardware and make reassembly straightforward.
Tools & Materials
- Precision screwdriver set (Phillips and flathead)(Include Phillips sizes #0, #1 and a few flathead tips; carry a micro-flat and stubby drivers.)
- Torx precision screwdriver set(Common sizes include T6 and T8; some enclosures use security Torx variants.)
- Hex/Allen bit set(Small sizes (e.g., M2.5–M3 range) may appear on some enclosures.)
- Magnetic parts tray or small labeled containers(Keeps screws organized by location for accurate reassembly.)
- Anti-static wrist strap or mat(Prevents electrostatic discharge from damaging sensitive components.)
- Isopropyl alcohol wipes (70%+)(For cleaning any contacts or surfaces if needed.)
Steps
Estimated time: 20-40 minutes
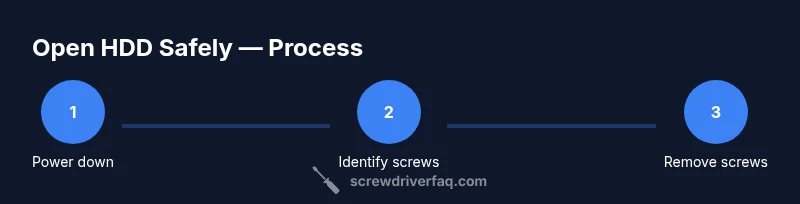
- 1
Power down and unplug
Ensure the computer or enclosure is fully powered down, unplug all cables, and disconnect any data connections. If you’re working on a laptop, remove the battery if it's removable. The goal is to eliminate all sources of power and prevent short circuits during disassembly.
Tip: Double-check that the device cannot be powered via USB or other interfaces before proceeding. - 2
Ground yourself and prepare workspace
Set up a clean, well-lit workspace with a non-conductive surface. Put on an anti-static wrist strap or touch a grounded metal object to discharge static electricity. Place a magnetized tray for screws and a soft mat to rest the drive on.
Tip: Avoid carpets or wool clothing; static charges build up quickly on synthetic fabrics. - 3
Identify enclosure screws
Examine the screws holding the enclosure together. Look at head shape (Phillips, Torx, hex) and estimate size. If a screw appears damaged, stop and switch to the correct bit rather than forcing it.
Tip: Take a quick photo of the screw layout for reference if reassembly becomes tricky. - 4
Select and test the screwdriver tip
Choose the smallest bit that fully seats in the screw head without wobble, then test on a non-critical screw. If the bit fits tight and seats evenly, proceed; otherwise swap to a slightly larger size.
Tip: Keep the bit perpendicular to the head while applying gentle, steady pressure. - 5
Position the drive and secure it
Place the drive on the anti-static surface; use a small tray to keep screws organized. Ensure the enclosure is stable before applying torque to remove screws.
Tip: Use a non-metal tool to gently pry if there is any resistance at a seam; avoid prying directly on the screw head. - 6
Loosen and remove screws in a cross pattern
If there are multiple screws, remove in a cross or star sequence to evenly relieve tension. Place screws in labeled locations correlating to their positions in the enclosure.
Tip: Keep track of screw lengths; longer screws may be used in the back or specific components. - 7
Lift the enclosure cover and inspect connectors
Carefully lift the cover to expose internal connectors. Do not pull on cables; disconnect only if intending to remove the drive. Check for ribbon cables or SATA connectors that may require gentle detachment.
Tip: If a connector resists, re-check alignment and refer to the device manual before forcing. - 8
Document and plan reassembly
Take photos of the internal arrangement and keep screws in order. If you only needed to access the drive, store the enclosure safely for later reassembly, or proceed with data recovery tasks as needed.
Tip: When in doubt, re-check each screw’s original position and tighten in reverse order of removal.
Quick Answers
What screwdriver do I use to open a standard desktop hard drive enclosure?
Enclosures vary, but common options include Phillips sizes #0 to #2, Torx sizes like T6 or T8, and occasionally hex bits. Check the screw head and pick a precise bit from your toolkit. If unsure, start with a small precision set to test fit.
Most enclosures use Phillips or Torx screws; test a small precision bit to confirm fit before proceeding.
Is it safe to open a hard drive without static precautions?
Static can damage sensitive drive electronics. Ground yourself by touching a metal object, or wear an anti-static wrist strap and work on an anti-static mat.
Yes. Ground yourself and use anti-static gear before touching the drive.
Will opening a hard drive void warranty?
Opening the enclosure can void the manufacturer’s warranty. Review the warranty terms and contact the vendor if you’re unsure before proceeding.
Opening may void warranty; check terms before starting.
Can I reuse the screws after opening the enclosure?
Generally yes, as long as screws are not stripped or damaged and are the correct length for the enclosure. If a screw is missing or damaged, replace it with a matching size.
Yes, keep track of screws and reuse if undamaged.
What if the screws are damaged or stripped?
Stop and avoid forcing the screw. Try a rubber band for extra grip or use a small screw extractor kit designed for tiny fasteners. If the head is severely damaged, seek professional help.
Don’t force; use grip aids or a screw extractor if necessary.
Are Torx screws common on drive enclosures?
Torx screws are common on many drive enclosures, but you may also encounter Phillips or hex types. Always verify the head type before choosing a bit.
Torx screws are common, but verify the screw head first.
Watch Video
The Essentials
- Identify screw type before selecting a bit.
- Use the correct tip size to prevent cam-out and damage.
- Ground yourself and work on a clean, static-free surface.
- Keep screws organized to ease reassembly.