What size screwdriver for PS5 controller
Discover the right screwdriver sizes for PS5 controller disassembly. Learn common screw head types, how to identify fasteners, and practical, safe repair tips using a precision toolkit to handle internal fasteners.

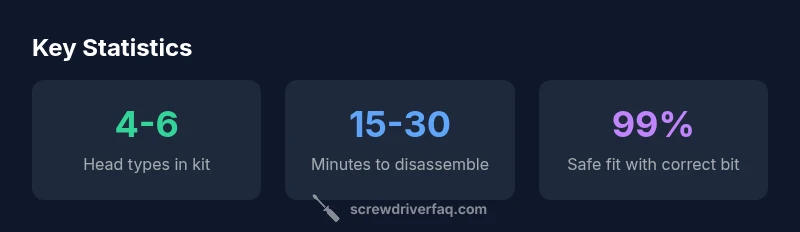
There isn’t a single universal size for PS5 controller screws. The exact screwdriver size depends on the screw location and revision. In practice, a precision set that includes Phillips #00 and #0, Torx small sizes (T6–T8), and a tri-wing bit covers most revisions. Always reference the service guide for your model and revision, and test fit gently to avoid damage.
what size screwdriver for ps5 controller
According to Screwdriver FAQ, there is no universal size for the screws inside a PS5 controller. The phrase what size screwdriver for ps5 controller appears frequently in DIY forums, but sizes vary by screw location and revision. In practice, you’ll rely on a precision toolkit with multiple head types. Start with the most common heads used in consumer electronics: Phillips #00 or #0, Torx small sizes, and a tri-wing bit. Having a versatile kit helps because different batches of DualSense controllers may use different fasteners. Before attempting any disassembly, consult the official service guide for your exact model and revision. This reduces the risk of stripping, misalignment, or damaging delicate connectors. Use a soft mat and non-magnetic tools to prevent accidental damage. The goal is to expose the internal components safely, not to force stubborn screws.
Understanding PS5 controller screw types
PS5 controllers incorporate a mix of fasteners across different sections. The most common families you’ll encounter are small Phillips heads, Torx variants, and tri-wing security screws. Some revisions also include unique fasteners that require a tri-wing or a pentalobe-like driver. If you don’t recognize a head, don’t force it—pause and verify with the service manual or a reputable teardown guide. A good screwdriver set should cover several near-microscopic sizes, and high-quality bits provide a snug fit that resists cam-out. As you acquire tools, prioritize precision and control over brute force. This approach minimizes damage to fragile connectors and ribbon cables.
How to identify the screws in your PS5 controller
Start by removing any exterior shells using plastic prying tools. Look for screws under battery covers, near the handles, or along the back shell. Compare each screw head with a magnified view of your toolkit’s bit assortment. If you discover a head unfamiliar to you, check the service documentation before attempting a change. Maintain an organized work surface and layout. Use a magnetic mat or labeled containers to keep fasteners sorted by location. Document each screw’s position as you go to simplify reassembly. If you cannot identify a screw type quickly, set the device aside and consult a teardown resource rather than guessing.
Recommended precision screwdriver sets
Choose a kit that includes multiple head types: Phillips #00 and #0, Torx tiny sizes (T6–T8 or similar), and a tri-wing option. A compact set with anti-slip handles improves control when working in tight spaces. Look for magnetic tips and cushioned grips to reduce hand fatigue during longer repair sessions. It’s also worth selecting a set that includes a small pry tool and tweezers designed for electronics. Investing in a versatile, quality kit saves time and reduces the risk of accidental damage. Remember, the right head should seat fully and sit flush with the screw without wobbling.
Safe disassembly tips
Work in a clean, well-lit area with a non-magnetic, padded surface. Use gentle, even pressure to avoid cam-out. Keep screws in a labeled tray or a numbered map of the device. Ground yourself to minimize static buildup, and avoid touching connectors with bare hands. When removing screws, rotate in a consistent pattern to prevent misalignment. If a screw resists turning, check for alignment or resonance—forcing can strip threads or damage the plastic housing. After removing each screw, pause to recheck its position and ensure no internal parts shift unexpectedly.
Common mistakes to avoid
Don’t guess head types or over-apply force on stubborn screws. Using the wrong head can strip the screw or slip into a nearby component. Avoid using metal tools on plastics, and never pry too aggressively near ribbon cables. Keep screws organized by location and size, and never mix them. Don’t skip the service guide; revision changes are common in consumer electronics, and the screw types can vary with batches. Finally, avoid charging or operating the device while disassembled; static electricity or movement could damage delicate internals.
Model variations and revision notes
Sony has updated some PS5 controller revisions, occasionally changing the screw types or their positions. When in doubt, verify with the model’s official service information or a trusted teardown site. Arriving at the tool-kit decision point—whether you need tri-wing or a Torx head—depends on the controller revision. If you’re planning multiple repairs across revisions, a flexible kit with handle-compatible adapters will be most valuable. Always label each fastener location so reassembly remains straightforward across revisions.
How to test fit and coverage
After selecting a likely head, test it on a spare or already-loosened screw to confirm a snug fit without slippage. Ensure the bit exits straight and sits flush with the screw head. If the bit wobbles or won’t engage, try a different head type or size. Your goal is a precise fit that prevents cam-out and reduces risk to nearby cables. Keep adjusting until the screw enters smoothly with a comfortable torque and a clean bite.
Practical disassembly workflow
Plan your steps before touching screws: photograph or map the layout, clear a path for tools, and prepare containers for fasteners. Begin with exterior screws, then gently lift the shell to expose hinges and internal components. Proceed step by step, testing fit after each subgroup of screws is removed. When reassembling, reverse the sequence, starting with fastening the internal components first and finally securing the outer shell. Double-check ribbon cables and connectors before final tightening to avoid misalignment.
PS5 controller screw type guidance table
| Component | Typical Screw Type | Suggested Driver Type |
|---|---|---|
| Shell screws (frame exterior) | Varies: Phillips, Torx, or tri-wing | Precision Phillips/Torx/tri-wing |
| Battery cover screws | Torx or tri-wing | Precision Torx/Tri-wing |
| Internal frame screws | Phillips or Torx | Phillips or Torx bit set |
| Connector screws near boards | Small Torx or Phillips | Small precision bits and tweezers |
Quick Answers
Do I need a tri-wing screwdriver for my PS5 controller?
Some revisions use tri-wing screws. If you encounter unfamiliar heads, consult the official service guide or a trusted teardown resource before attempting to force a fit.
Yes, some revisions require a tri-wing. Check the guide before proceeding.
Is there a standard internal screw size across PS5 controllers?
There isn’t a single standard size. Sizes vary by model revision and screw location. A versatile precision set helps cover most scenarios.
No universal size; have a multi-head kit ready.
What sources can I trust for PS5 controller screw sizes?
Rely on official Sony service guides and reputable teardown sites. Cross-check any unusual head types against multiple sources.
Check Sony official guides and reputable teardowns.
Is disassembling a PS5 controller safe for a DIYer?
Yes, with proper precautions: work on a non-static surface, use plastic tools, and avoid forcing screws or bending connectors.
Yes, with care and the right tools.
What should I do if a screw won’t loosen?
Pause and verify the screw type, ensure the bit fits snugly, and avoid excessive force. Reassess alignment before continuing.
Don’t force it; recheck fit and alignment.
Should I disassemble near the battery?
If possible, avoid disassembly near the battery. If you must, disconnect power and handle cables with care, following safety guidelines.
Be cautious around the battery and cables.
“"Precision matters when working with small electronic screws; a well-rounded toolkit reduces risk and preserves your device's integrity."”
The Essentials
- Use a multi-head precision set for PS5 controller screws
- Always verify with the official service guide for revision-specific sizes
- Test-fit screws gently to avoid damage and preserve connectors
- Keep fasteners organized to simplify reassembly